Why stop with the stock experience when you can poke around and make it a little better?
Back in the days of Windows Phone, we'd often see all kinds of creative ways to interact with apps and services that we either didn't have or had sub-par support for.
Learning from those days, I love to poke around on the web and see what interesting third-party projects are out there that do something exciting or improve my experience in something I use daily. Spicetify is exactly that: it makes the Spotify app for Windows just a little bit better.
It also scratches my itch to open up a terminal to do things, so there's that. But Spicetify is simple to use, has extensive documentation, and will add a few tweaks to the Spotify Windows app that you might like — notably custom themes.
Before we begin
A quick note before going much further. Obviously, anything done to your Spotify app is at your own risk, though nothing in Spicetify will require you to enter login details. It simply injects its goodness into your existing application.
You'll also want to be running the version downloaded directly from Spotify for best effect, as the version through the Microsoft Store has more limited support. So, if you want to try this stuff for yourself, it's best to make sure you get that version first.
Installing Spicetify is a breeze
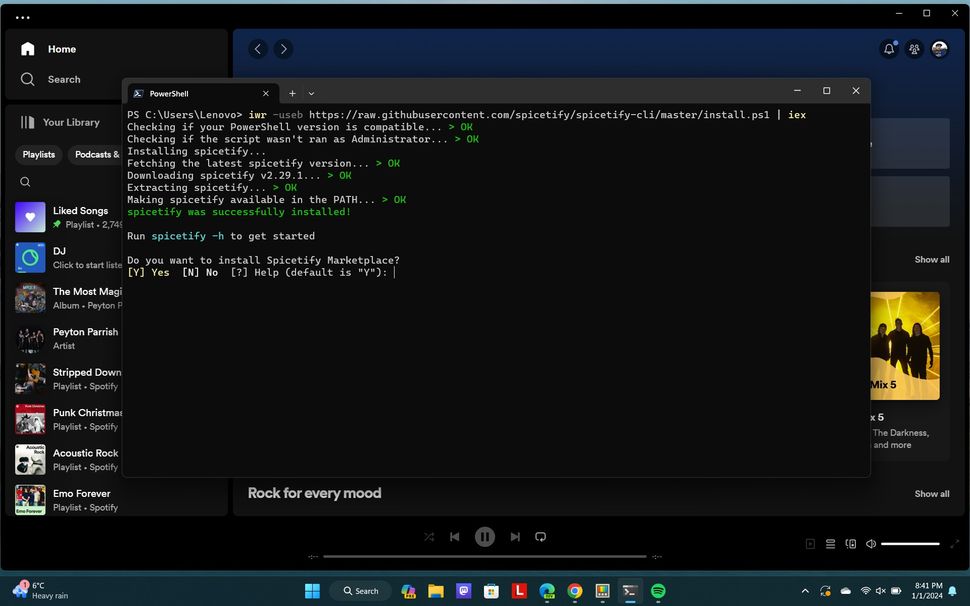
The installation process is simple, requiring just a single command pasted into a PowerShell window. (Image credit: Windows Central)
Installing Spicetify is straightforward, with the documentation telling you everything that you need to know. Essentially, you copy a command and paste it into a PowerShell window on your PC, and it'll do the rest. The project is also hosted on GitHub if you want to go and have a nose at what makes it tick.
There are alternative methods, including the Windows Package Manager, but I went down the copy/paste route to install the prebuilt binary since it's the recommended method.
The magic command you need is as follows:
iwr -useb https://raw.githubusercontent.com/spicetify/spicetify-cli/master/install.ps1 | iexI also installed the marketplace when prompted, as it's supposed to give you access inside the Spotify client to the custom themes and extensions, but it doesn't seem to work with the current version of the app. So you don't really need to worry about this part.
The next thing to do is simply to enter the command spicetify into the terminal and run it. This initializes everything and creates the all-important config file. Besides actually needing this, the config file can be used to make changes with Spicetify without having to run commands in the terminal all the time.
Using Spicetify to theme the Spotify app
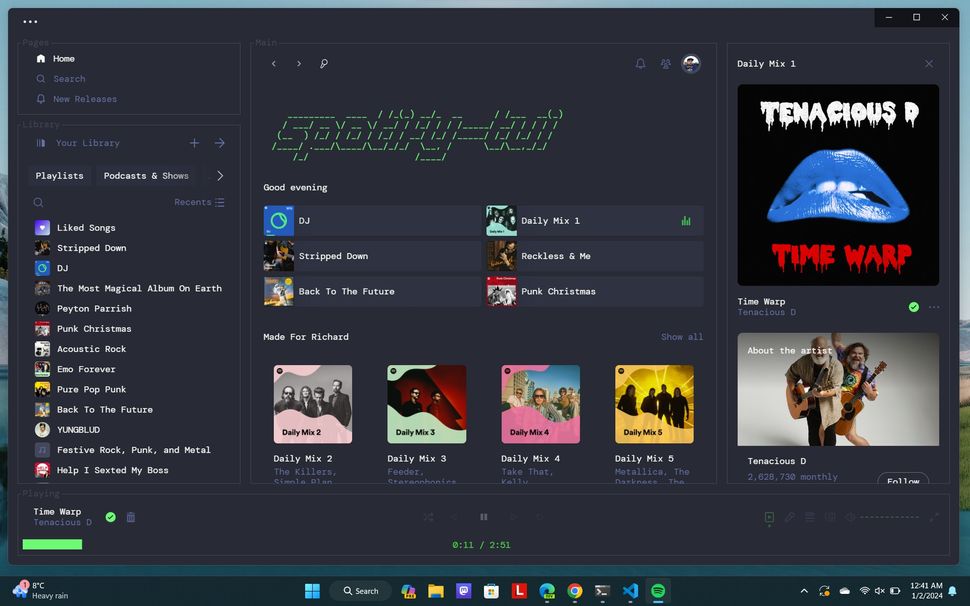
Too far? You can even make it look like an app that would run in a terminal. (Image credit: Windows Central)
One of the main reasons you might think about using Spicetify at all is to add a custom theme to your Spotify app. The stock colours look OK, but who doesn't like to add their own flair?
If adding a theme is where you'll end your use of this tool, then using the terminal isn't a bad way to go about it (I'll talk more about the config file later.)
Spicetify has a list of a bunch of themes that have already been built for Spotify, with a great selection available in its own official repository. To add this to your PC, you will need to have Git installed. If you don't and need a pointer, I've written a guide on how to get started with Git on Windows.
Run the following command in PowerShell to get the themes downloaded to your PC:
git clone --depth=1 https://github.com/spicetify/spicetify-themes.gitYou then need to put them into the necessary themes folder, which you can do like this:
cd spicetify-themes
cp * "$(spicetify -c | Split-Path)\Themes\" -Recurse
Once this is all set up, you can apply a theme using the terminal with this command. In this example, I'm using the "Matte" theme, but you would substitute that for the theme of your choice.
spicetify config current_theme matte
spicetify apply
The first time you do this, Spicetify will prompt you that you haven't created a backup. You should have one, so just follow the prompt.
Any time you want to change it up, remember to use the spicetify apply command after changing the theme; otherwise, it won't apply the new one. The apply command will also automatically reload the Spotify app even if it's open, so you can check out your new theme.
The Spicetify config file, extensions, and custom apps
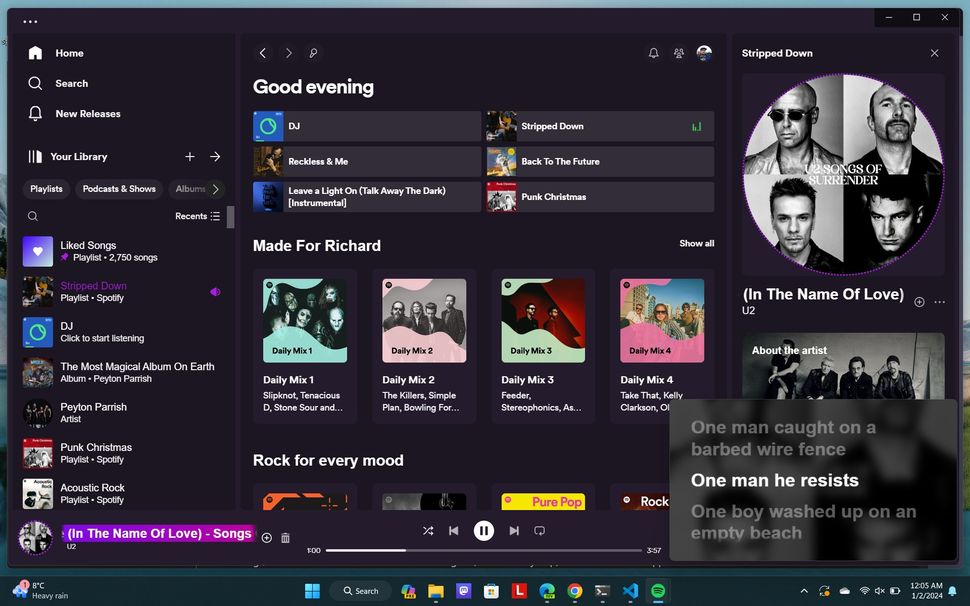
Beyond themes, you can add in extensions, like this pop-up lyrics window. (Image credit: Windows Central)
Beyond the extensive visual changes you can make, Spicetify also allows you to inject extensions and custom apps into Spotify.
The image above shows one of the extensions, a pop-up lyrics widget that will sit atop any app you're currently using. It behaves like a pop-out video player might, so wherever you are you can see the lyrics of the track you're listening to.
But rather than using the command line to apply these, I've found it's simplest to just add them into the config file. You can do as many as you want in a single hit, then just go back to the terminal and use the spicetify apply command to install and refresh everything.
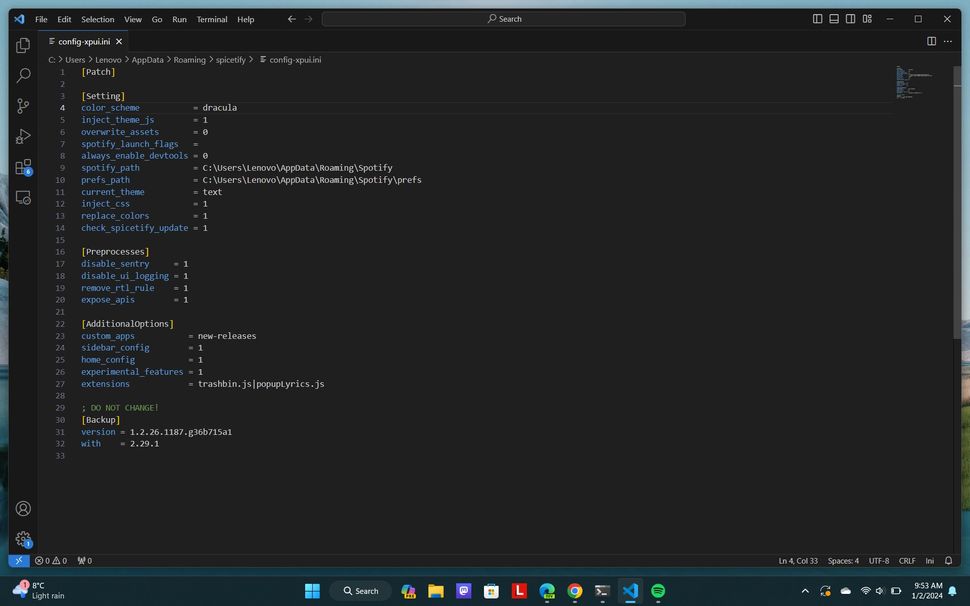
The config file is simple to navigate and allows you to make many changes in one go. (Image credit: Windows Central)
To edit the config file, you simply need a text editor and to know where the file is. Type spicetify -c into PowerShell, and it'll present you the location on your PC. I'm using VS Code in this example, but other text editors will also suffice if you don't have that.
To add extensions, you need to know the file name, which can be found by looking at the Spicetify extensions catalog. Then add them like the following under the [AdditionalOptions] section of the config file after extensions =. In this example, I'm adding the trash bin and the pop-up lyrics:
trashbin.js|popupLyrics.jsThe same applies to custom apps, though there are less of these. I've added one that curates new releases from artists I'm following by date, and you apply these in the same section of the config file under custom_apps following the same template as with the extensions above.
The config file can also be used to make changes to the theme rather than applying a new one through the command line. It's especially useful to change the theme in this way if the one you're using has multiple colour schemes since you can make changes to both in one go.
For example, in the image above, you'll see I've applied the theme "Text" and the colour scheme "Dracula" to my config file. Once you're happy with all your changes, save the file, go back to the terminal, and give it a quick spicetify apply to get them all ready, and you're all set.
Again, the Spicetify documentation contains all the details you need on what you can apply and what each addition does.
Make Spotify your own
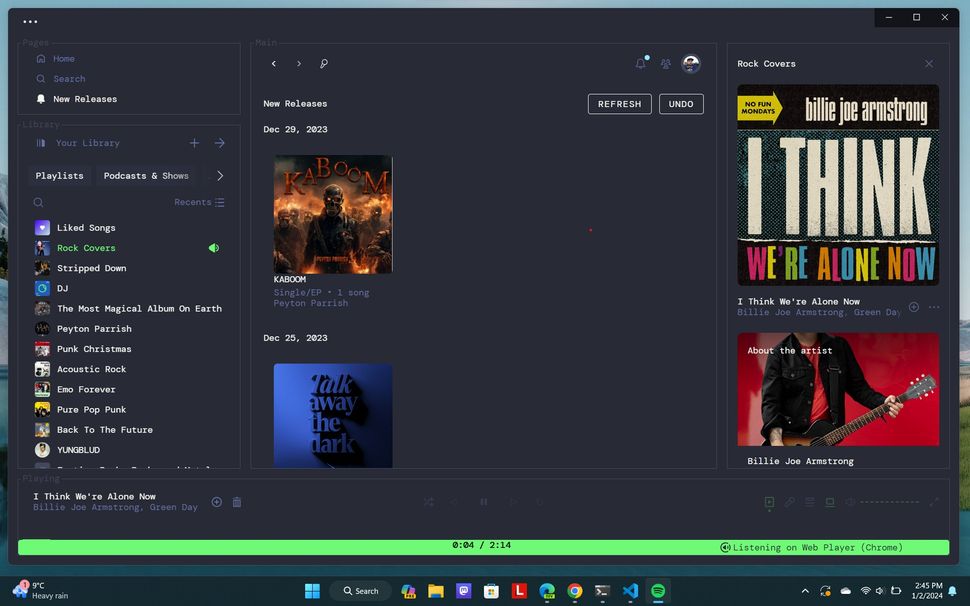
The New Releases custom app makes organising the latest from your favorite artists so much easier. (Image credit: Windows Central)
I'm really happy I stumbled on Spicetify in one of my regular GitHub surfing sessions. With even just a few tweaks, I'm much happier with the Windows app now, and running a Dracula-themed interface that looks like it belongs in a terminal, I am happy, content, and enjoy using it so much more.
The talk of the command line can be off-putting, but there's nothing to be afraid of. It's really easy to use, the documentation is excellent, and if you make a copy of the config file, you can easily paste your favorite settings across machines, too.
If you're a Spotify user on Windows, give it a try. I'm pretty confident it'll make enjoying the app so much better for you!


3175x175(CURRENT).thumb.jpg.b05acc060982b36f5891ba728e6d953c.jpg)
Recommended Comments
There are no comments to display.
Join the conversation
You can post now and register later. If you have an account, sign in now to post with your account.
Note: Your post will require moderator approval before it will be visible.