Use this guide to troubleshoot and fix common problems upgrading to the Windows 11 2024 Update.
Windows 11 is getting a new feature update (version 24H2), and as usual, this means potential issues during and after the installation.
Even though Microsoft is gradually rolling out the Windows 11 2024 Update to devices known to have a good upgrade experience, this new version includes a slew of new features and changes that could cause different issues.
For example, you can encounter driver problems, compatibility issues, and even issues with existing features. Furthermore, since version 24H2 requires reinstallation, it's possible to experience other issues related to the upgrade process rather than the new version.
In this how-to guide, I will share some of the most common problems and the different ways to resolve them as you jump from an older version to Windows 11 version 24H2.
Important: The Windows 11 2024 Update is expected to become partially available on June 18, 2024, for Copilot+ PCs, but it won't include all the intended features, including Windows Recall, as it has been postponed until further notice. In September or October, the feature update will become more broadly available for existing devices. As a result, some of the new features and changes may not be available to everyone on day one. Also, some features (especially AI features) may require new hardware to be available.
Windows 11 2024 Update common problems and fixes
When it's time to upgrade to a new version, you may encounter problems related to the new feature update. However, it's also possible to come across issues during and after the upgrade that are not related to the latest version of the operating system.
This guide outlines the troubleshooting steps for both types of issues.
Windows Update troubleshooting
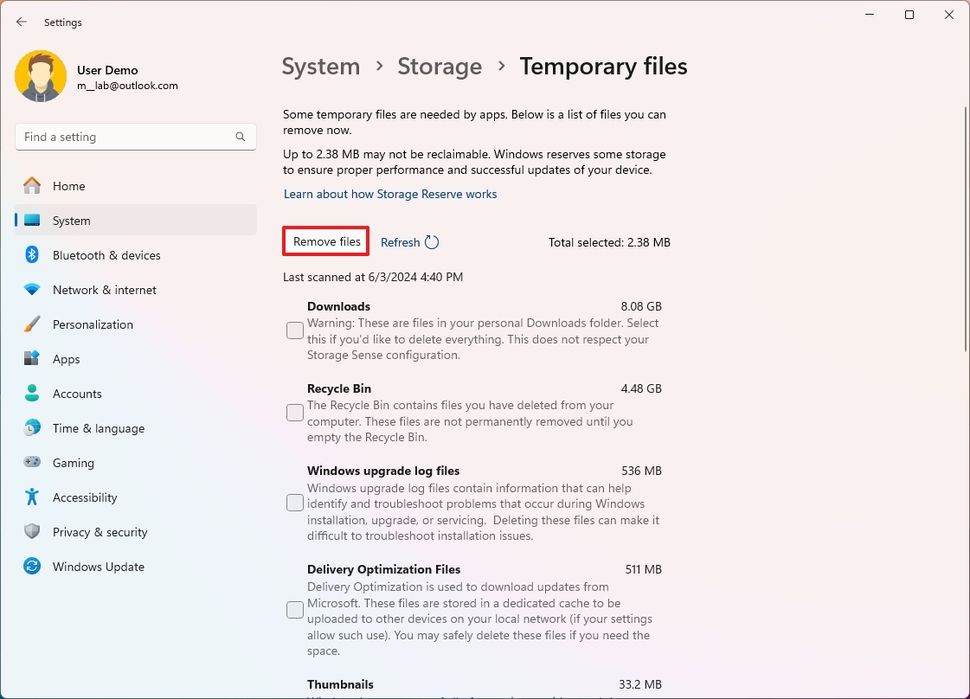
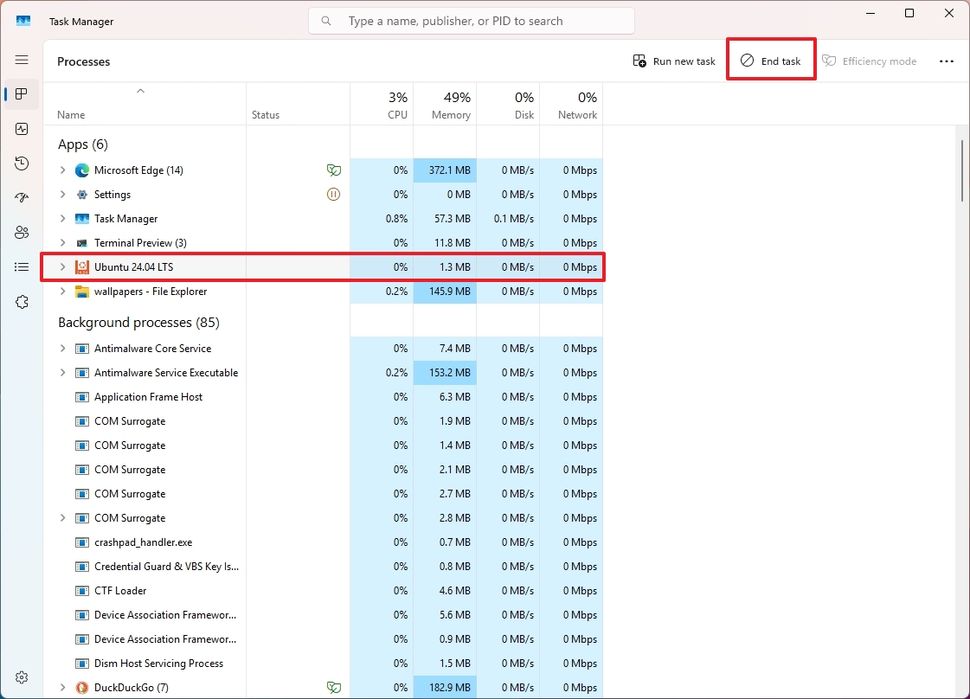
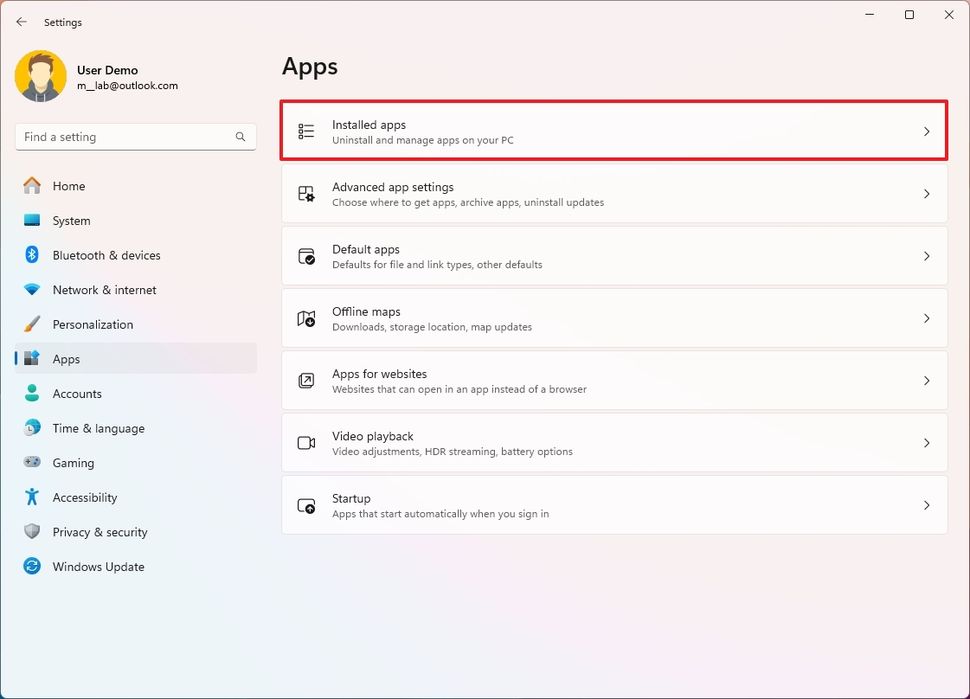
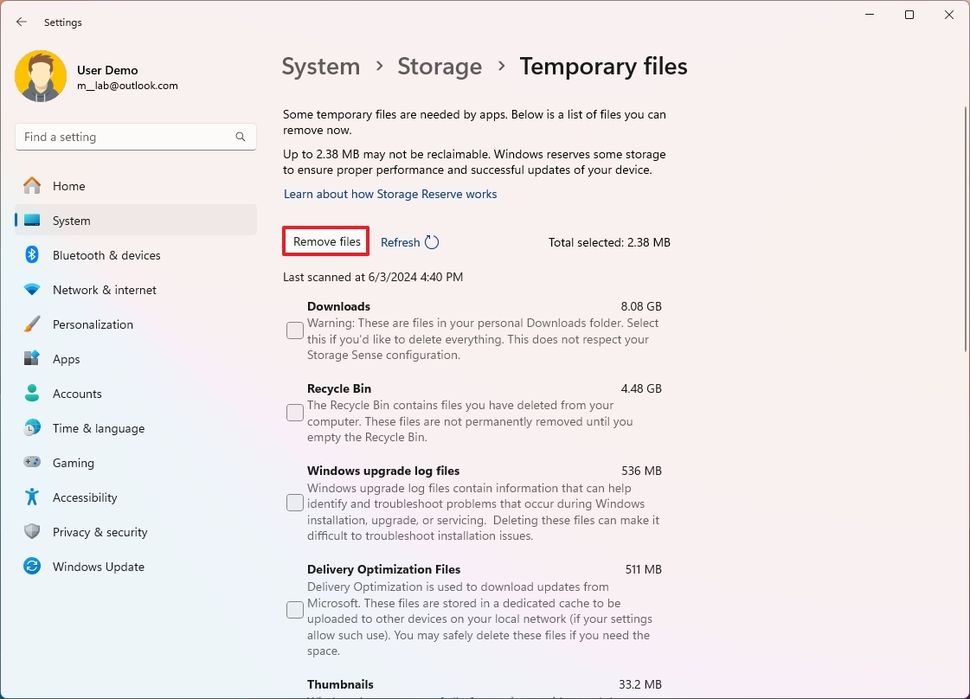
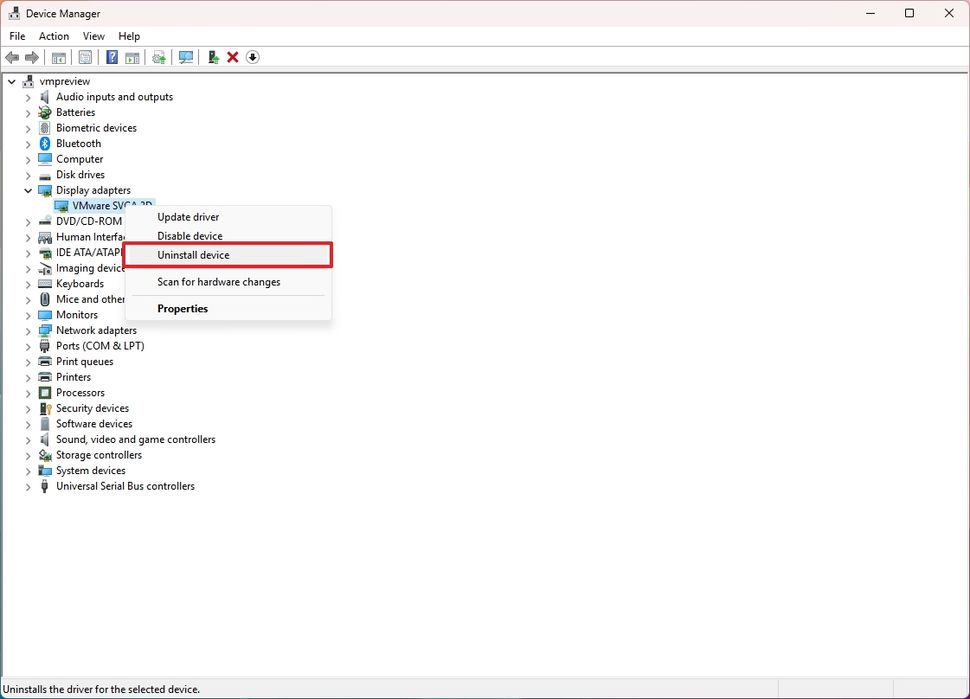
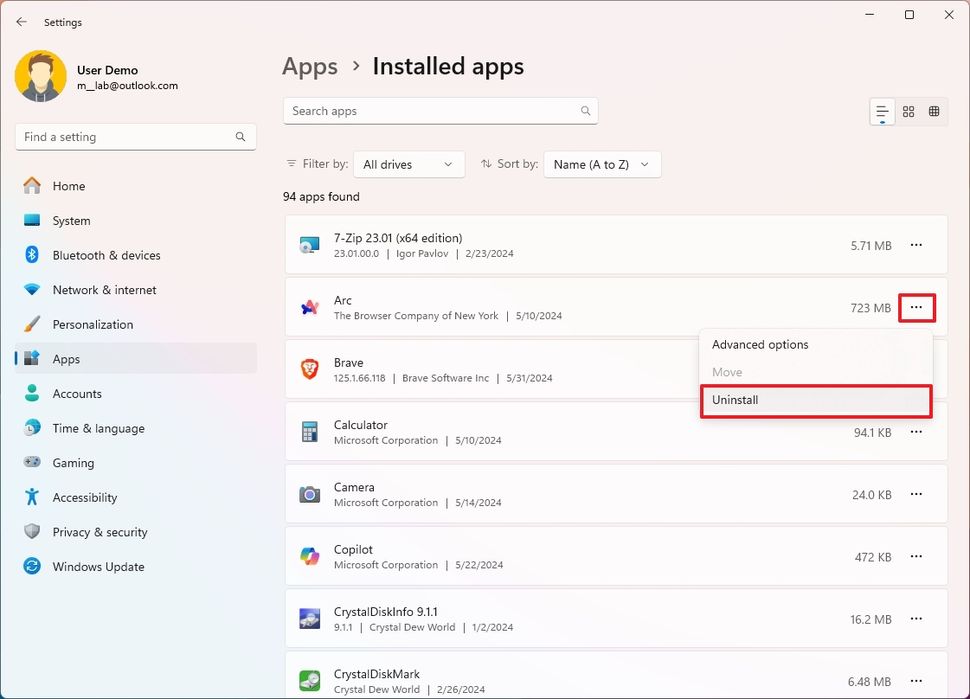
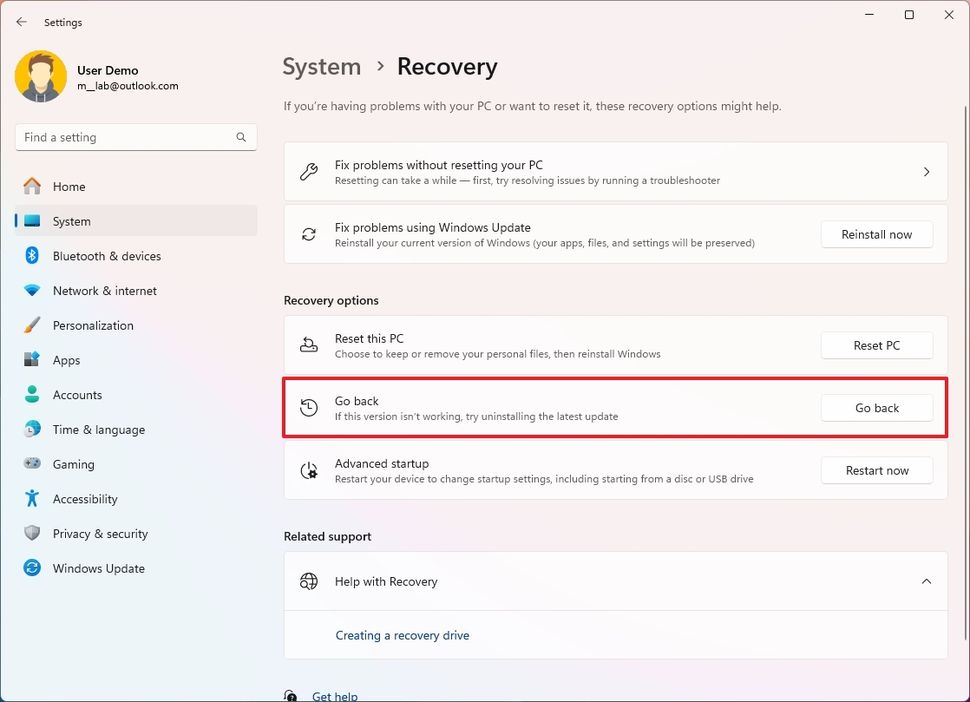
Although Microsoft recommends upgrading to a new version of Windows 11 through the "Windows Update" settings, sometimes this mechanism won't work.
(Image credit: Mauro Huculak)
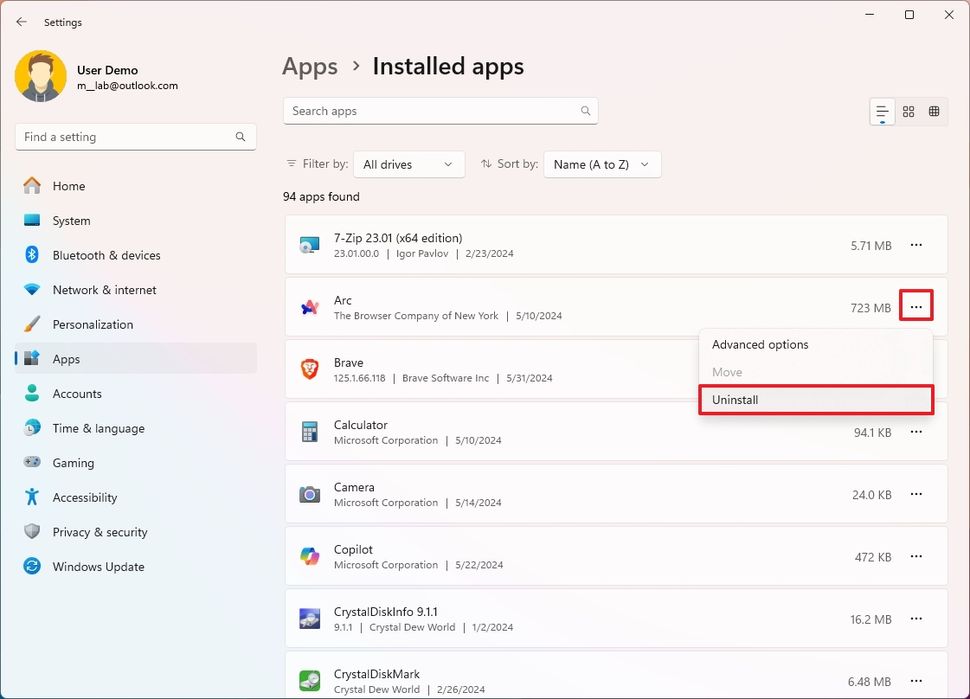
- Click the Uninstall button again.
- Continue with the on-screen directions (if applicable).
Once you complete the steps, you should be able to upgrade to version 24H2.
Update drivers
If the issue is a driver, you will likely see an error code that starts with 0xC1900101 or 0x80090011. You can always update the driver in question to resolve the issue.
It's always best to use the manufacturer's instructions when updating a device driver. If you can't find them, you can refer to these steps:
- Open Settings.
- Click on Windows Update.
- Click the Advanced options page on the right side.
- Click the Optional updates setting under the "Additional options" section.
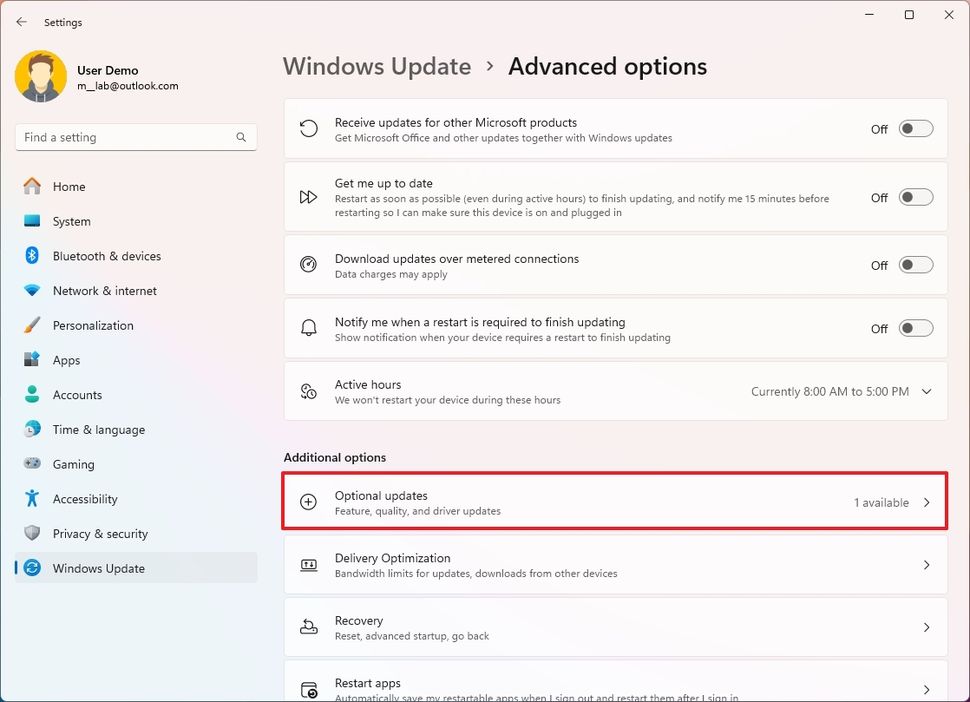
(Image credit: Mauro Huculak)
- Select the available driver update.
- Click the "Download and install" button.
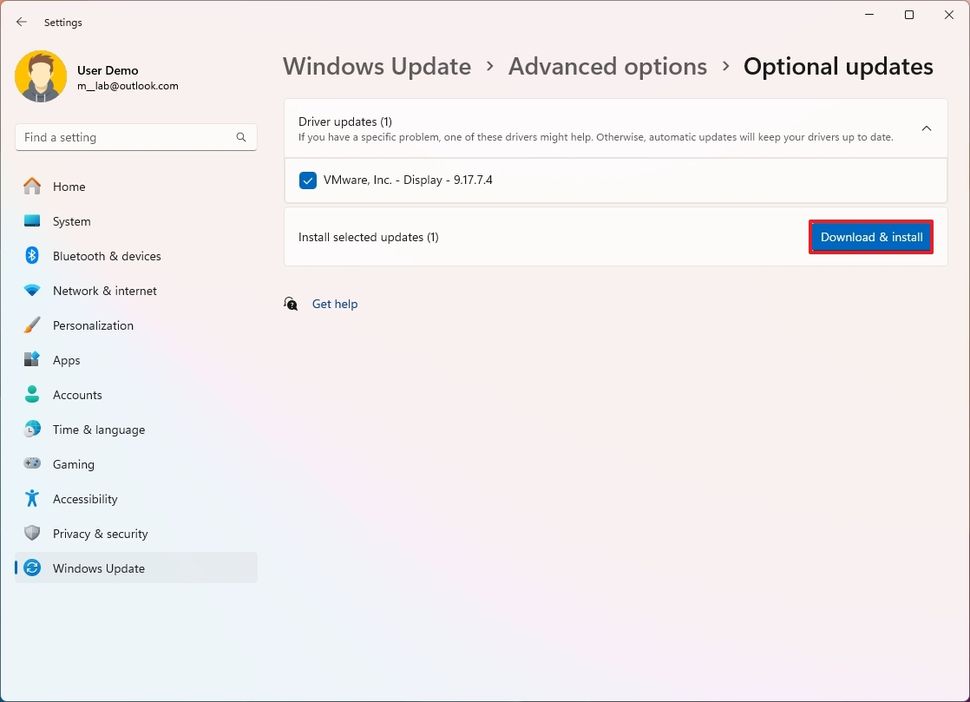
(Image credit: Mauro Huculak)
After completing the steps, you should be able to upgrade without issues.
Repair installation
An error code 0xC1900101 can also indicate a problem with the current installation. In this situation, you can use the Deployment Servicing and Management (DISM) and the System File Checker (SFC) tools to repair the installation.
To fix problems with DISM and SFC, use these steps:
- Open Start.
- Search for Command Prompt, right-click the top result, and select the Run as administrator option.
- Type the following command and press Enter: dism /Online /Cleanup-image /Restorehealth
- Type the following command to repair the installation and press Enter: SFC /scannow
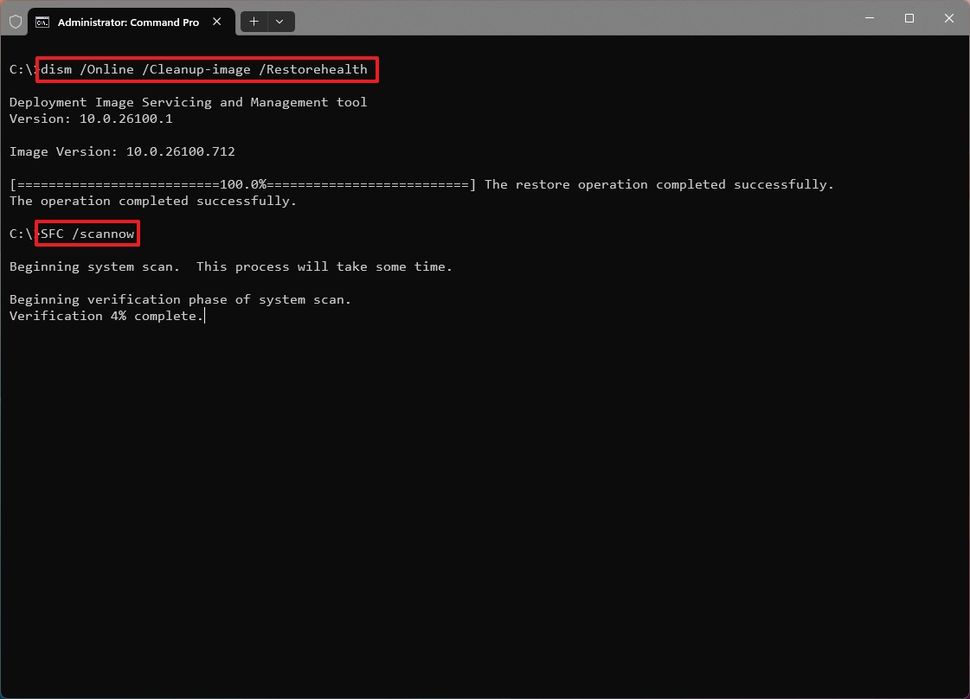
(Image credit: Windows 11 upgrade fix with dism)
Once you complete the steps, the DISM command will repair the files of the local Windows image, and the SFC command will use the local image files to repair the current installation. (You can find additional instructions in my previous guide.)
Repair physical drive
You can also use the CHKDSK command to fix logical and specific physical errors on the installation drive with these instructions:
- Open Start.
- Search for Command Prompt, right-click the top result, and select the Run as administrator option.
- Type the following command and press Enter: chkdsk/f 😄
- Type Y and press Enter to schedule a scan.
- Restart the computer.
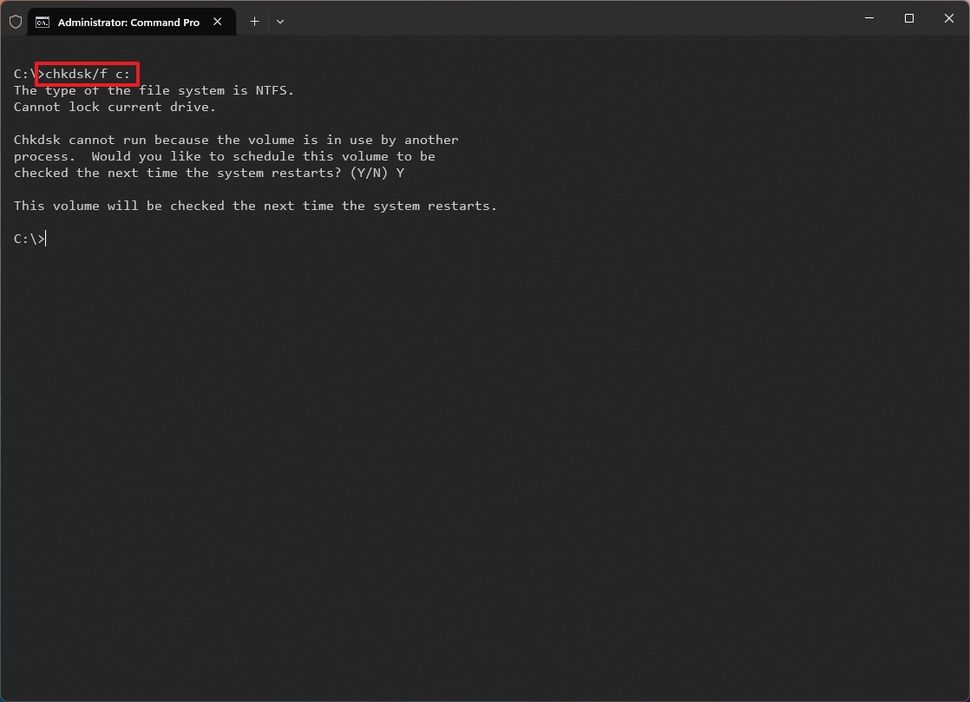
(Image credit: Mauro Huculak)
Once you complete the steps, the computer will restart in the Windows Recovery Environment (WinRE) and run the Check Disk command to fix issues.
Clean installation
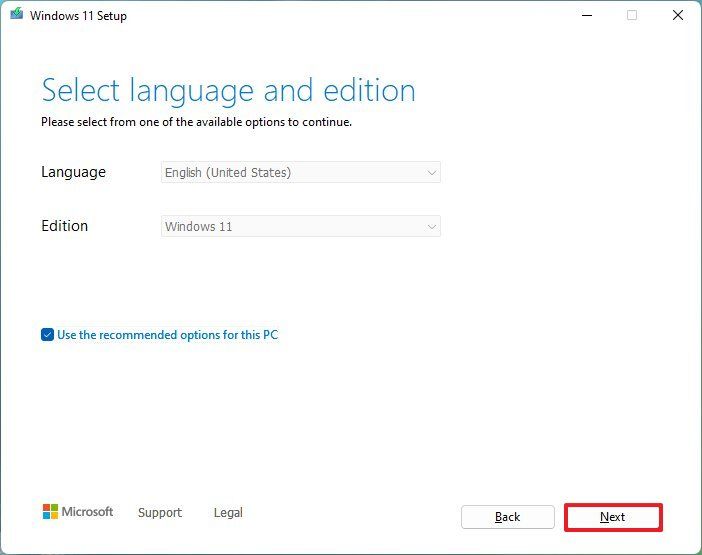
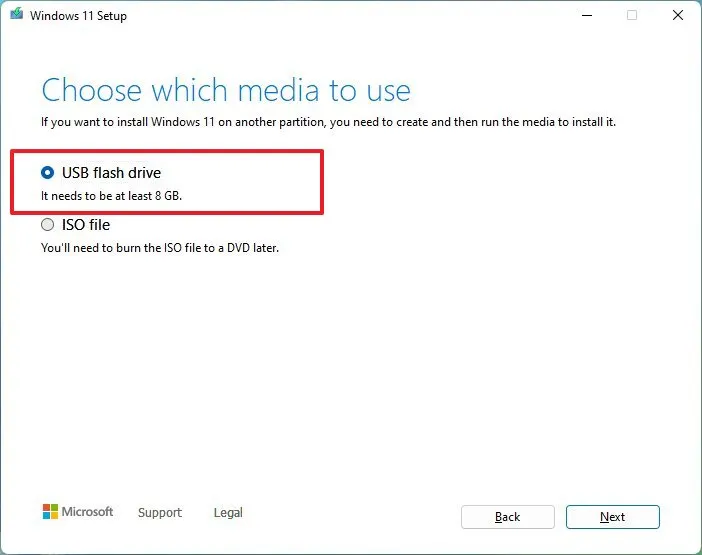
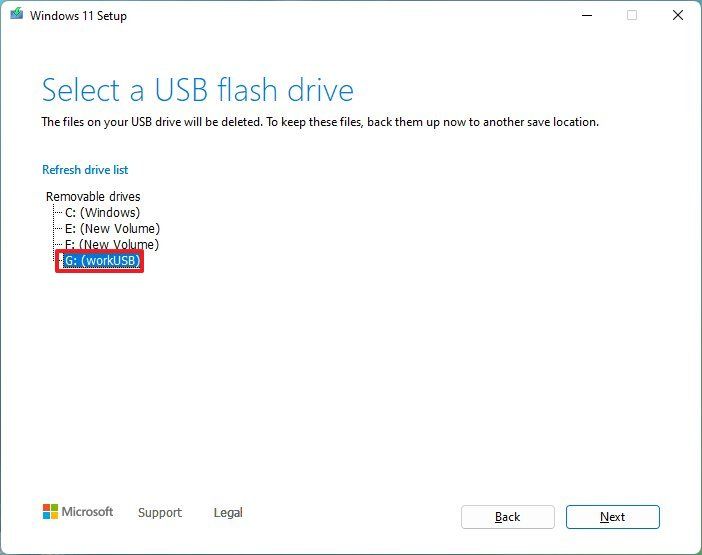
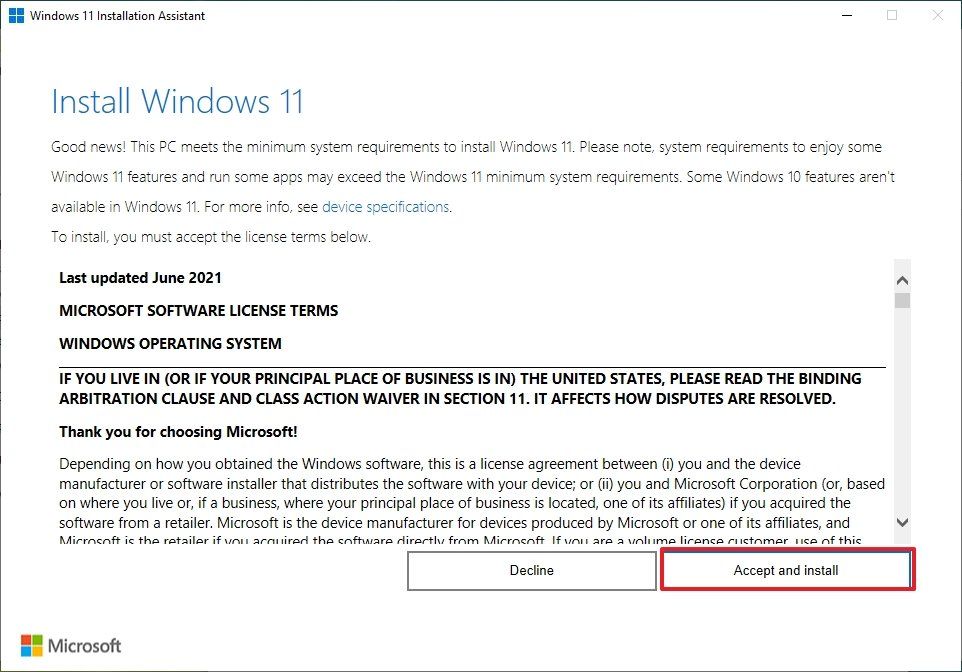
When you can't find a fix for the problem, performing a clean installation with an ISO file or USB flash drive to upgrade to the Windows 11 2024 Update is best.
Install failure troubleshooting
When installing a new version of the operating system, the setup can fail for many reasons. Sometimes, you may receive a message describing the issue, and other times, the installation will fail without any error.
If either of these things happens, depending on whether you receive an error, you can use the update history settings or the SetupDiag tool to find clues that can help you resolve the issue.
Error messages troubleshooting
You may also receive at least two different error messages during the upgrade process, including:
- Error: We couldn't complete the updates. Undoing changes. Don't turn off your computer.
- Error: Failure configuring Windows Updates. Reverting changes.
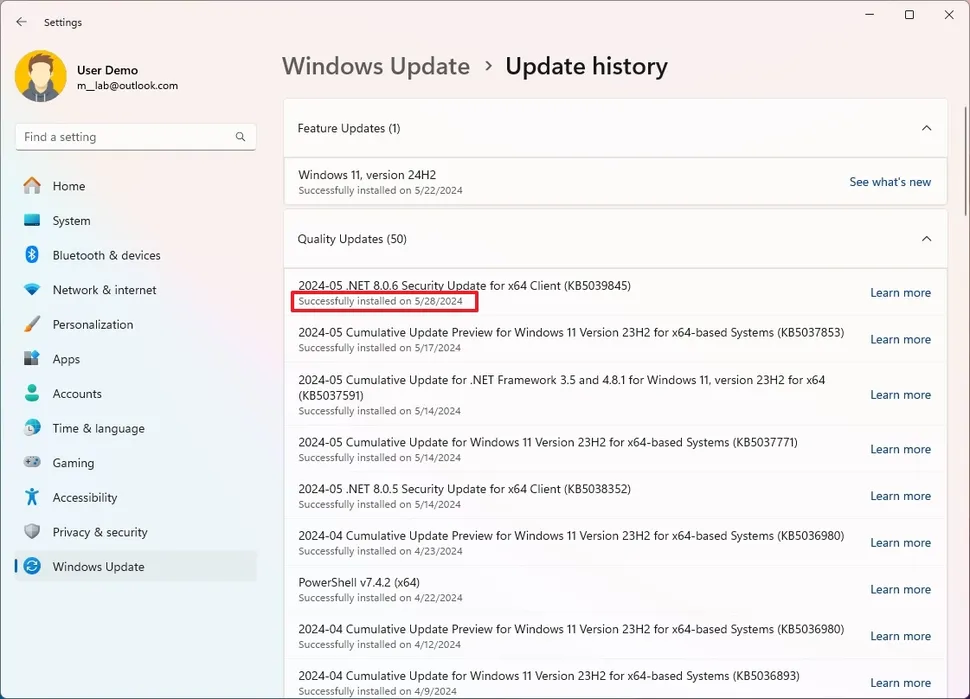
Although these errors try to give you a description of the problem, they are very generic responses. In this case, you will have to check the Windows Update history settings to find out the exact error and research online for a possible resolution.
To find the error code blocking the installation of the Windows 11 2024 Update, use these steps:
- Open Settings.
- Click on Windows Update.
- Click the Update history setting under the "More options" section.
- Confirm the error code under the update that failed to install.
(Image credit: Mauro Huculak)
- Copy the code and research online for a possible solution.
After you complete the steps, use your research to resolve the problem.
SetupDiag troubleshooting
If the installation process rolls back to the previous version without any error message, you can use the SetupDiag tool to diagnose and determine the exact reason why the new version failed to install.
To run the SetupDiag tool on Windows 11, use these steps:
- Open Start.
- Search for Command Prompt, right-click the top result, and select the Run as administrator option.
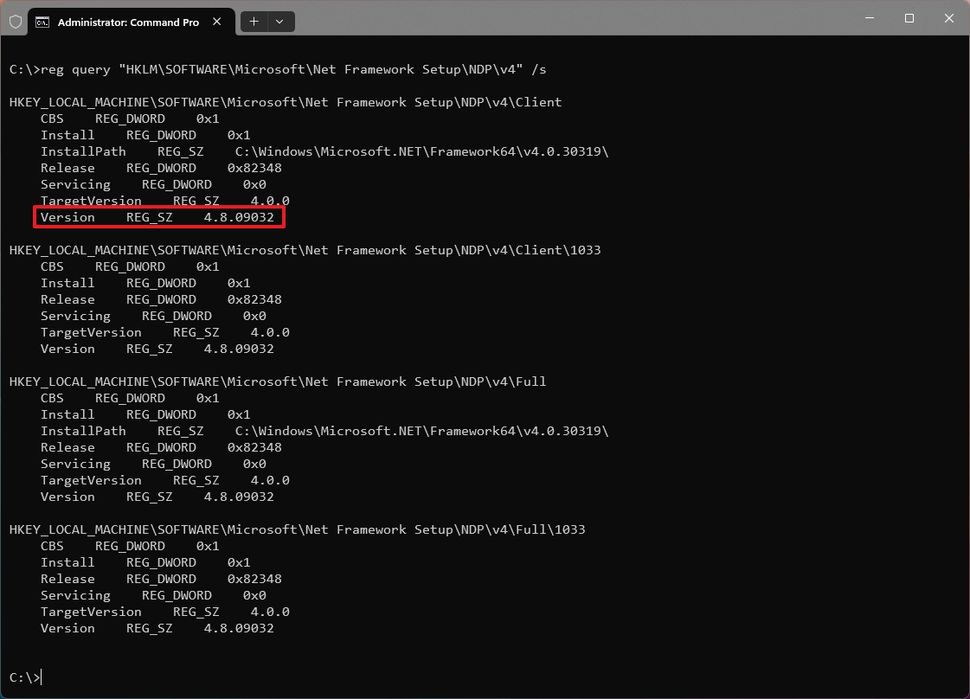
- Type the following command to reveal the version of .NET installed and press Enter: reg query "HKLM\SOFTWARE\Microsoft\Net Framework Setup\NDP\v4" /s
- Confirm that the "Version" field reads something higher than 4.6.xxxxx, you can run the tool.
(Image credit: Mauro Huculak)
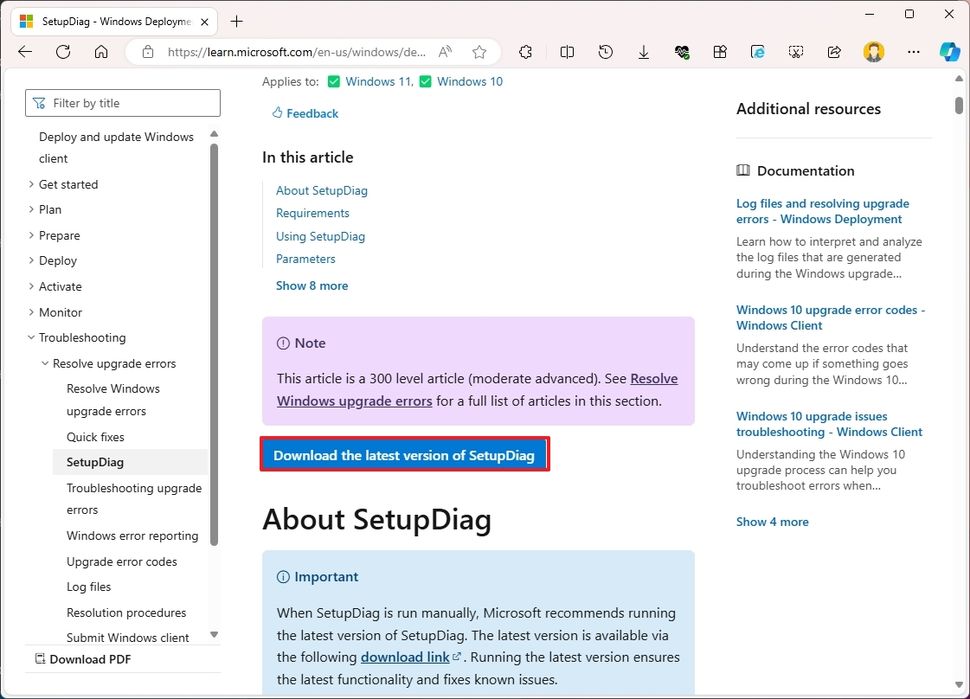
- Open SetupDiag download page.
- Click the Download SetupDiag button.
(Image credit: Mauro Huculak)
- Select an empty folder to download the files.
- Click the Save button.
- Open File Explorer.
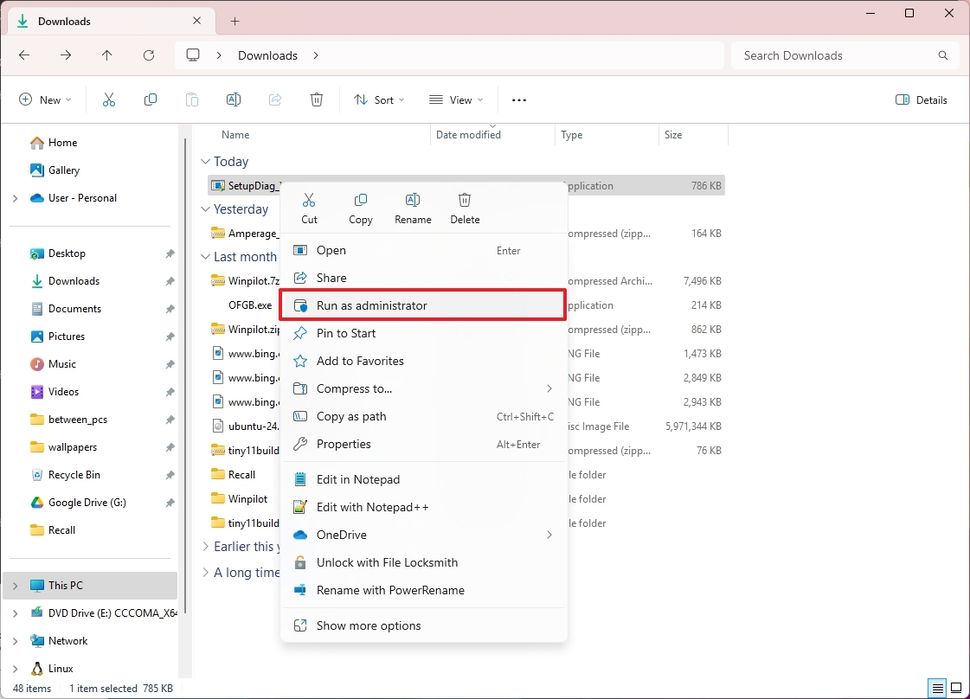
- Browse to the downloaded file location.
- Right-click the "SetupDiag.exe" and select the Run as administrator option.
(Image credit: Mauro Huculak)
- Open File Explorer.
- Browse to the downloaded file location.
- Right-click the SetupDiagResults.log file and select the Open option.
Once you complete the steps, the log file will open with the results that the tool was able to identify based on the known rules.
You can find even more details about the SetupDiag in my previous instructions.
Network troubleshooting
If the computer loses local or internet access, this can happen for a number of reasons, such as problems with drivers, configuration, wireless signal, network cable, router, switch, access point, or internet providers, or it could also be an issue with the new version.
If the problem is a configuration or something wrong with the networking components, you can use the network troubleshooter or reset option on Windows to resolve this problem.
Network adapter troubleshoot
To fix network adapter problems after upgrading to the new version of Windows 11, use these steps:
- Open Settings.
- Click on System.
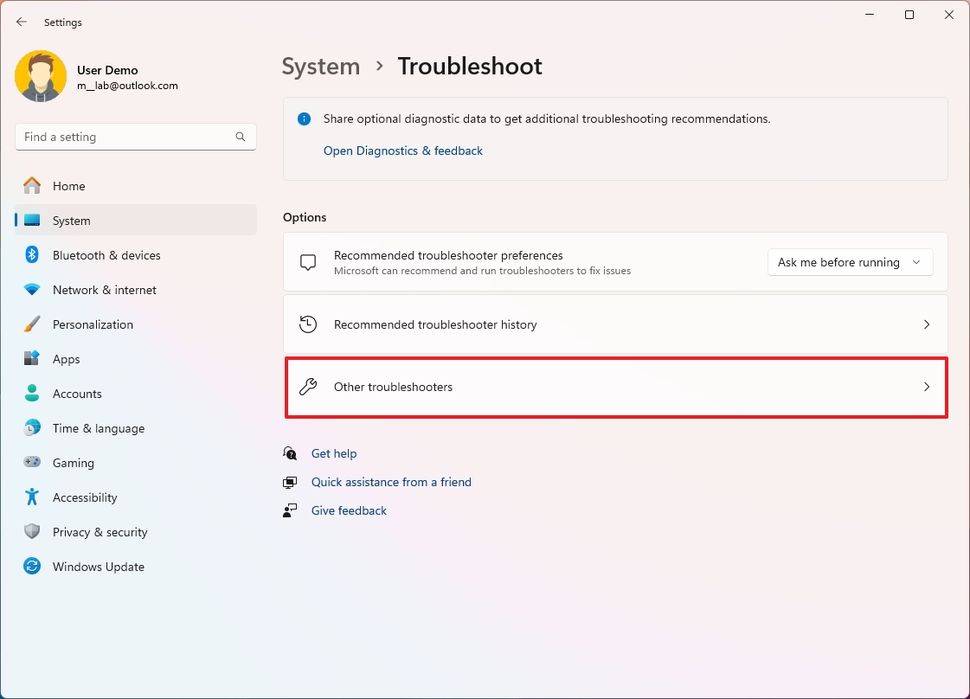
- Click the Troubleshoot page on the right side.
- Click the Other troubleshooters setting.
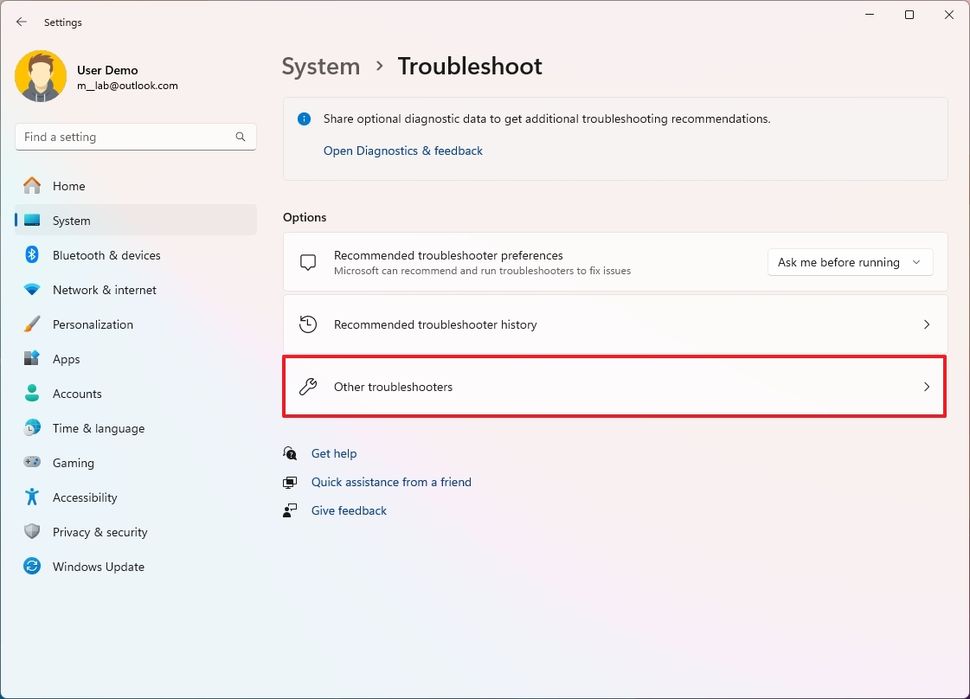
(Image credit: Mauro Huculak)
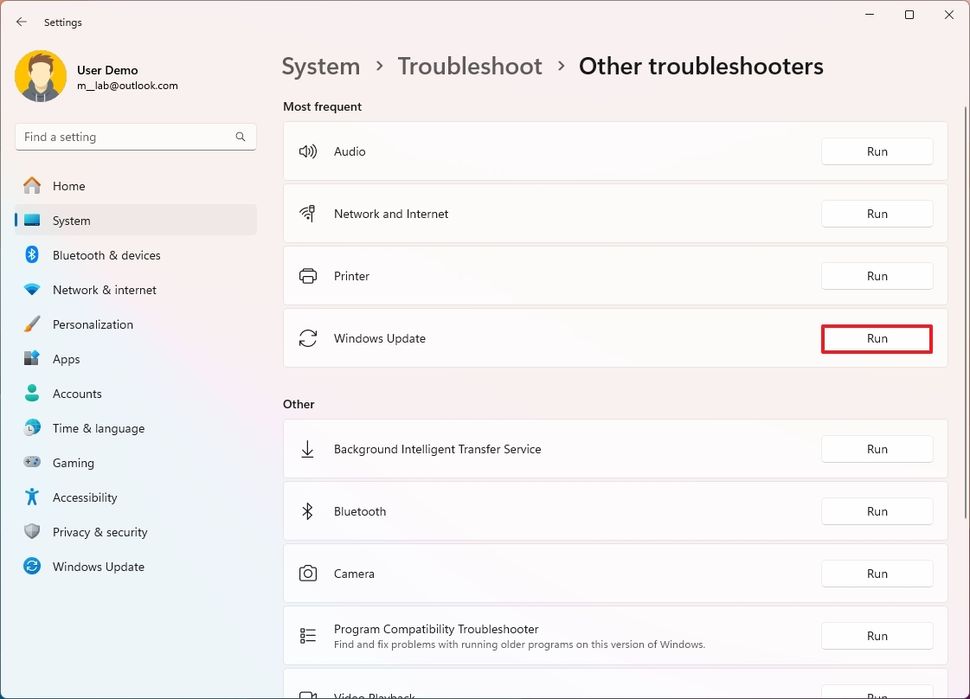
- Click the Run button for the "Network and internet" under the "Most frequent" section.
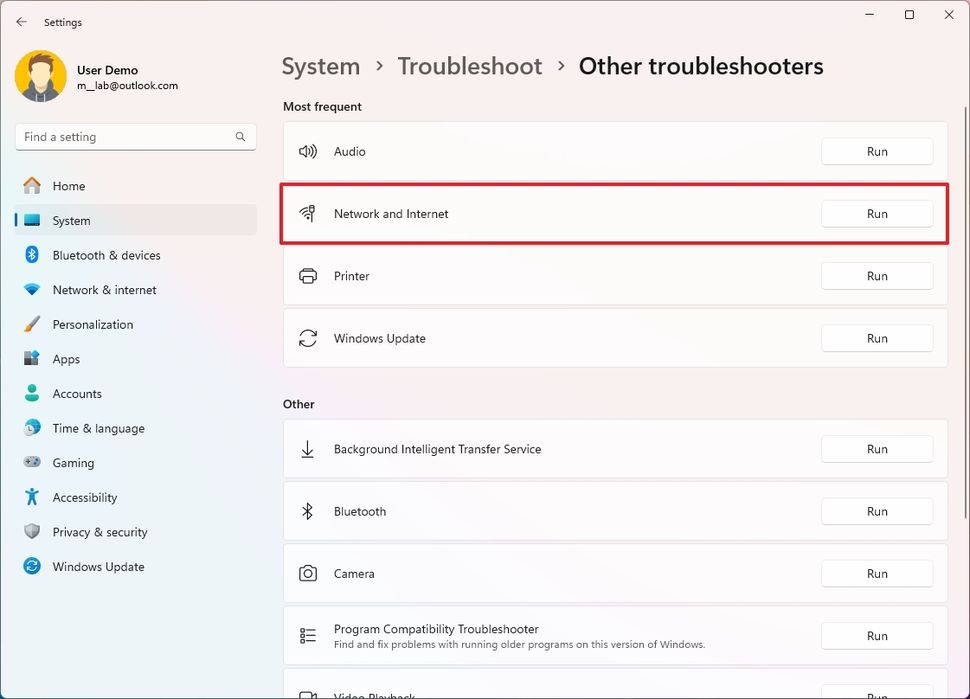
(Image credit: Mauro Huculak)
- Continue with the on-screen directions with the Get Help app.
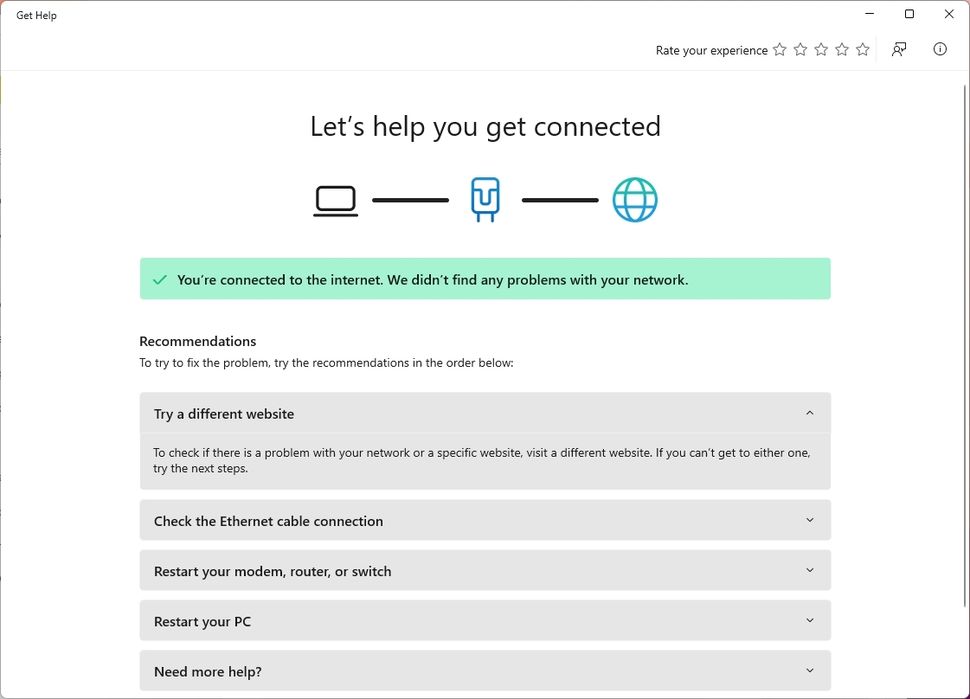
(Image credit: Mauro Huculak)
After you complete the steps, the device should connect to the network again.
Network adapter reset
To reset network adapters to their default settings, use these steps:
- Open Settings.
- Click on Network & internet.
- Click the Advanced network settings page on the right side.
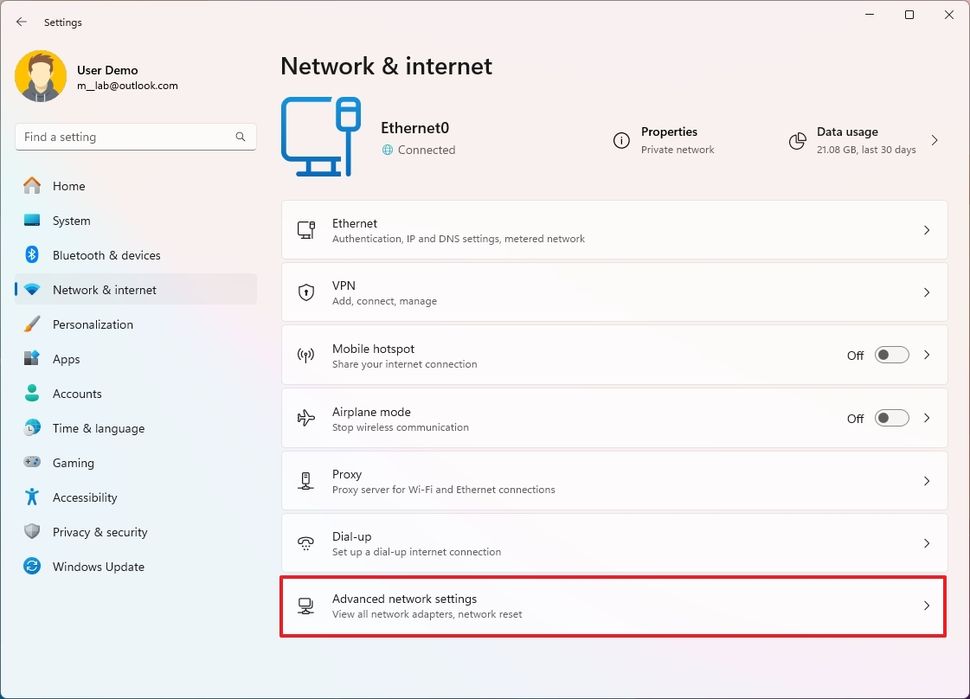
(Image credit: Mauro Huculak)
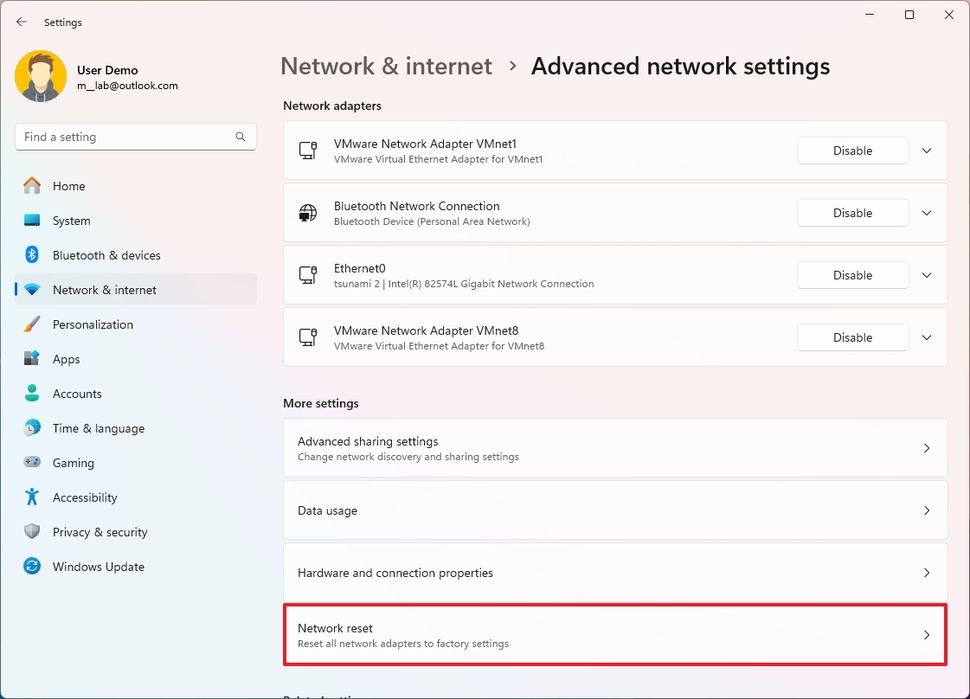
- Click the Network reset setting under the "More settings" section.
(Image credit: Mauro Huculak)
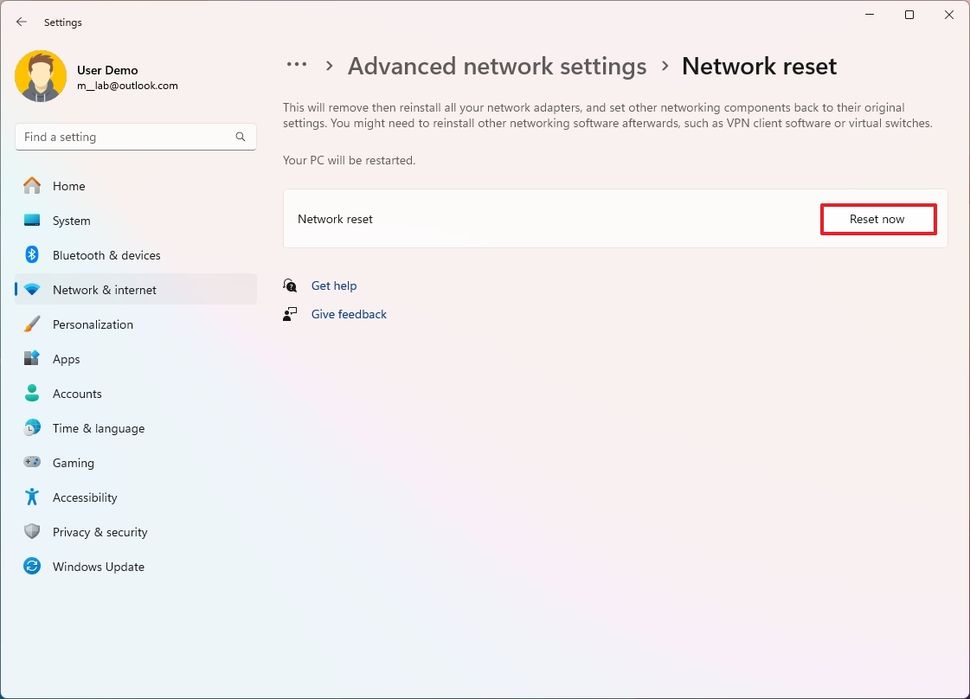
- Click the Reset now button.
- Click the Yes button.
(Image credit: Mauro Huculak)
Once you complete the steps, the system will reinstall the network adapters to reset the settings. If you have a wireless connection, you may need to re-enter the password to connect to the network again.
Unsupported hardware troubleshooting
If you plan to upgrade a device running Windows 10, you may receive the "Error this PC doesn't currently meet Windows 11 system requirements" message, which indicates a compatibility problem.
Typically, this means that the setup has failed to detect the TPM and Secure Boot components or the processor is incompatible. Sometimes, you may even receive the error codes 0xC1900200 – 0x20008 and 0xC1900202 – 0x20008, indicating that the device doesn't meet the minimum requirements.
These are the minimum requirements to install any version of Windows 11:
- Processor: 1GHz or faster CPU or System on a Chip (SoC) with two or more cores.
- Memory: 4GB.
- Storage: 64GB or larger.
- System firmware: UEFI with Secure Boot enabled.
- Graphics: Compatible with DirectX 12 or later with WDDM 2.0 driver.
- TPM: Trusted Platform Module (TPM) version 2.0.
- Display resolution: High definition (720p) display greater than 9 inches diagonally, 8 bits per color channel.
If you want to access the new AI features available on version 24H2, you will typically have a computer featuring at least a Qualcomm Snapdragon X Elite processor, 16GB of RAM, and at least 256GB of SSD storage.
Enable TPM and Secure Boot
If the computer supports TPM 2.0 and Secure Boot, you can enable these features in the UEFI firmware of the motherboard with these instructions.
- Open Settings.
- Click on Update & Security.
- Click on Recovery.
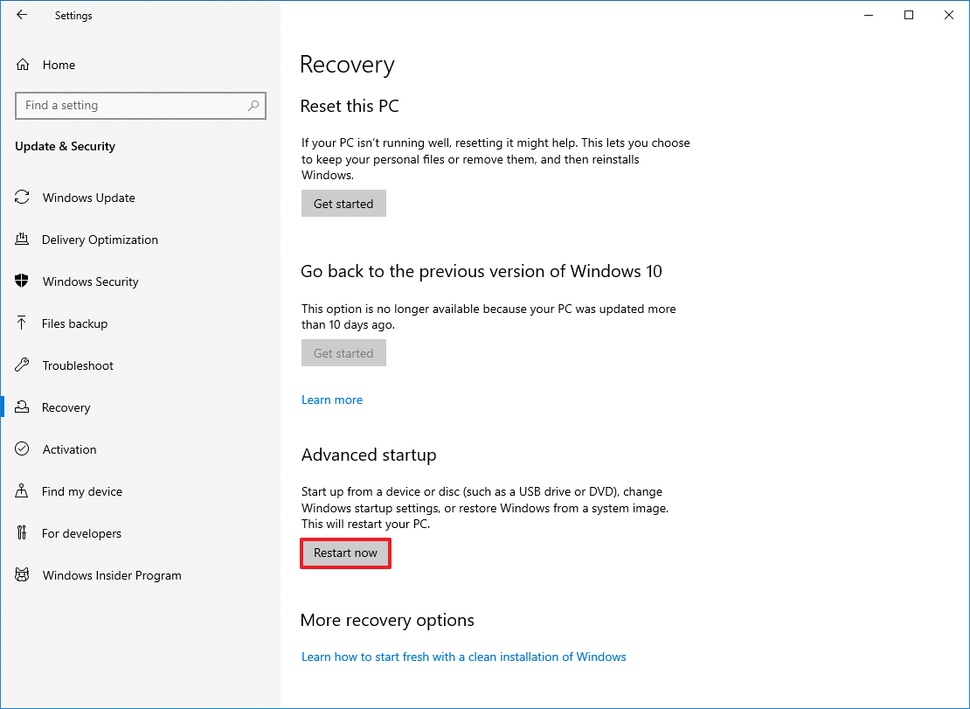
- Click the Restart now button under the "Advanced startup" section.
(Image credit: Mauro Huculak)
- Click on Troubleshoot.
- Click on Advanced options.
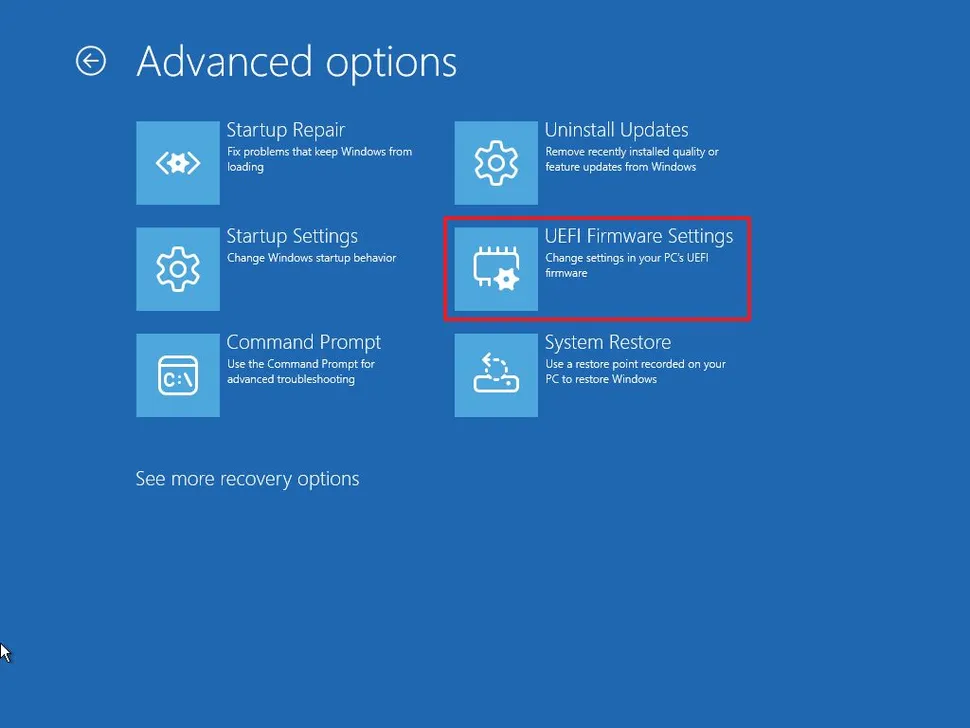
- Click the "UEFI Firmware Settings" option.
(Image credit: Mauro Huculak)
- Click the Restart button.
- Open the security or boot settings and enable TPM and Secure Boot (as necessary).
If the motherboard doesn't include the TPM chip, it may be available on the processor. On AMD processors, the feature may appear as "fTPM" or "AMD fTPM switch," and on Intel processors as "PPT."
Hope you enjoyed this news post.
Thank you for appreciating my time and effort posting news every single day for many years.
2023: Over 5,800 news posts | 2024 (till end of May): Nearly 2,400 news posts


3175x175(CURRENT).thumb.jpg.b05acc060982b36f5891ba728e6d953c.jpg)


Recommended Comments
Join the conversation
You can post now and register later. If you have an account, sign in now to post with your account.
Note: Your post will require moderator approval before it will be visible.