Microsoft Word offers various custom methods when working with page numbers. The possibilities are endless. This article will look at how you can work with page numbers in Microsoft Word.
Inserting Page Numbers
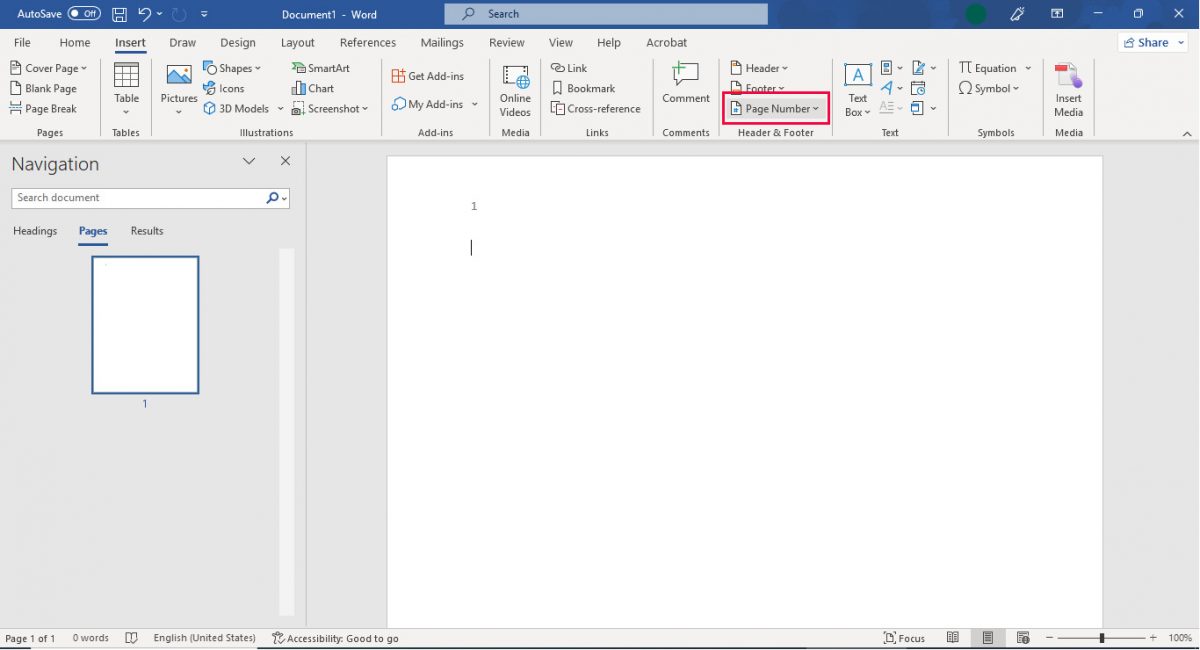
You can add page numbers to your document in a simple way. You must go to the insert tab and click on page number under the header and footer sections. You will get a dropdown menu showing various options for the page number. For example, you can have it at the top or bottom of the page. You can also format your page numbers or remove already inserted page numbers.
When you select any of the first four options, you will get a pop-up showing how your page number will look in the position you selected. Click the option you like, and Word will insert page numbers into the document.

Custom Page Numbers
If you want page numbers to not appear on specific pages of your document, there's a simple way to do that as well. For example, you may want a different header/footer for the opening of your document. In this case, click inside the header or footer section of the page on which you want to make changes. This will open up a design tab. You will then see different options, like a different first page or odd and even pages.
This option only applies to the section where your cursor is. If you select a different first page, the header and footer from your first page will disappear. You can type any information you want where the header and footer used to be. This gives you a different first page.
Odd & Even
You can also have different odd and even pages. For this, you need to enable the different odd and even pages under the design section. This will align the page numbers differently. The even pages will have page numbers on the left side, and for odd pages, they will be on the right side.
Adding Different Numbers and Formats
Some Word documents use Arabic numerals, while some use Roman numerals. You can set up how you want your page numbers to be displayed in Word. To do this, you must create different Word document sections. For example, if you want your introduction and synopsis to have different page numbers, you need to create a different section for these two parts.
To create a section, you need to place an insertion point at the beginning of the document. You then need to switch to the layout tab and click breaks. In the dropdown that comes up, you need to click next page. This will create a section break, and a new section begins. Once the section is created, you can change the page number format.
Open the header and footer section under the design tab, and you will see 'link to previous.' This links the new section and the next section. Now that the two sections are linked, you can format page numbers the way you want in a few steps.
You must first open the header and footer of any page in your preliminary section. Right-click on the number and select format page numbers. In the pop-up, select the format you want and click ok.
Controlling the Page Numbers Using Fields
By default, Word will number all your pages. However, the numbers are hidden unless you decide to display them. You can do this by inserting a code field anywhere on the page. This tells Word to reveal the page number. You can also have control over your page numbers with this option. You can put page numbers anywhere you want, not just in the headers and footers.
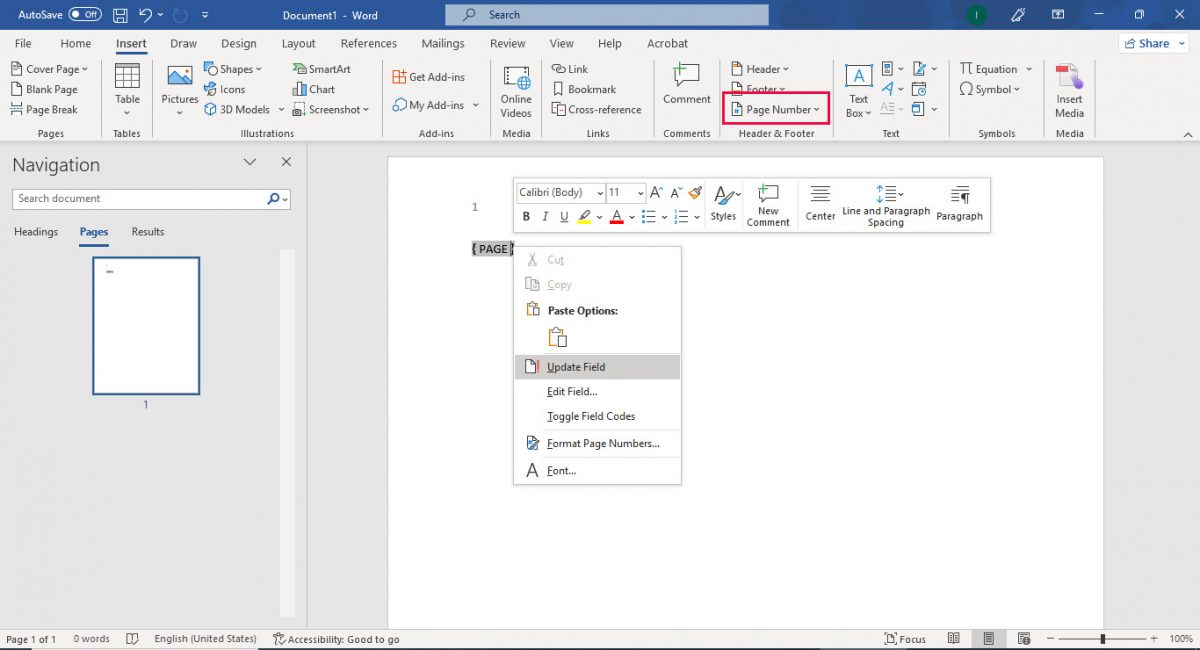
To do this, place your cursor where you want to insert your page number and press CTRL+F9. This will insert pair field brackets. Type "PAGE" inside these brackets. You can also modify this command to give you control over the style of your page numbers. For example, you can type "PAGE \* Arabic" or "PAGE \* ROMAN" to get the desired page number format. When done, right-click between the brackets and click on update field.

Broken Page Numbers
If page numbers are broken, they will not appear in sequence and may not appear on all pages. To fix this, you first need to identify which sections are broken. To do this, head to the view section and click on draft. This draft view will show you where a section has broken and what kind of break it is.
Once you've seen the kind of break and where it is, head to the print layout view. You first need to ensure the header and footer sections are linked together. This has been explained in this article.
Page Numbers as Easy as 1.2.3.
There you have it. Everything you can do with page numbers in your Microsoft Word document. Try out a few of these and let us know if they helped. It's time to make your document stand out from the rest with simple formatting tricks.


_story.jpg)
3175x175(CURRENT).thumb.jpg.b05acc060982b36f5891ba728e6d953c.jpg)
Recommended Comments
There are no comments to display.
Join the conversation
You can post now and register later. If you have an account, sign in now to post with your account.
Note: Your post will require moderator approval before it will be visible.