Windows 11 version 25H2 is right around the corner, and its release is imminent, with Microsoft already having ISO and enablement packages on its servers. For existing Windows 11 users, this release will be a rather mundane update, unless they upgrade from older releases. Since Windows 11 version 25H2 shares the same branch as version 24H2, updating to a new version will be simple and quick. However, things are a bit different for customers with unsupported devices, where installing Windows 11 version 25H2 is less straightforward.
As we usually do with major Windows 11 releases, here is how to install Windows 11 version 25H2 on an unsupported PC.
Reminder: There is no way to bypass hardware requirements on PCs whose processors do not support SSE4.2 instructions. If your computer is this old, the only Windows 11 version you can run is Windows 11 23H2 or older. Windows 11 version 24H2, 25H2, and older cannot physically work on such computers.
How to update an unsupported PC to Windows 11 version 25H2?
If you have a computer that already runs Windows 11 version 24H2, you do not have to do anything. Version 25H2 will arrive as a regular cumulative update via an enablement package. Additionally, all new features will be available on version 24H2 as well. Therefore, there is no point in doing anything right now. However, if you still want "25H2" in your Settings > System > About, you can use the enablement package from this guide.
However, if your computer runs Windows 10, and you want to get to version 25H2, you have to do a bit more to make it work because a regular ISO or clicking a single button is not enough. Note: Methods described in this guide for Windows 11 24H2 remain mostly relevant.
Open the mounted ISO and go to the sources folder.
Press and hold the Shift key and right-click an empty space. Select Open PowerShell here.
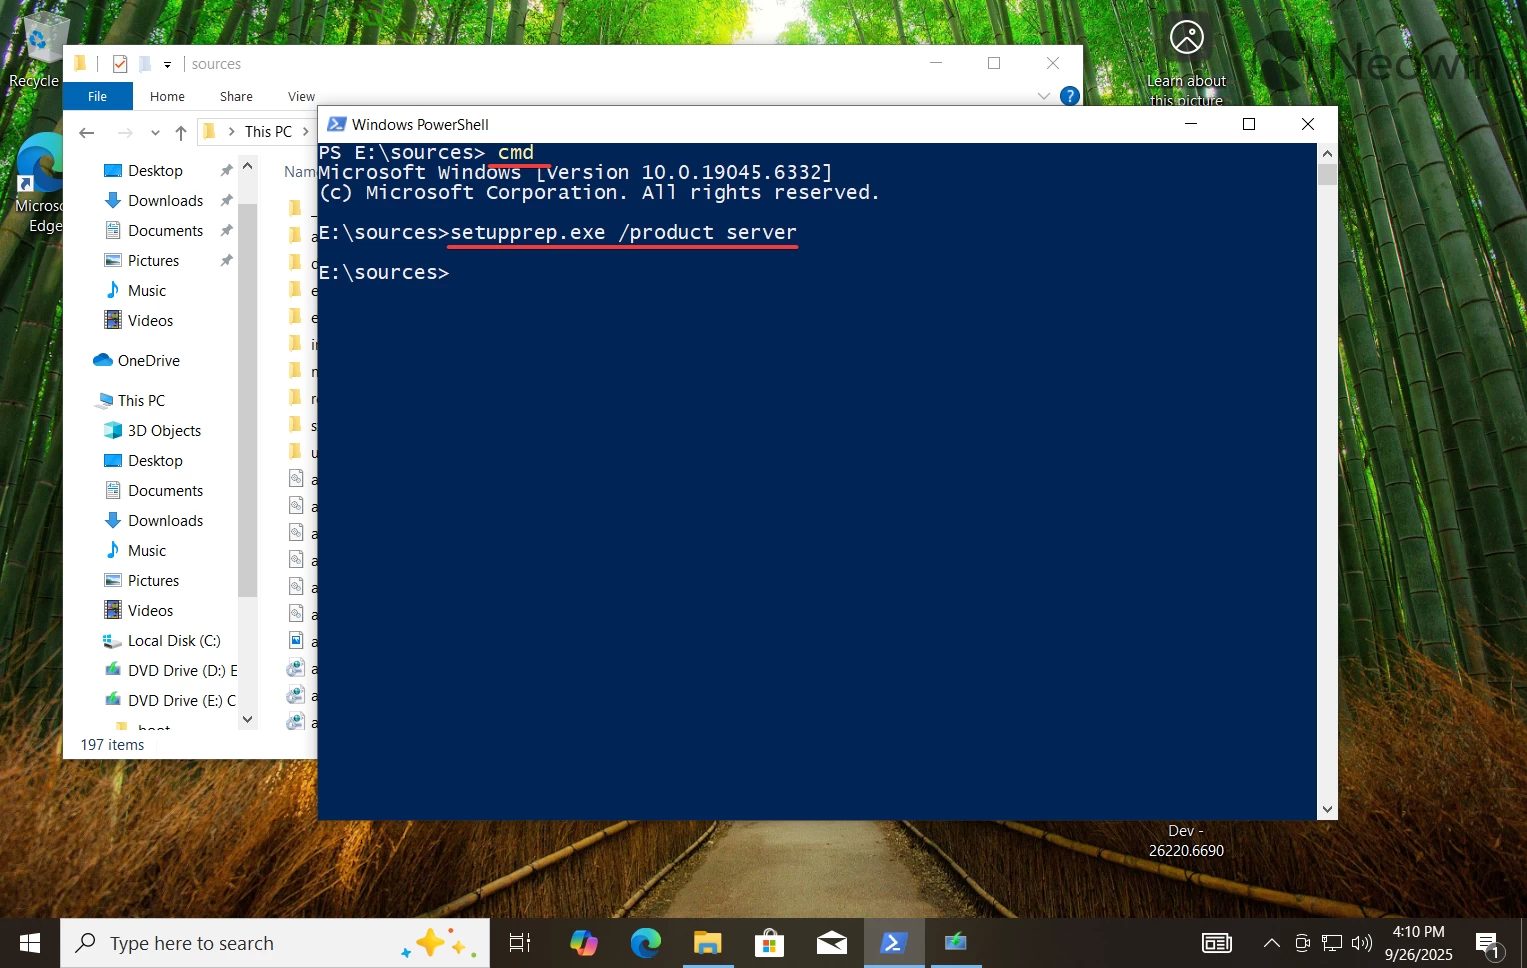
Type cmd in the PowerShell window and press Enter.
Type setupprep.exe /product server and press Enter.
Explainer: This command tricks Windows into thinking you are installing Windows Server, and it skips the hardware requirements. Don't fret, you are still getting a regular Home or Pro edition, depending on your current installation. The command is only necessary to bypass the requirements.
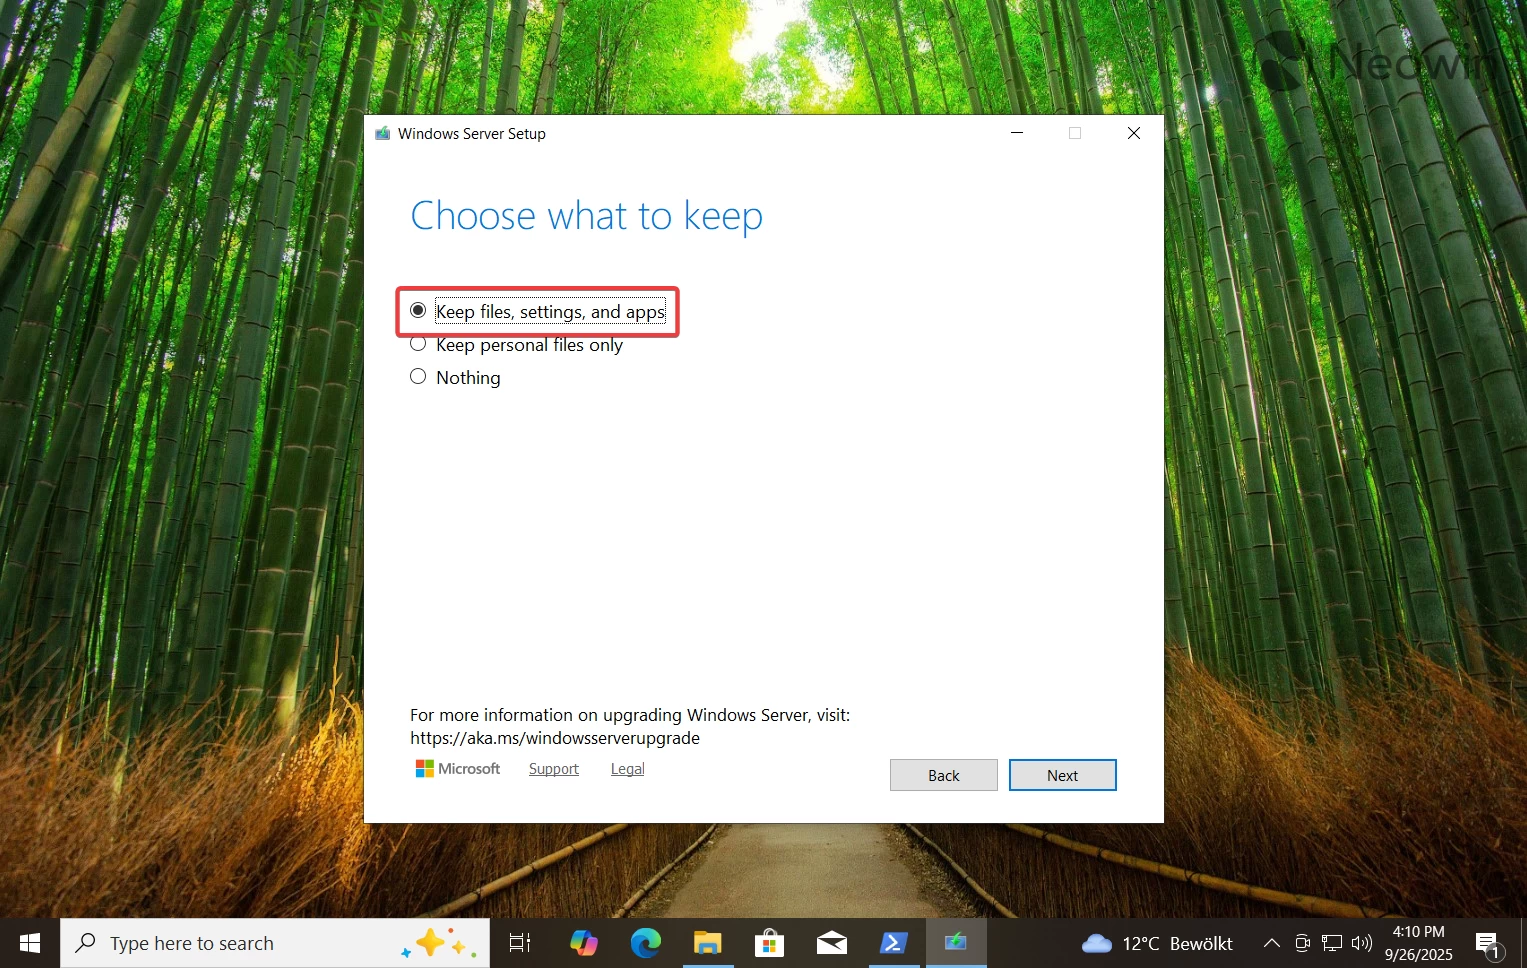
Follow the on-screen instructions and select the necessary option on the "Choose what to keep" page. If you want to continue using your computer as is, select the first option.
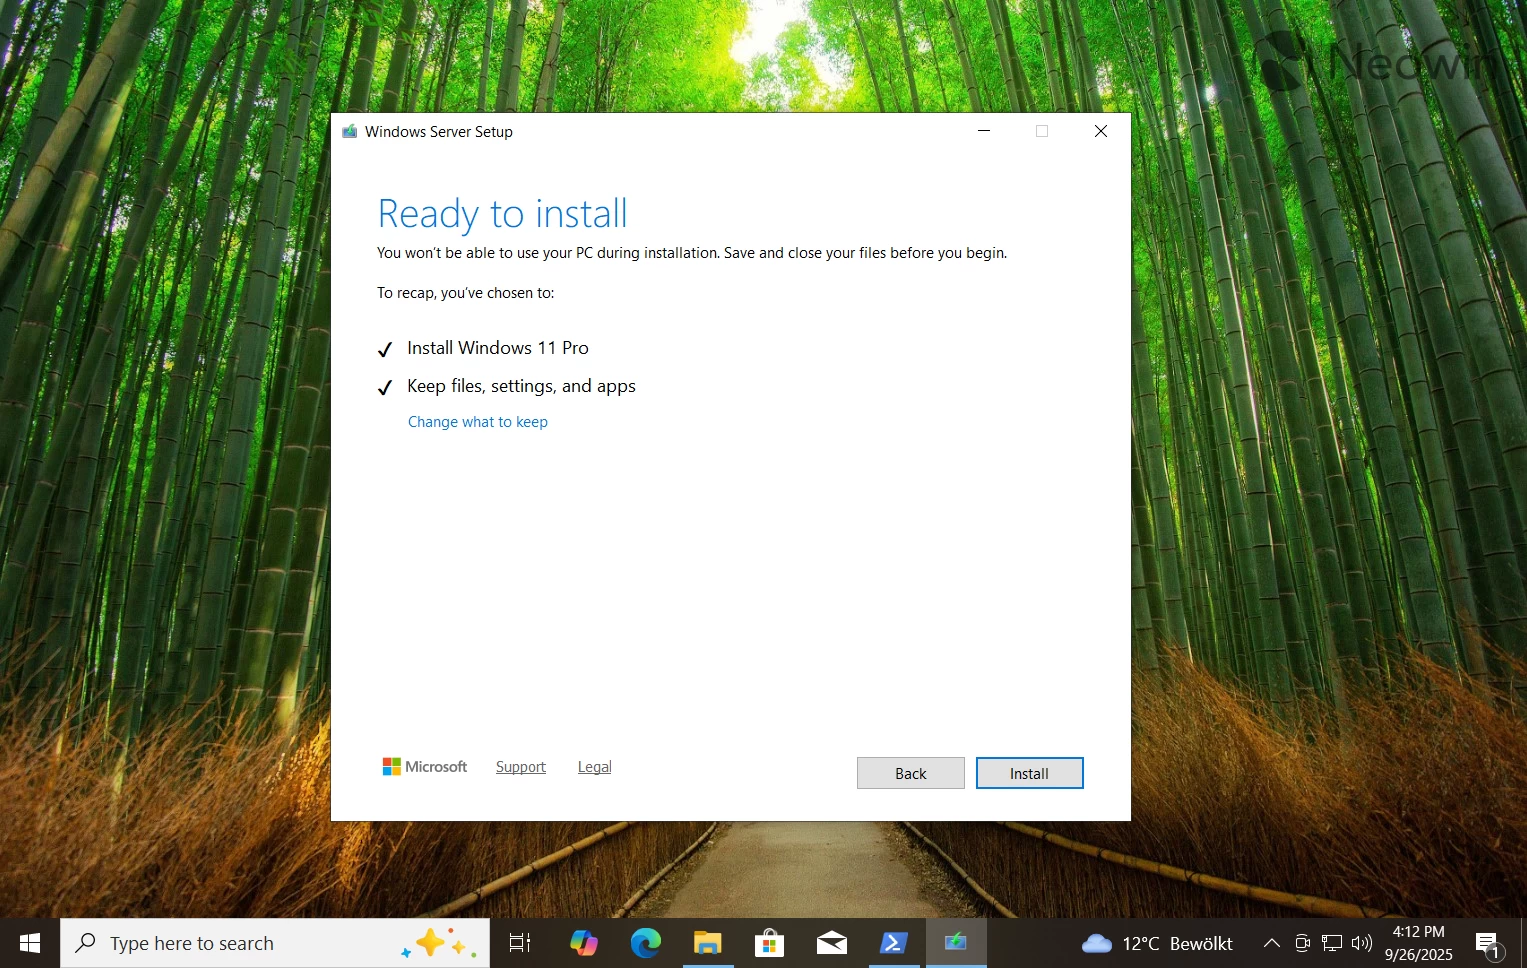
Confirm the action and then sit back and wait for Windows 11 to install itself.
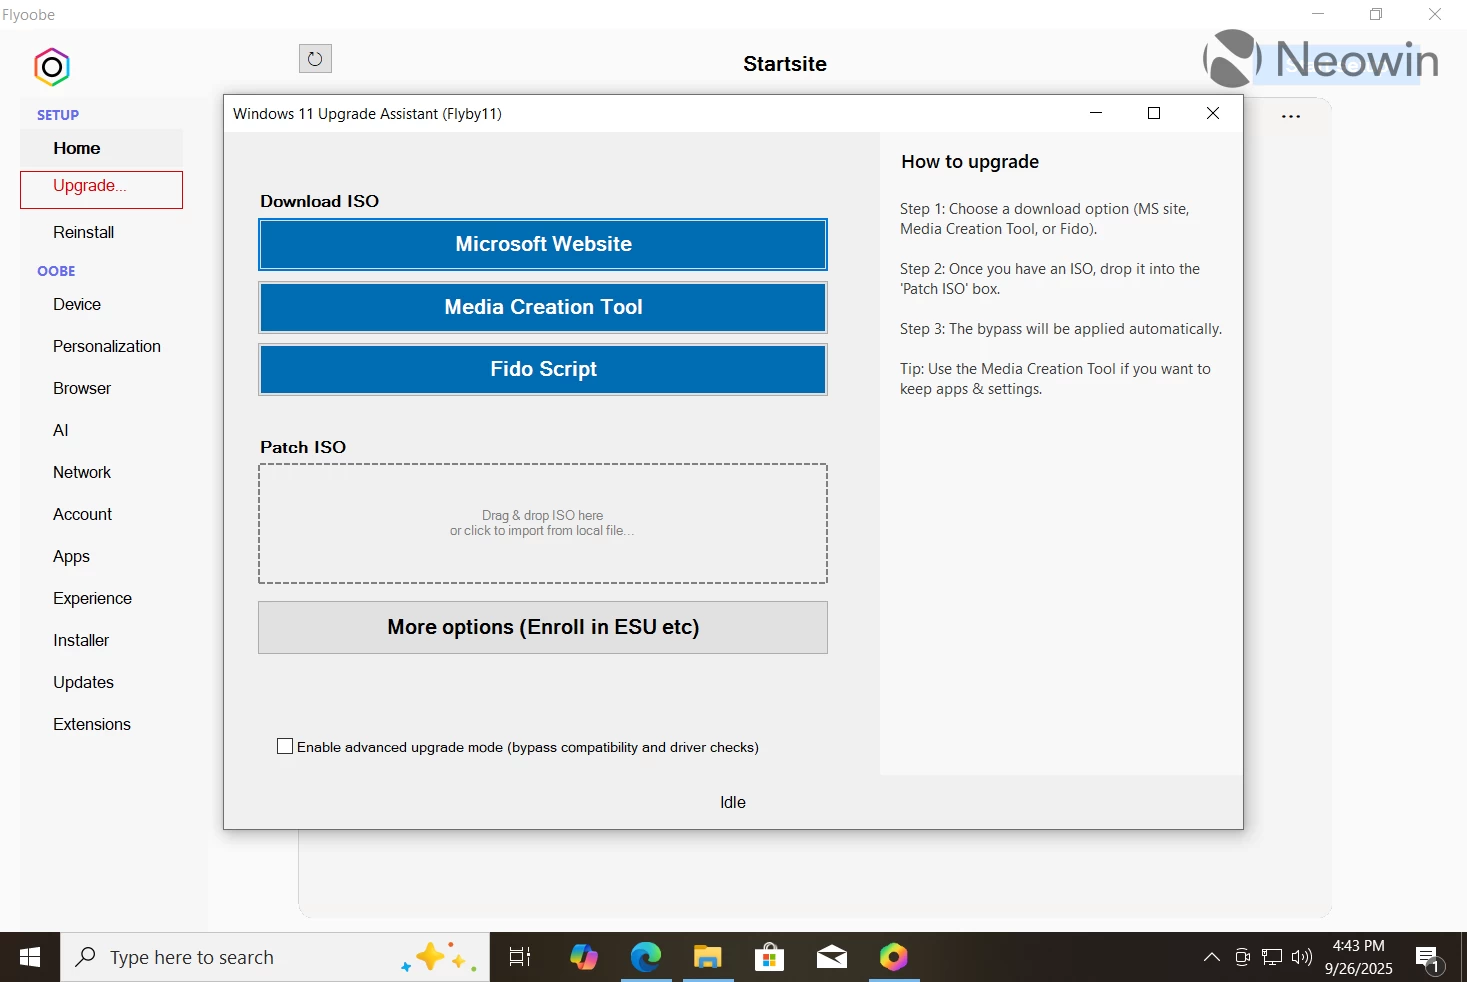
Done, you are now on vanilla Windows 11 version 25H2. This is the easiest option that does not require fiddling with the system registry or using third-party apps. However, there is a small app that lets you do the same with a more user-friendly interface, so that there is no need to open PowerShell or type various commands.
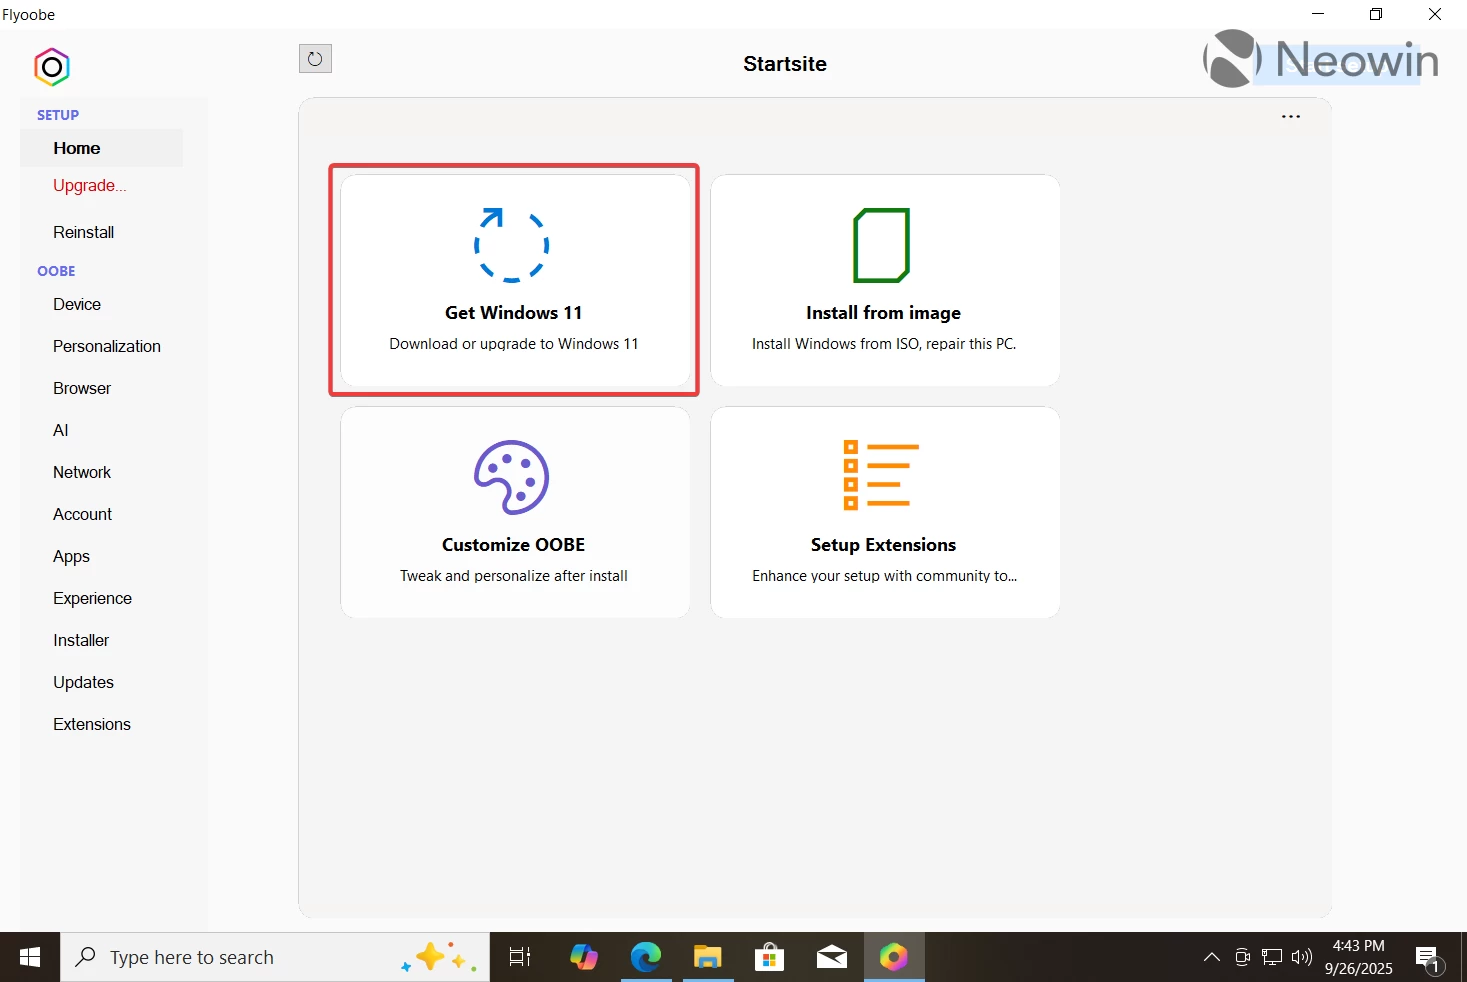
Click this link to download the Flyoobe app from its GitHub repository. Get the latest release and extract it to a convenient folder.
Run the Flyo file and click Get Windows 11.
Download Windows 11 25H2 ISO and drag it into the Patch ISO area.
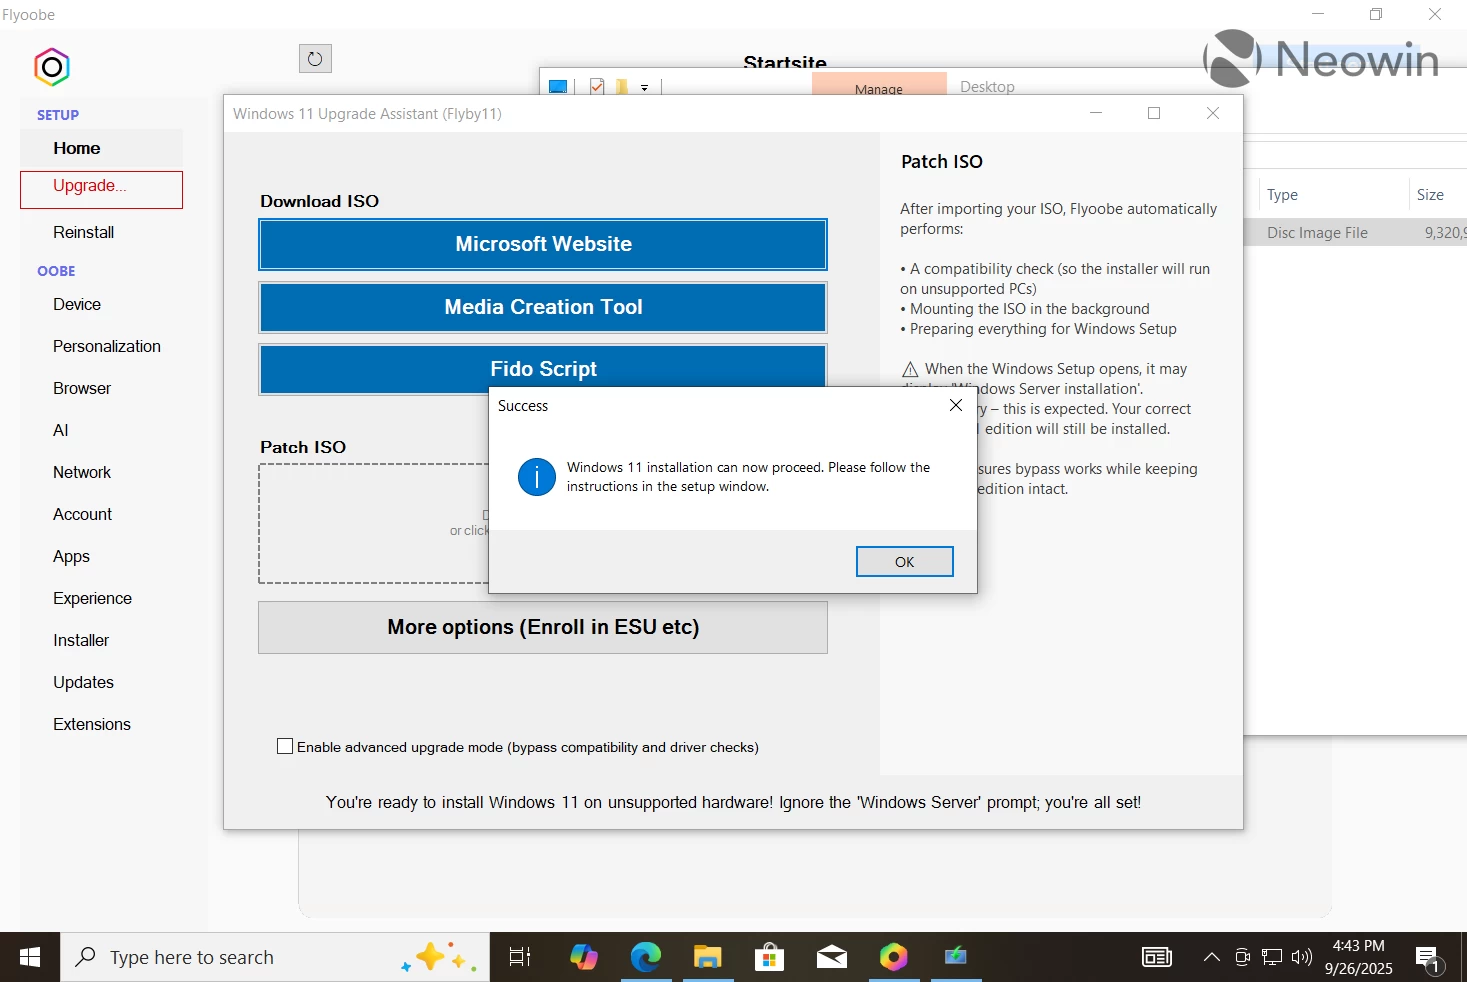
Flyoobe will run all the necessary scripts for you and skip the hardware requirements. The installation wizard will open automatically and let you proceed with upgrading to Windows 11 version 25H2.
How to install Windows 11 25H2 on an unsupported PC?
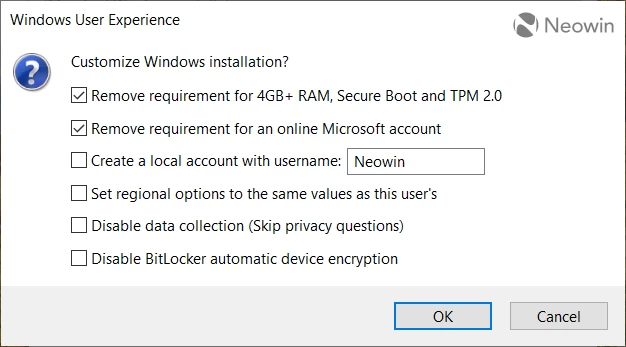
If you want to clean-install Windows 11 version 25H2 on a computer that does not support the operating system officially, you need a handy tool called Rufus. It is a popular drive-making utility that lets you create a bootable USB and remove Windows 11's hardware requirements and some of its annoyances, such as the mandatory Microsoft Account.
Run the downloaded file and allow the app to check for updates.
If you do not have the ISO file for Windows 11 25H2, you can click the arrow-down button next to the Create button and click Download instead. The app will prompt you to select a version, language, and edition. Select where to save the file and wait for Rufus to finish downloading it.
Now grab a USB drive (8GB or more), connect it to your computer and select it from the Device drop-down list.
Select "Disk or ISO image" and click Select.
Find the downloaded Windows 11 25H2 image and leave everything as is.
Click Start.
Now, the most important part: Tick the "Remove requirement for 4GB+ RAM, Secure Boot, and TPM 2.0" option. You can also select additional options, such as turning off mandatory BitLocker, creating a local account, etc.
Wait for Rufus to write the ISO to your USB.
Now, you can install Windows 11 25H2 on your unsupported PC as usual. Alternatively, you can open the USB and click setup to perform an in-place upgrade.
And that is it. Now you know how to install Windows 11 version 25H2 on unsupported hardware.
You can post now and register later.
If you have an account, sign in now to post with your account.
Note: Your post will require moderator approval before it will be visible.

3175x175(CURRENT).thumb.jpg.b05acc060982b36f5891ba728e6d953c.jpg)


Recommended Comments
Join the conversation
You can post now and register later. If you have an account, sign in now to post with your account.
Note: Your post will require moderator approval before it will be visible.