In early June, I wrote a guide explaining how you can apply all software updates in Ubuntu with a single command in the Terminal. As time went on, however, I wanted to adapt the commands in that guide to run on my system automatically on start-up and came up with a way to do it.
I should note that the method I’ll outline below requires you to store your Ubuntu password in a text file. While it’s probably OK for most personal users, I definitely advise against doing this on corporate machines or anywhere you have very sensitive data.
You may remember from the last guide that the main command chain that was outlined checked for updates, installed available software updates in the repositories, and then any Snap updates; it was as follows:
sudo apt update && sudo apt upgrade -y && sudo snap refresh
The command chain does what it’s supposed to but requires the user to open up the Terminal to run it and type in their password.
To use the same command chain to automatically update the computer in the background, it requires a new section at the start containing your user password and it needs to be placed in a file that can be executed from the Startup Applications tool on each login.
To get started, we want to create a new file which can be placed somewhere in your local directory, the Home directory is as good as anywhere. Name it update.sh then right-click, head to Properties > Permissions > and check Allow executing file as program.
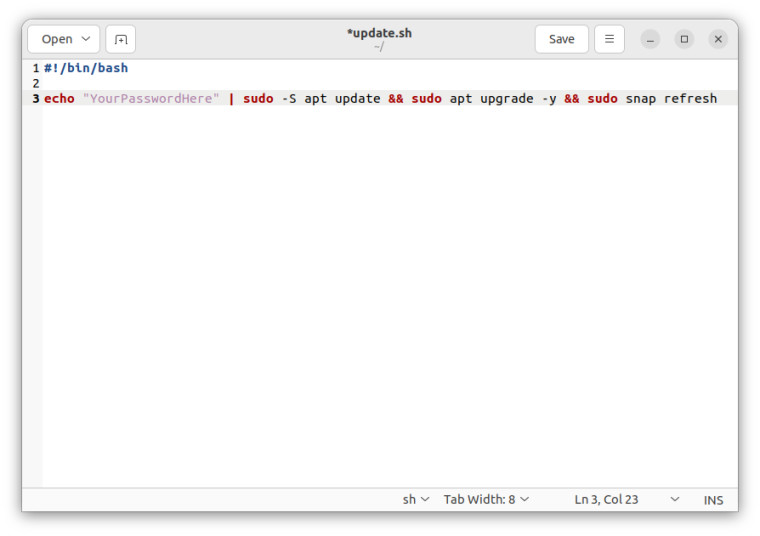
Now open up the update.sh file in Gedit and on line 1 enter:
#!/bin/bash
Then on line 3, enter:
echo "YourPasswordHere" | sudo -S apt update && sudo apt upgrade -y && sudo snap refresh
You need to replace YourPasswordHere with your actual Ubuntu password. The new portions in this command chain are the echo, the pipe (|) and the standard input (-S) - on a none technical level you’ve given the computer your password to remember and when this script is run it takes the password and feeds it through so that sudo can be used without manually typing your password.

Obviously, keeping your password stored like this could be a security risk, especially on sensitive computers so think carefully about whether you want to do this and definitely make sure it’s not the same password you use for online accounts.
Once you have the commands above in the update.sh file, you need to save it and close Gedit. Next, press the Windows Key and search for Startup Applications and open that.
Now, you'll want to add a new startup program with the Add button, give it a relevant name like 'Autoupdate', then under Command press Browse… and find the update.sh file you created, then put in a short comment like ‘Autoupdate on startup’ to help you remember what it is.
Having added that you’re all finished. Each time you log in, that script will be run and your system will grab all the latest updates available and install them.
I have been using this on my own computer for about a month or so and haven't noticed any performance degradation in the first few minutes that it takes to install the updates. As the computer is now grabbing updates at every login, it tends to only have a couple to do whenever there are new ones available.
One of the things you might want to do is check whether everything is working properly as the updates are installed silently. Just enter the following command into the Terminal and press the End Key, you should be able to the latest updates that have been installed and when they were installed, from this you can infer whether the script is working.
less /var/log/apt/history.log
That’s all for this guide, it’s a nice little set-up to have if you’re too lazy to mess around updating your system manually. Just be careful where you use this as the password does need to be stored in a file and it could potentially be accessed by someone malicious either remotely or with physical access to your computer.
- aum
-

 1
1


3175x175(CURRENT).thumb.jpg.b05acc060982b36f5891ba728e6d953c.jpg)
Recommended Comments
There are no comments to display.
Join the conversation
You can post now and register later. If you have an account, sign in now to post with your account.
Note: Your post will require moderator approval before it will be visible.