3175x175(CURRENT).thumb.jpg.b05acc060982b36f5891ba728e6d953c.jpg)
If privacy isn't a strict concern, you can prevent your PC from requiring a password to unlock by following these steps.
On Windows 11, the computer will lock the system automatically after a period of inactivity to minimize the chances of someone else trying to access your device when you're not near your desk. However, if you're in a secure environment or privacy isn't much of a concern, you can customize the system settings to prevent your computer from locking up automatically.
The settings you have to change will depend on the features you have configured on your computer and how you want to prevent the computer from locking automatically.
For example, if you want the system to stop requiring a password when you have been away, you must change the Sign-in options. However, if you're using Dynamic Lock, you may want to turn off the feature to stop Windows from locking your computer every time you step away.
If you're using the legacy Screen Saver, you must customize the resume settings for that feature.
In the case that the device locks automatically too quickly, you can change the screen, sleep timeouts, and the presence sense settings (if applicable).
In this how-to guide, I'll outline the steps to prevent the computer from locking automatically on Windows 11.
How to stop Windows 11 from locking automatically
To control how the operating system locks your computer automatically, you have a number of options. Here's how.
Adjust sign-in requirements
To stop the operating system from requiring a password when you have been away, use these steps:
- Open Settings.
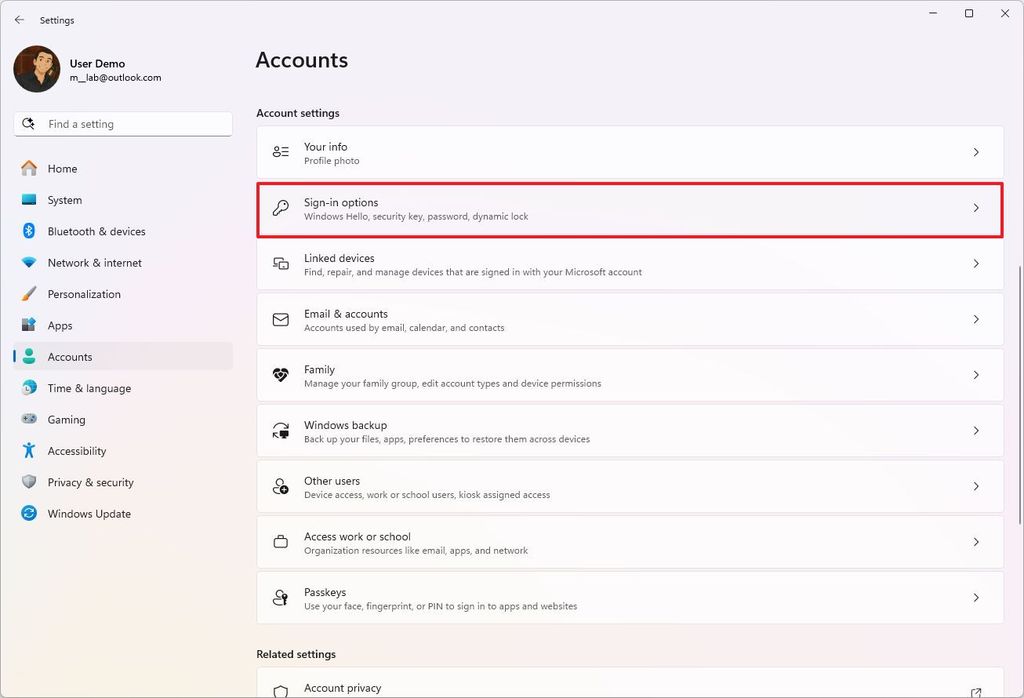
- Click on Accounts.
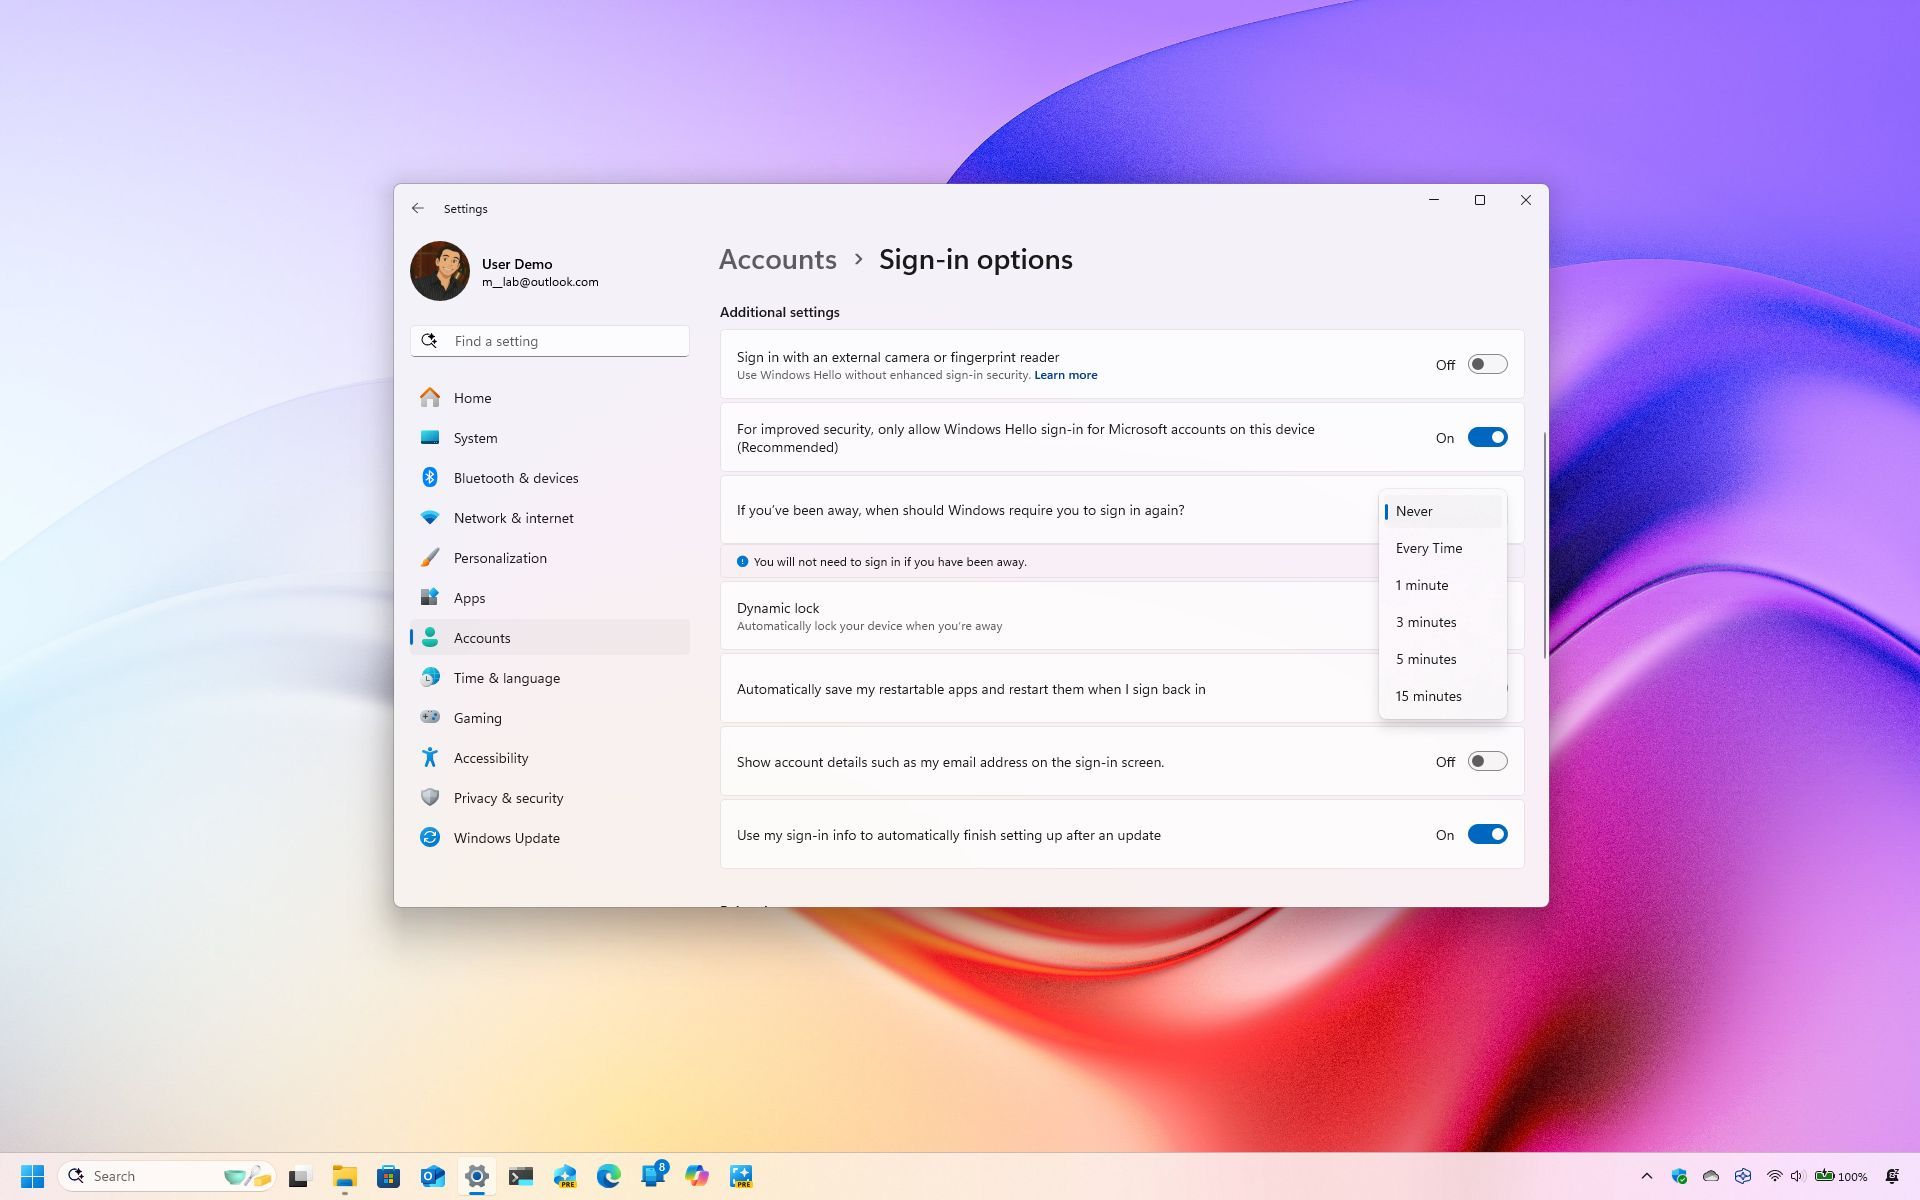
- Click the Sign-in options page on the right side.
(Image credit: Mauro Huculak)
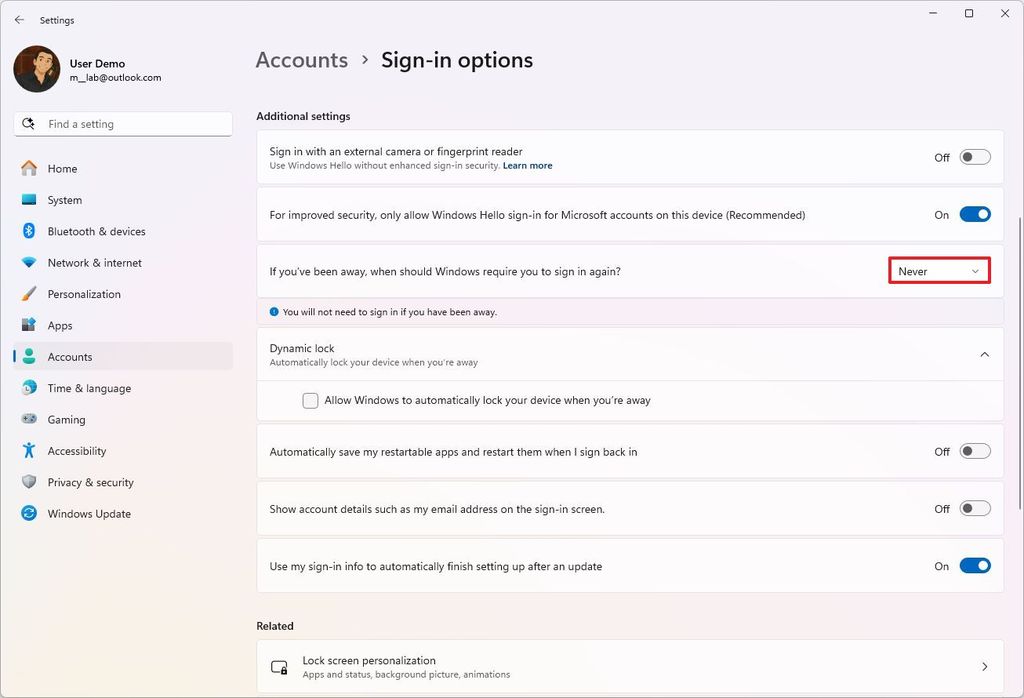
- Select the Never option for the "If you've been away, when should Windows require you to sign in again?" option under the "Additional settings" section.
(Image credit: Mauro Huculak)
Once you complete the steps, the system won't lock automatically, and on resume, you won't need a password to sign in.
This feature is influenced by Windows Hello, meaning that if you have the fingerprint or face recognition sign-in feature turned on, you won't be able to change this setting.
When turning off this feature, you don't have to change the Power or Presence Sense settings, since resuming from sleep or turning off the screen won't lock your computer.
Disable Dynamic Lock
This option will only help if you have the feature configured on your computer.
To disable Dynamic Lock to prevent your device from locking automatically, use these steps:
- Open Settings.
- Click on Accounts.
- Click the Sign-in options page on the right side.
(Image credit: Mauro Huculak)
- Click on the Dynamic lock setting under the "Additional settings" section and clear the "Allow Windows to automatically lock your device when you're away" option.
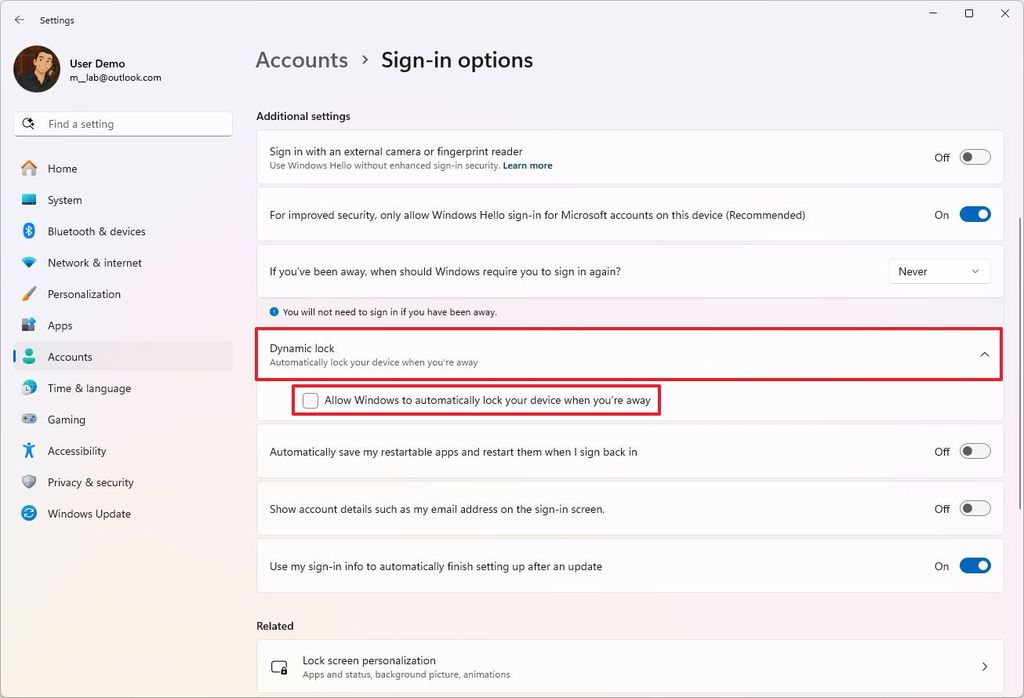
(Image credit: Mauro Huculak)
After you complete the steps, when stepping away, Windows 11 should stop locking automatically.
Disable Screen Saver
To disable Screen Saver to stop the computer from locking up automatically, use these steps:
- Open Settings.
- Click on Personalization.
- Click the Lock screen page on the right side.
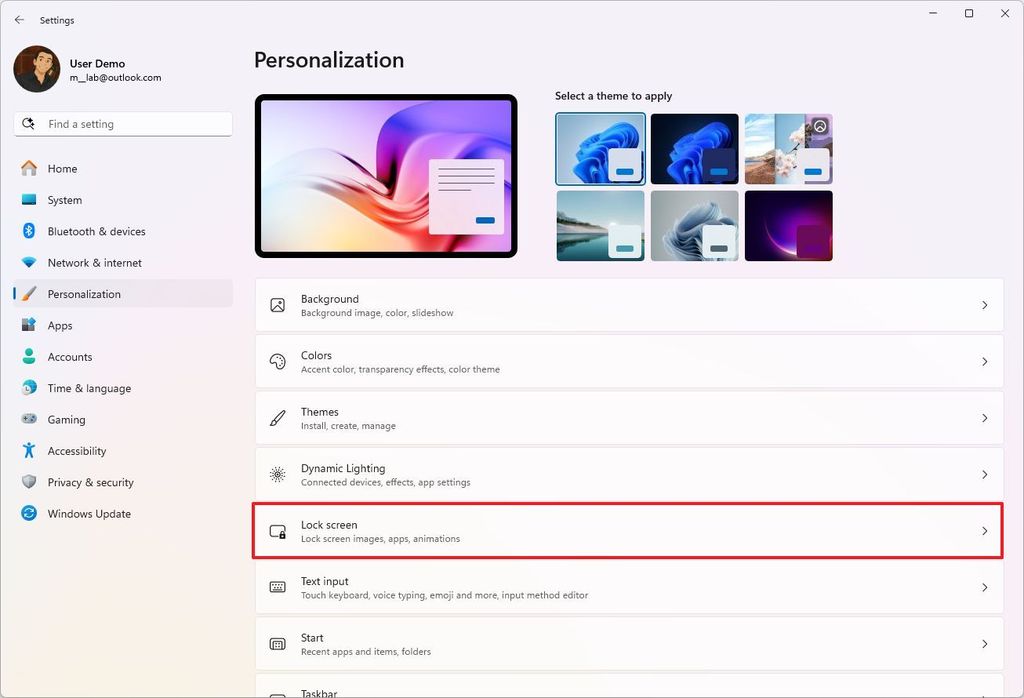
(Image credit: Mauro Huculak)
- Click on the Screen Saver setting under the "Related settings" section.
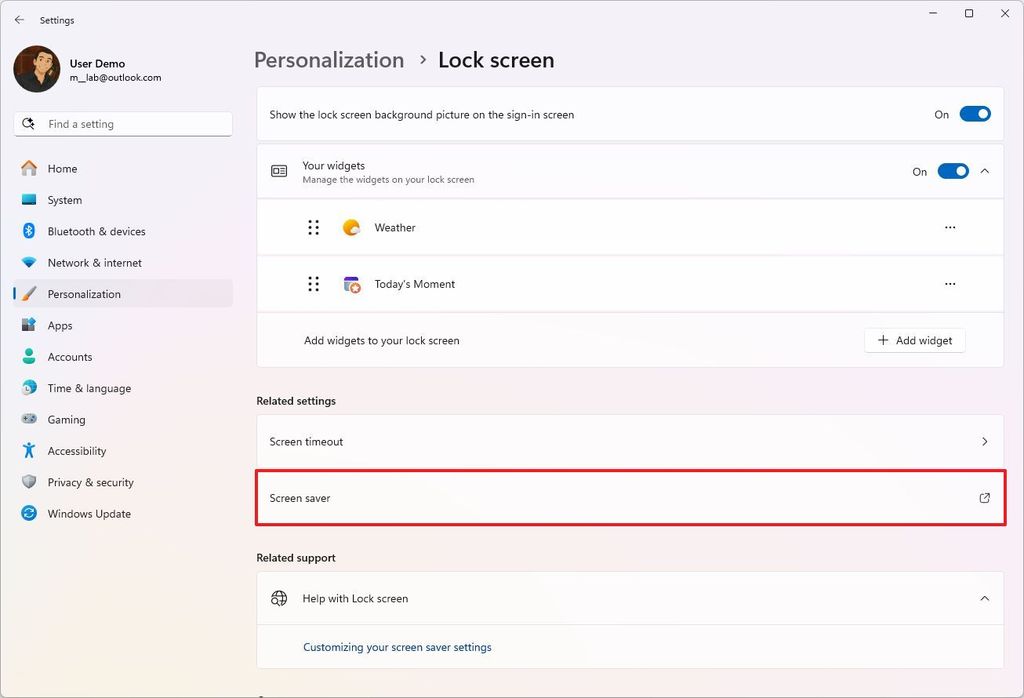
(Image credit: Mauro Huculak)
- Clear the "On resume, display logon screen" option.
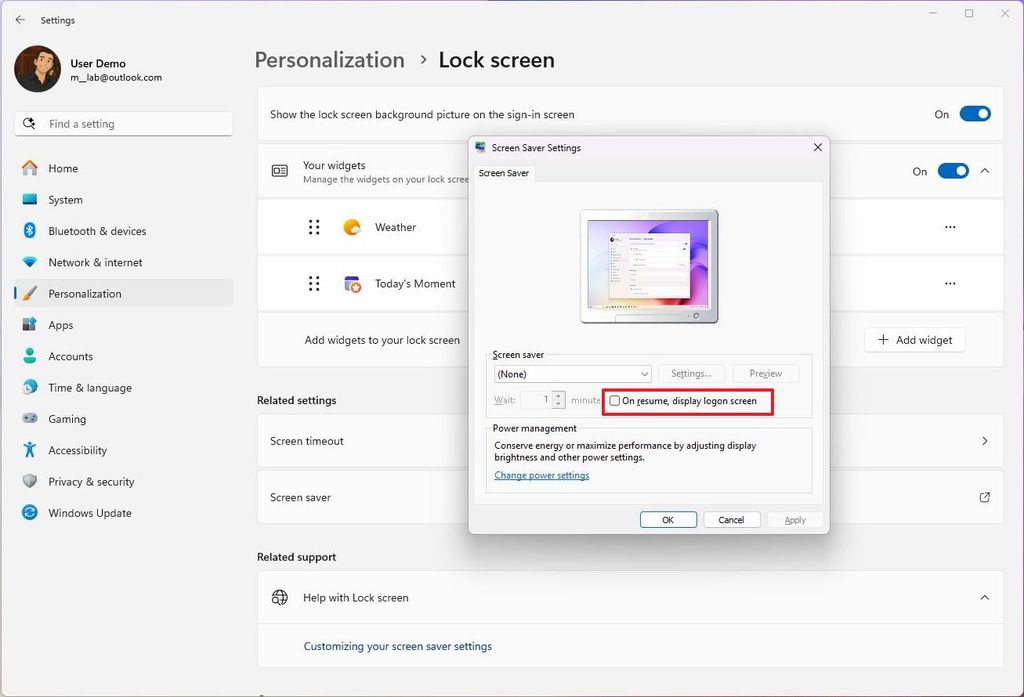
(Image credit: Mauro Huculak)
- Click the Apply button.
- Click the OK button.
Once you complete the steps, the next time you exit the screen saver, Windows 11 should go directly to the desktop instead of the sign-in screen.
Change power settings
The power settings won't prevent the computer from locking automatically, but will delay it.
To change the power settings on Windows 11, use these steps:
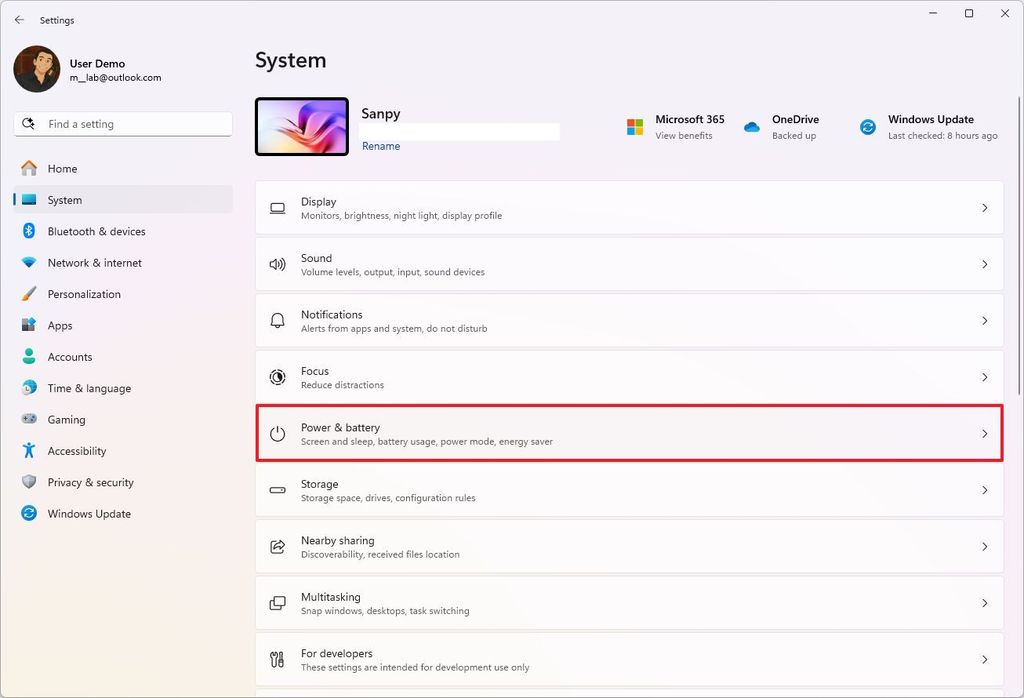
- Open Settings.
- Click on System.
- Click the Power & battery (or Power) options page on the right side.
(Image credit: Mauro Huculak)
- Click the "Screen and sleep timeouts" (or "Screen, sleep, & hibernate timeouts") setting.
- Under the "Plugged in" setting, set the "Turn my screen off after" and "Make my device sleep after" settings to Never or a specific period.
- Under the "On battery" setting, set the "Turn my screen off after" and "Make my device sleep after" settings to Never or a specific period.
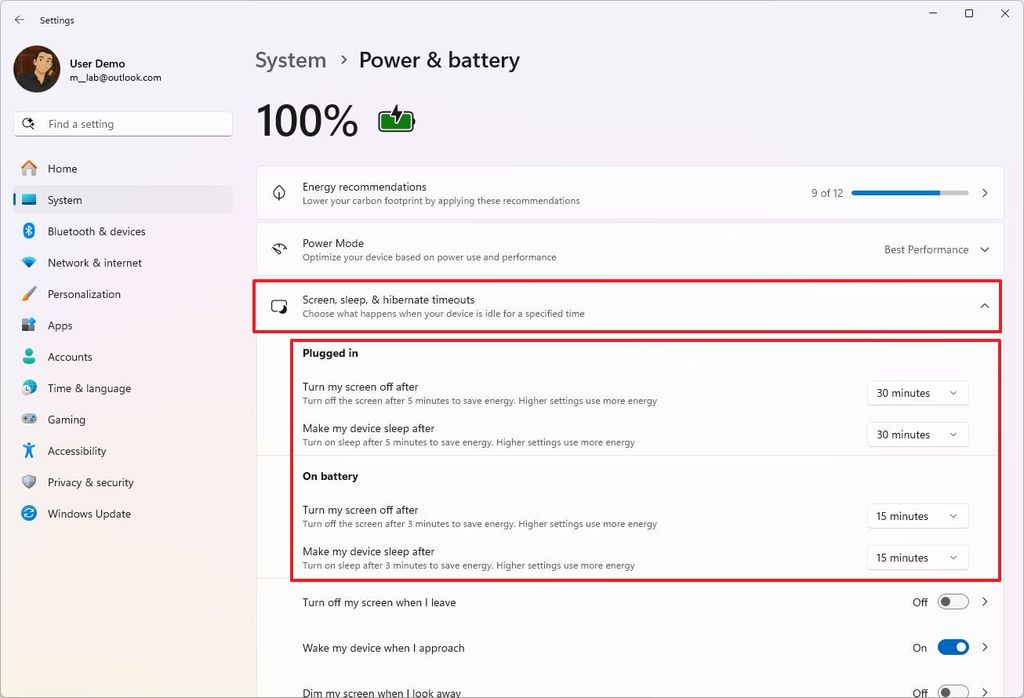
(Image credit: Mauro Huculak)
After you complete the steps, your computer will stay unlocked according to your computer.
Change Presence Sense settings
Changing the Presence Sense settings won't stop the computer from locking automatically, but adjusting them can delay it. (These settings will only apply to compatible devices.)
To change the Presence Sense settings on Windows 11, use these steps:
- Open Settings.
- Click on Privacy & security.
- Click the Presence Sensing page on the right side.
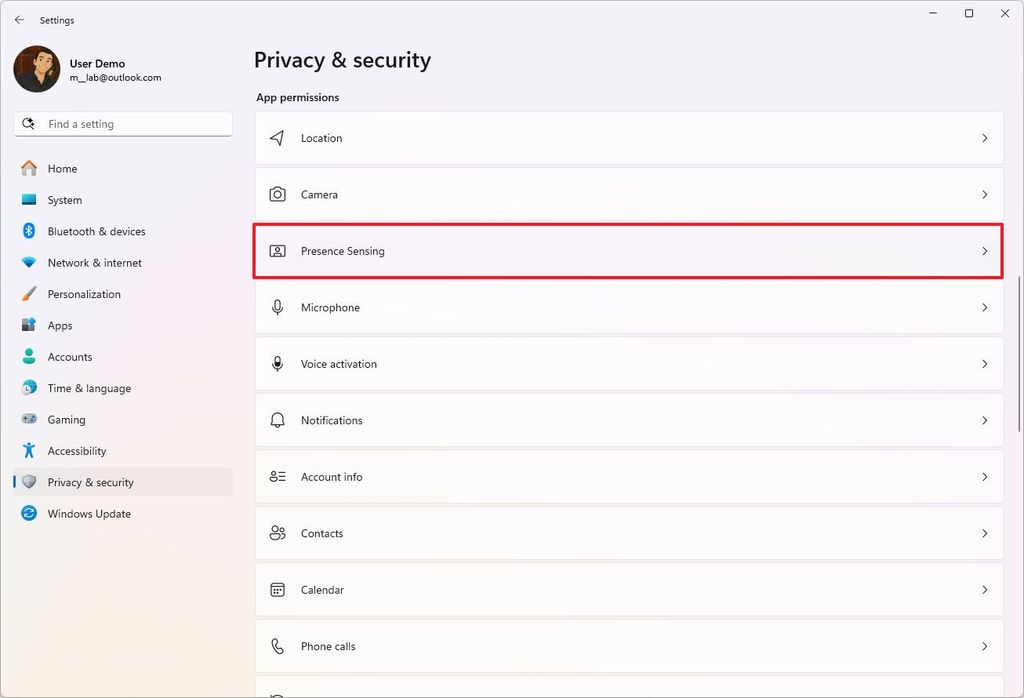
(Image credit: Mauro Huculak)
- (Option 1) Turn off the "Presence Sensing access" toggle switch to turn off the feature altogether.
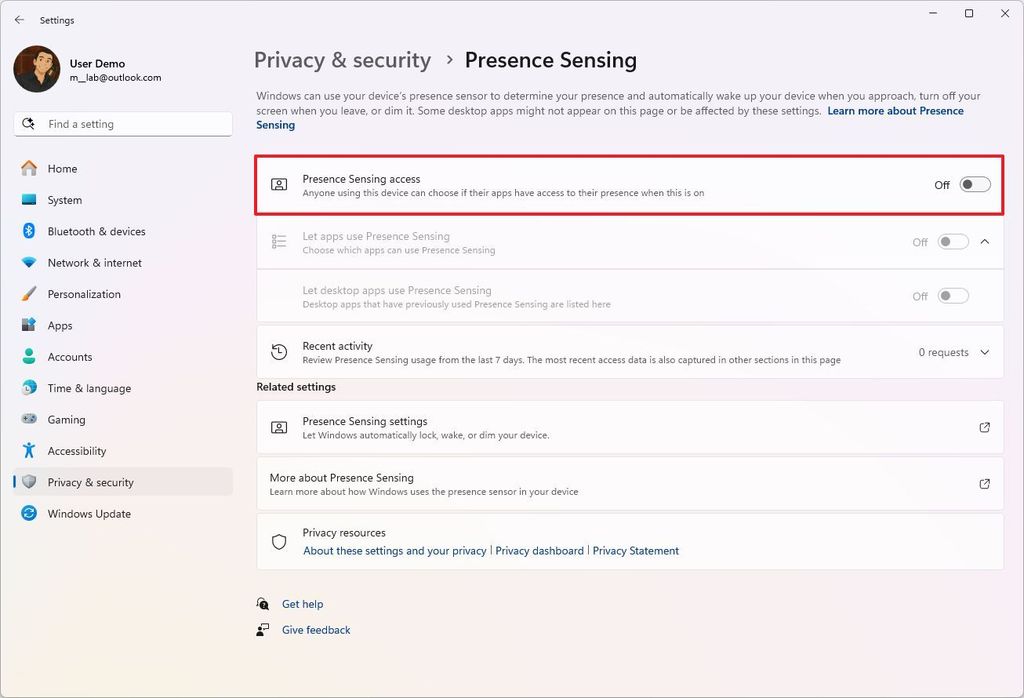
(Image credit: Mauro Huculak)
- (Option 2) Click the "Presence Sensing settings" option under "Related settings."
- Set the "Consider me gone when I'm this far away" option to 4 feet.
- Set the "Then, turn off my screen after this amount of time" option to 2 minutes.
- (Optional) Turn off the toggle switch to "Turn off my screen when I leave."
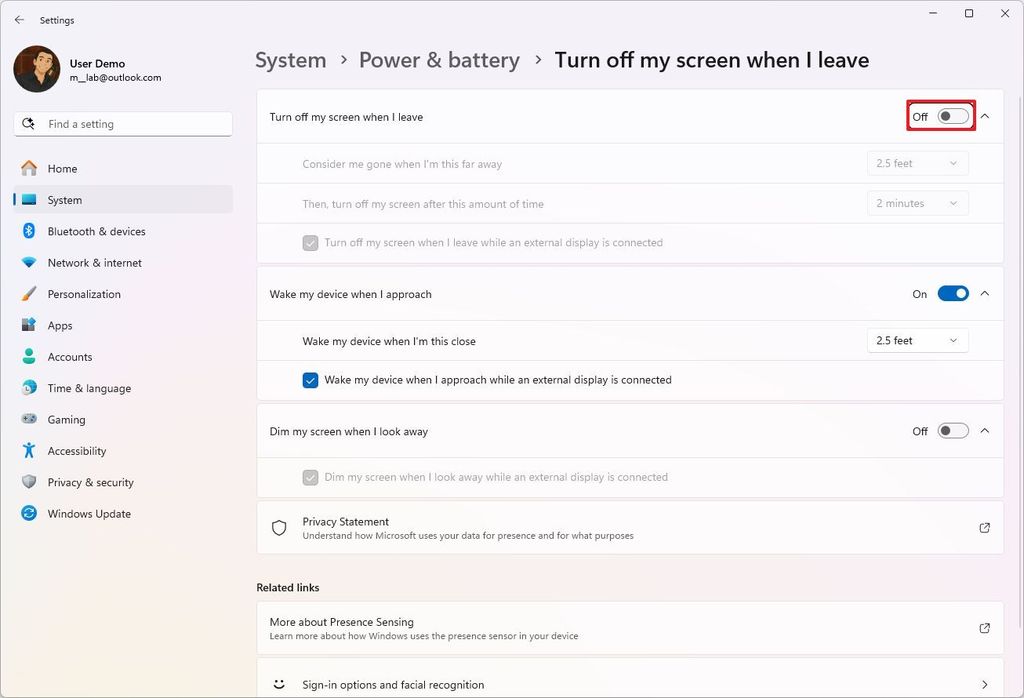
(Image credit: Mauro Huculak)
Once you complete the steps, the feature will prevent the devices from turning off the screen and locking the device if you have the "If you've been away, when should Windows require you to sign in again?" option enabled.
Hope you enjoyed this news post.
Thank you for appreciating my time and effort posting news every day for many years.
News posts... 2023: 5,800+ | 2024: 5,700+ | 2025 (till end of April): 1,811
RIP Matrix | Farewell my friend 
Recommended Comments
There are no comments to display.
Join the conversation
You can post now and register later. If you have an account, sign in now to post with your account.
Note: Your post will require moderator approval before it will be visible.