3175x175(CURRENT).thumb.jpg.b05acc060982b36f5891ba728e6d953c.jpg)
Whether you like it or not, Microsoft has a new Outlook app, and this guide will help you get started.
On Windows 11, Microsoft is finally ditching the legacy Mail and Calendar apps (originally introduced on Windows 10) with the new unified experience for emails and calendars. The new experience will eventually replace the desktop version of the Outlook app that's part of the Microsoft 365 (Office) apps.
The new experience is identical to the online version of Outlook but with an application wrapper specifically designed for the desktop with offline and multiple account support. Using this app, you can connect Outlook accounts, Hotmail, Live, and other services, such as Google Gmail, Yahoo, and iCloud, and you can even attach IMAP accounts.
The idea with the new Outlook for Windows 11 is to have only one experience across the devices and on the web, allowing the company to improve the app's development and features more quickly.
In addition, the app aims to help you compose better emails using AI features, and with the integration of the Microsoft Editor, you get rich editing, spelling, and auto-complete suggestions.
The calendar experience introduces various improvements, such as the addition of Google Calendar, multiple time zones, weather, and calendar-sharing support. Of course, the app also offers access to your contacts with the People service and Microsoft 365 apps and services (online), such as Word, Excel, To Do, and more.
In this how-to guide, I'll give you an overview of the new email client for Windows 11 and the steps to configure the most important settings.
Beginner's guide to the Outlook app for Windows 11g
This guide covers the steps to switch to the new version, a walkthrough of the new interface, and the most important settings for Accounts, General, Mail, and Calendar.
If you have more than one account connected to the application, you must select the account before configuring its settings.
Switch to the new version
To switch to the new experience, use these steps:
- Open the Mail or Outlook app.
- Click the "Try the New Outlook" toggle switch.

(Image credit: Mauro Huculak)
- Click the Next button.
- Select the "No, don't send optional data" option (if applicable).
- Click the Accept button.
- Click the Continue button.
- Click the Open Outlook button.
Once you complete the steps, you will have access to the new Outlook experience.
Navigating Outlook for Windows 11
If you have been using the online version of Outlook or the desktop app from the Microsoft 365 subscription, you already know how to use the new app for Windows 11. However, if you're coming from the legacy Mail & Calendar apps, you will have to go through a learning curve.
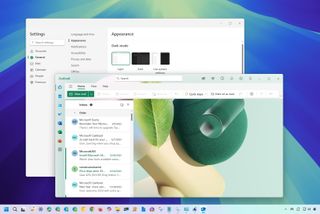
Once you made the transition to the new app, you will notice that the email client includes a left navigation pane to navigate between the different services, including Mail, Calendar, People, To Do, and some of the Microsoft 365 apps, such as Word, Excel, and PowerPoint.
The only issue with this page is that the Microsoft 365 apps open on the web version instead of the desktop version. (This makes no sense to me because if I have installed the Microsoft 365 apps, it can be assumed that I want to use those apps.)
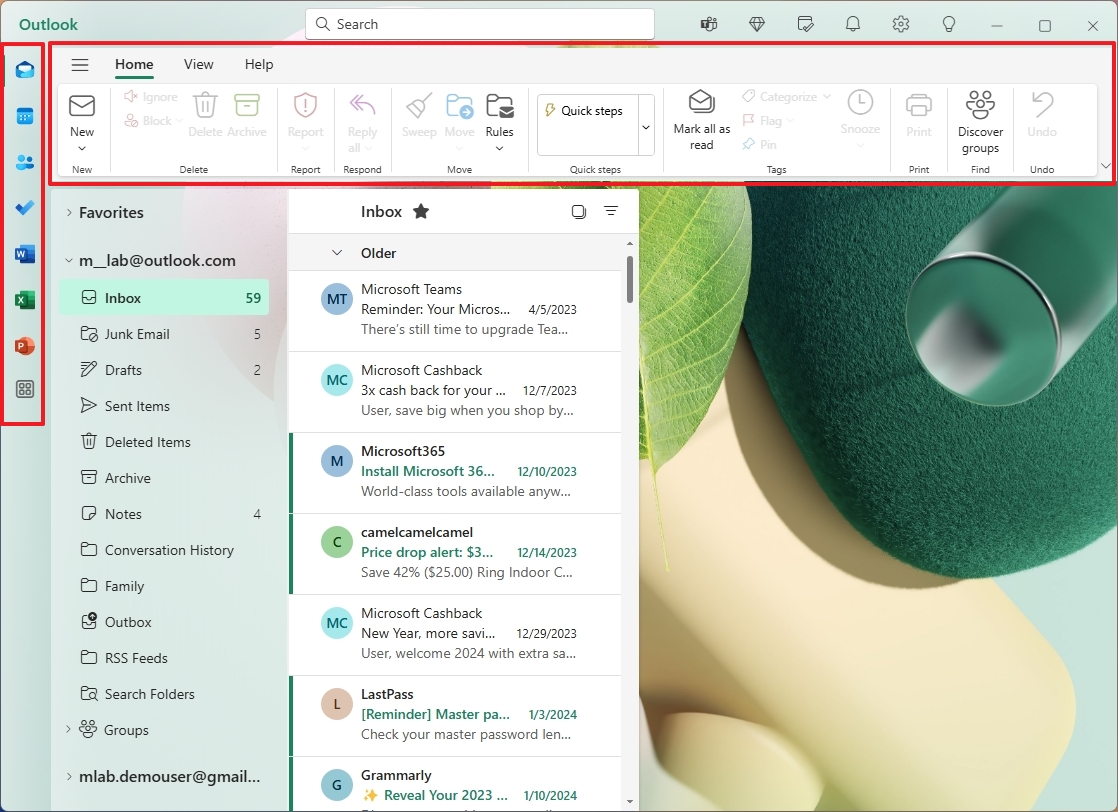
On the top, you have the ribbon with the different tabs, including "Home," "View," and "Help."
(Image credit: Mauro Huculak)
The "Home" tab includes the basic options to create a new email as well as the options to delete, report, reply, and move settings.
Other options include "Quick steps," "Mark all as read," "Print," "Undo," and more.
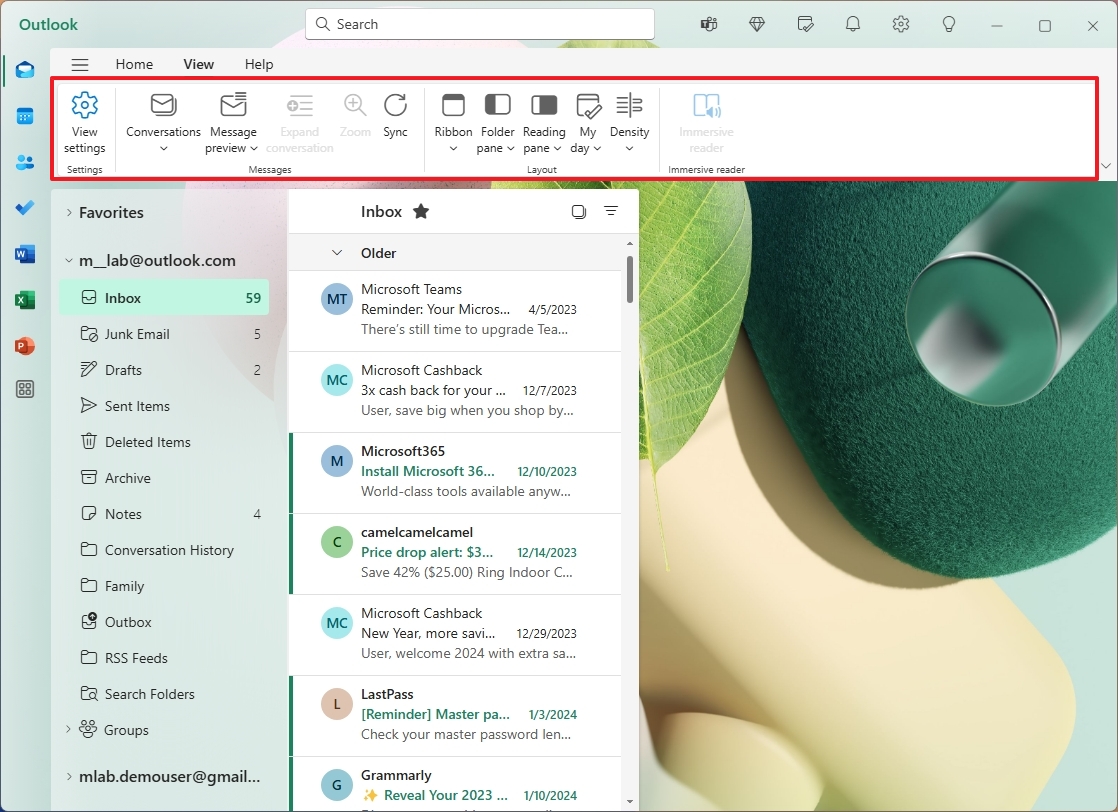
In the "View" tab, you will find the different options to change the settings for messages, layout, and more.
(Image credit: Mauro Huculak)
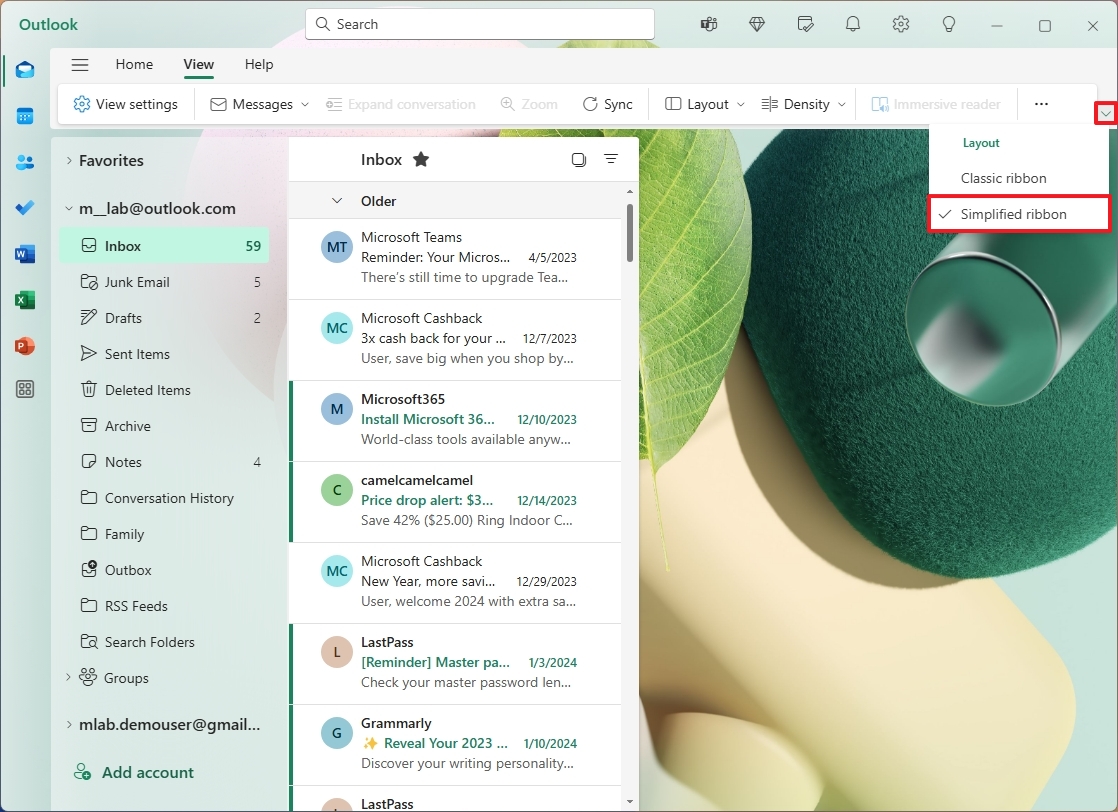
If you want to use the compact mode for the ribbon, open the "Layout" menu from the right and select the "Simplified ribbon" option.
(Image credit: Mauro Huculak)
You can also navigate through your different accounts on the left side. If you don't see the navigation pane, you may have to toggle the hamburger button next to the "Home" tab.
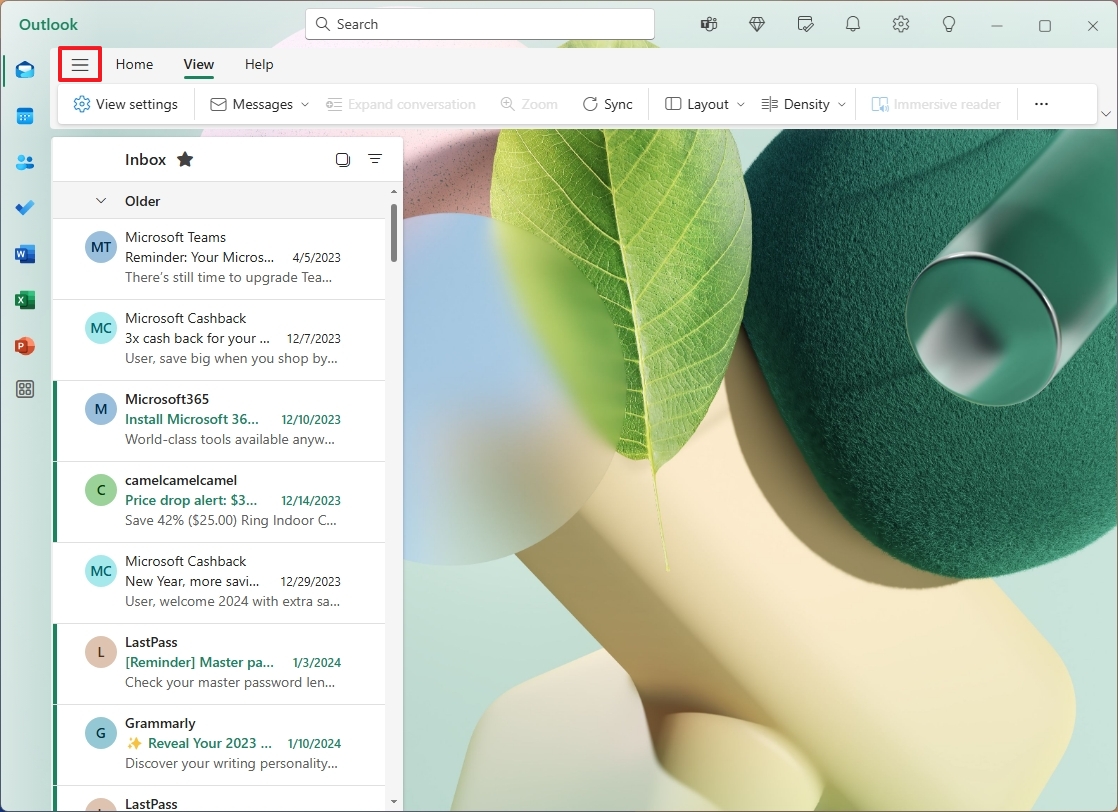
(Image credit: Mauro Huculak)
On the right side, you will have access to the items depending on the folder you're selecting on the left. As you select an email, its contents will open the main canvas on the right side.
It's important to note that the options available will depend on whether you are using the free or paid version of Outlook. Also, even if you are signed in with a Microsoft 365 subscription, you won't have access to Copilot for Outlook because that's a separate subscription.
Accounts settings
In the "Accounts" section, you can add or remove accounts, configure automatic replies, signatures, and categories, and review the storage usage for accounts connected to Microsoft and devices that are synchronizing your mailbox.
Connect multiple accounts
If you were previously using the legacy Mail or the desktop version of Outlook, the account will transfer over to the new experience automatically. However, only those accounts from Microsoft (such as Outlook, Hotmail, and Live) will be set up automatically. If you have a Google account or another service, you will have to sign in again.
To connect additional accounts, use these steps:
- Click the Settings (gear) button.
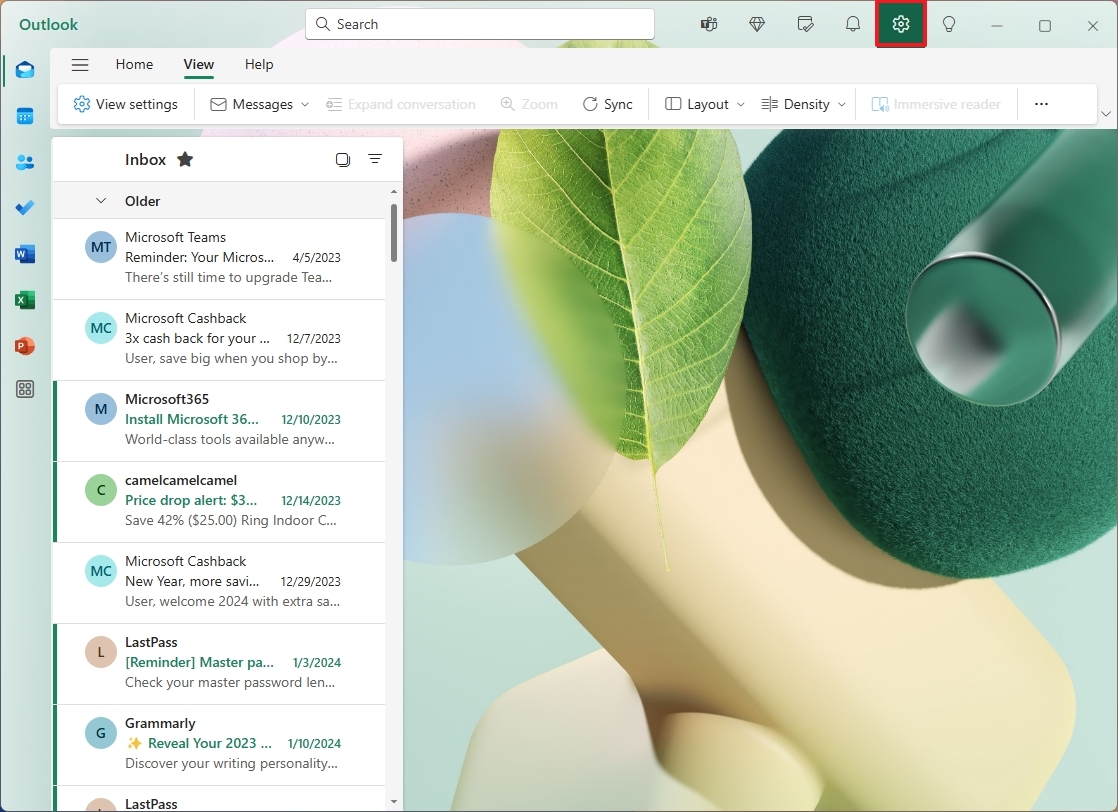
(Image credit: Mauro Huculak)
- Click on Accounts.
- Click the Email accounts setting.
- Click the Add account option.
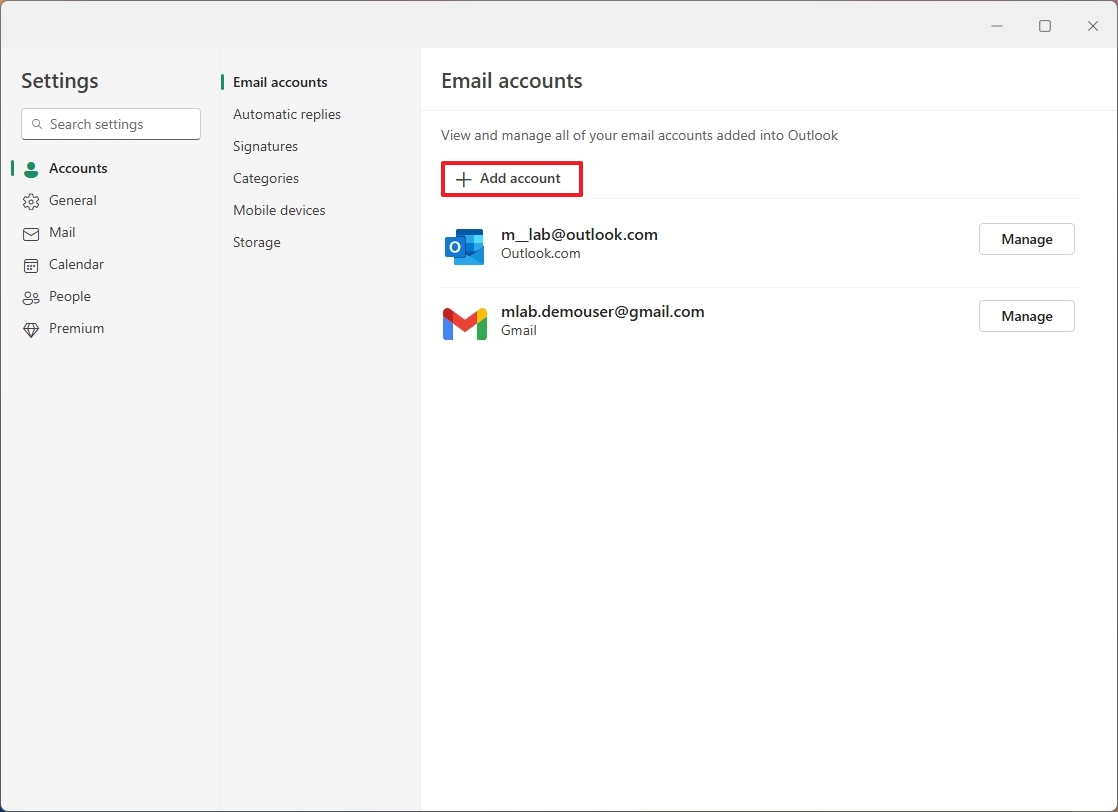
(Image credit: Mauro Huculak)
- Confirm your Outlook, Google, Yahoo, iCloud, or IMAP account.
- Click the Continue button.

(Image credit: Mauro Huculak)
- Continue with the on-screen directions to complete the setup.
After completing the steps, you must repeat the instructions to connect additional accounts.
Remove email account
To connect additional accounts, use these steps:
- Click the Settings (gear) button.
- Click on Accounts.
- Click the Email accounts setting.
- Click the Manage button for the account.
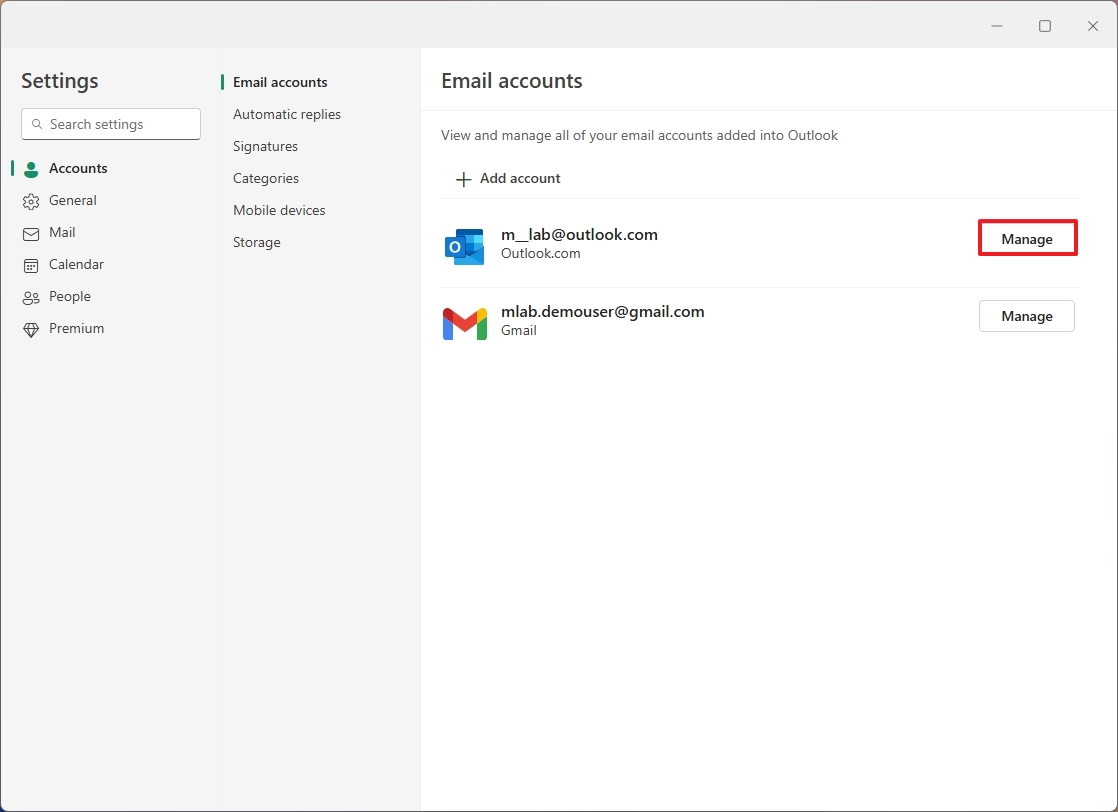
(Image credit: Mauro Huculak)
- Click the Remove button.
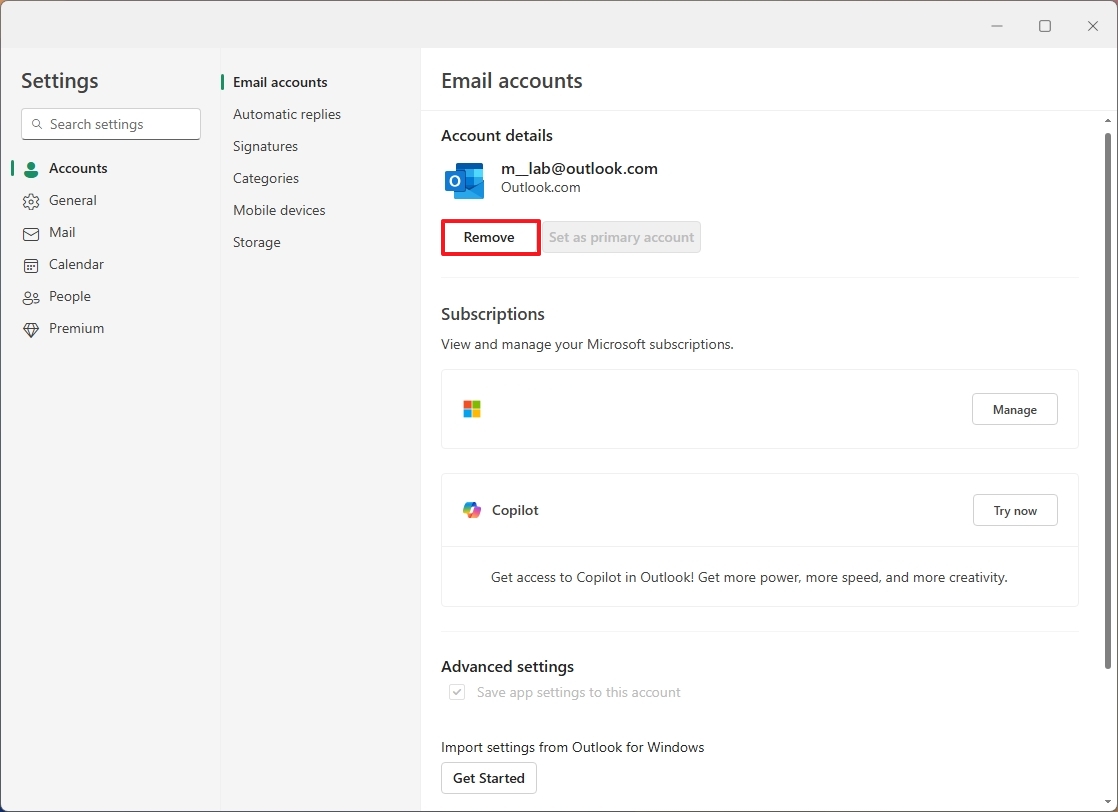
(Image credit: Mauro Huculak)
Once you complete the steps, the account will be removed from the app.
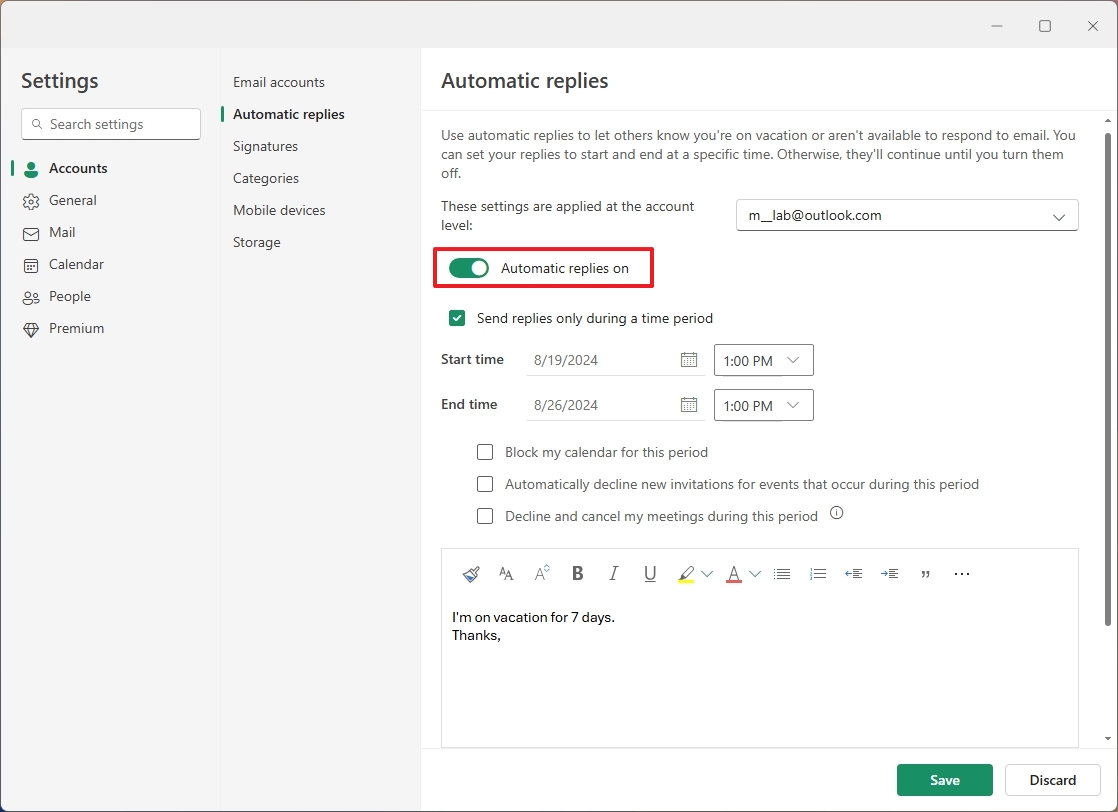
Set up automatic replies
To set up automatic replies, use these steps:
- Click the Settings (gear) button.
- Click on Accounts.
- Click the Automatic replies setting.
- Turn on the "Turn on automatic replies" toggle switch.
(Image credit: Mauro Huculak)
- Check the "Send replies only during a time period" option.
- Confirm the start and end times for sending automatic replies.
- Compose the message to send during the time period.
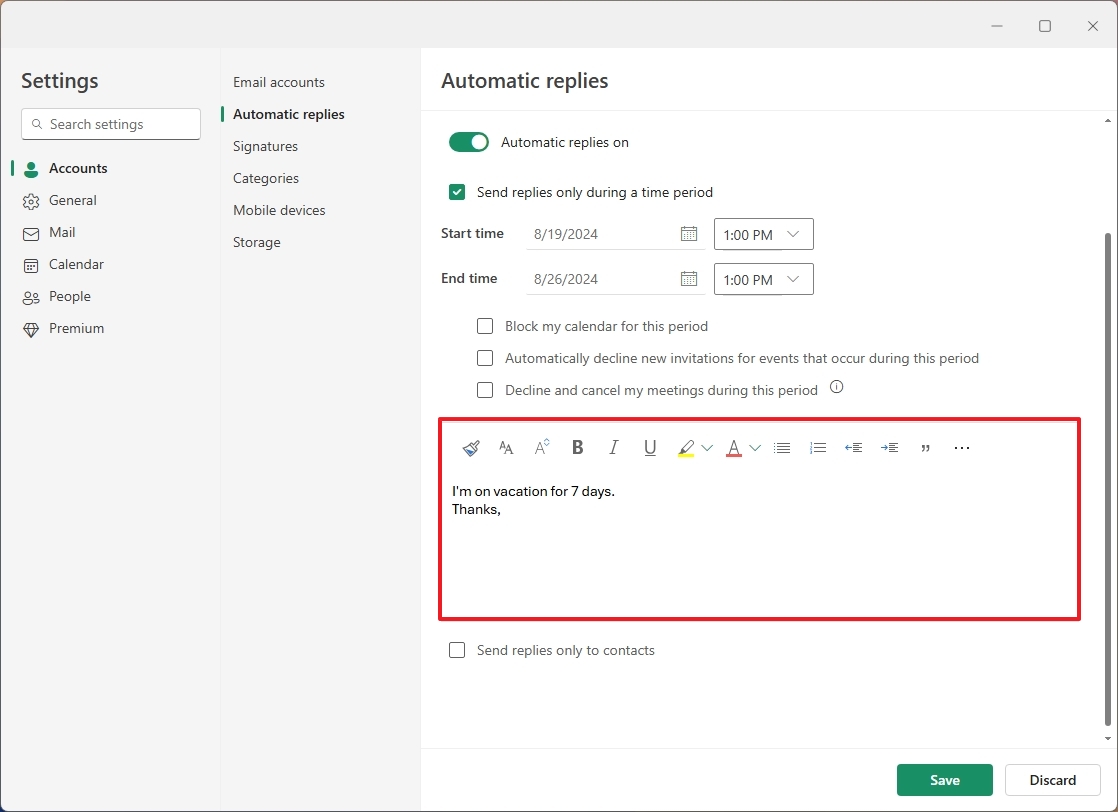
(Image credit: Mauro Huculak)
- (Optional) Check the "Send replies only to contacts" option.
- Click the Save button.
After you complete the steps, the app will automatically send replies to anyone who sends you an email.
It's important to note that while configuring the schedule, you can block your calendar for the period, decline invitations, and cancel meetings automatically.
This feature works with your Microsoft account (online), so you don't need to keep the app open for it to work.
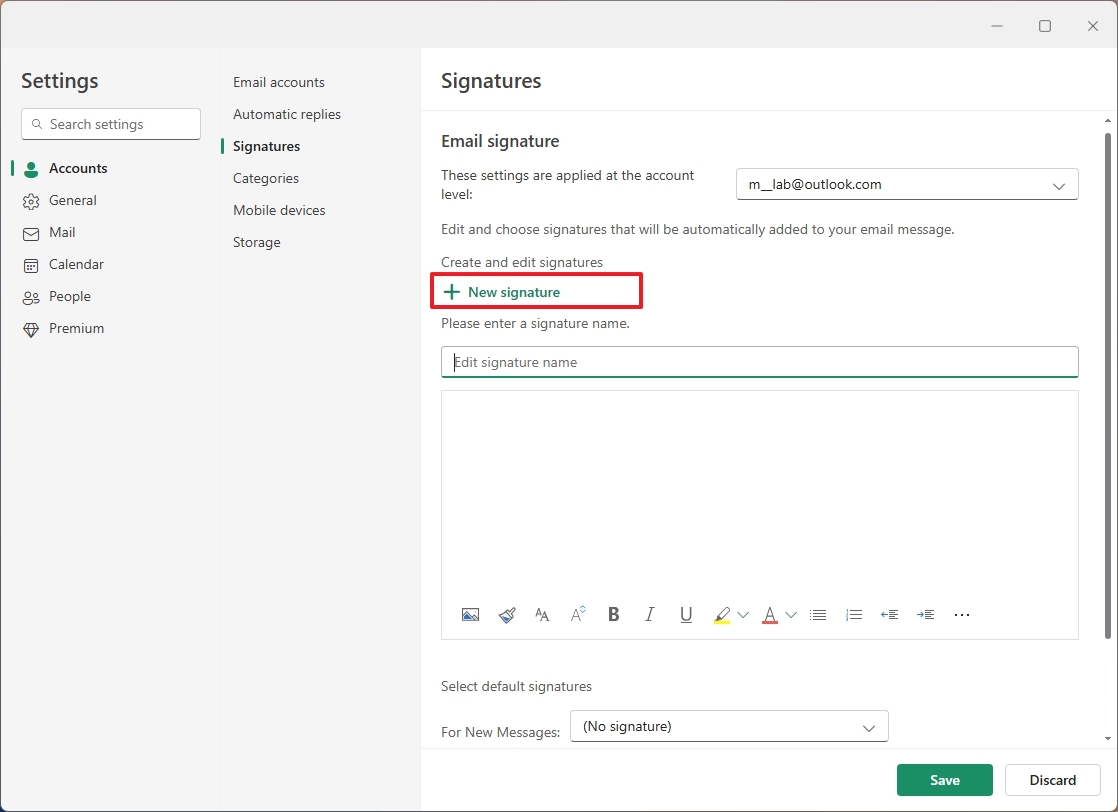
Configure email signature
To set up automatic replies, use these steps:
- Click the Settings (gear) button.
- Click on Accounts.
- Click the Signatures setting.
- Click the New Signature option.
(Image credit: Mauro Huculak)
- Confirm a name for the signature.
- Compose your custom signature.
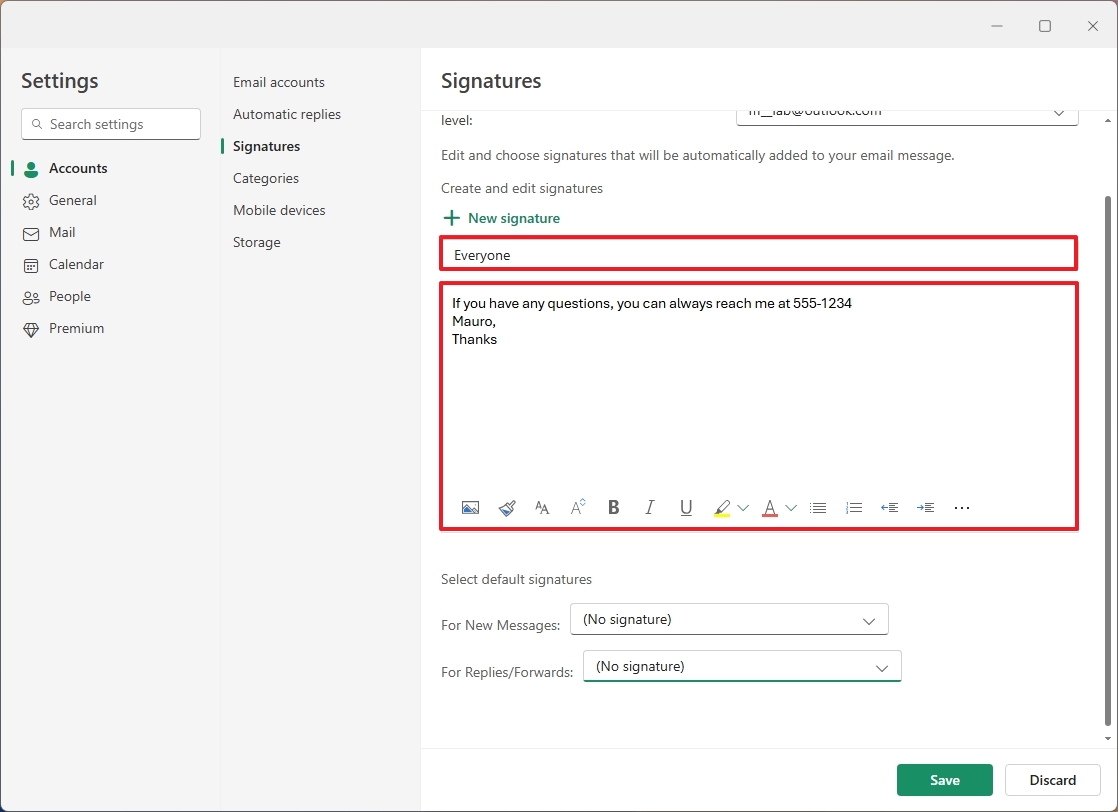
(Image credit: Mauro Huculak)
- Choose the default signature for new, replay, and forward messages (if applicable).
- Click the Save button.
Once you complete the steps, the signature the custom signature will apply when composing new messages.
Check email account storage
If you have a Microsoft account connected to the Outlook app, you can check the storage usage of your account with these instructions:
- Click the Settings (gear) button.
- Click on Accounts.
- Click the Storage setting.
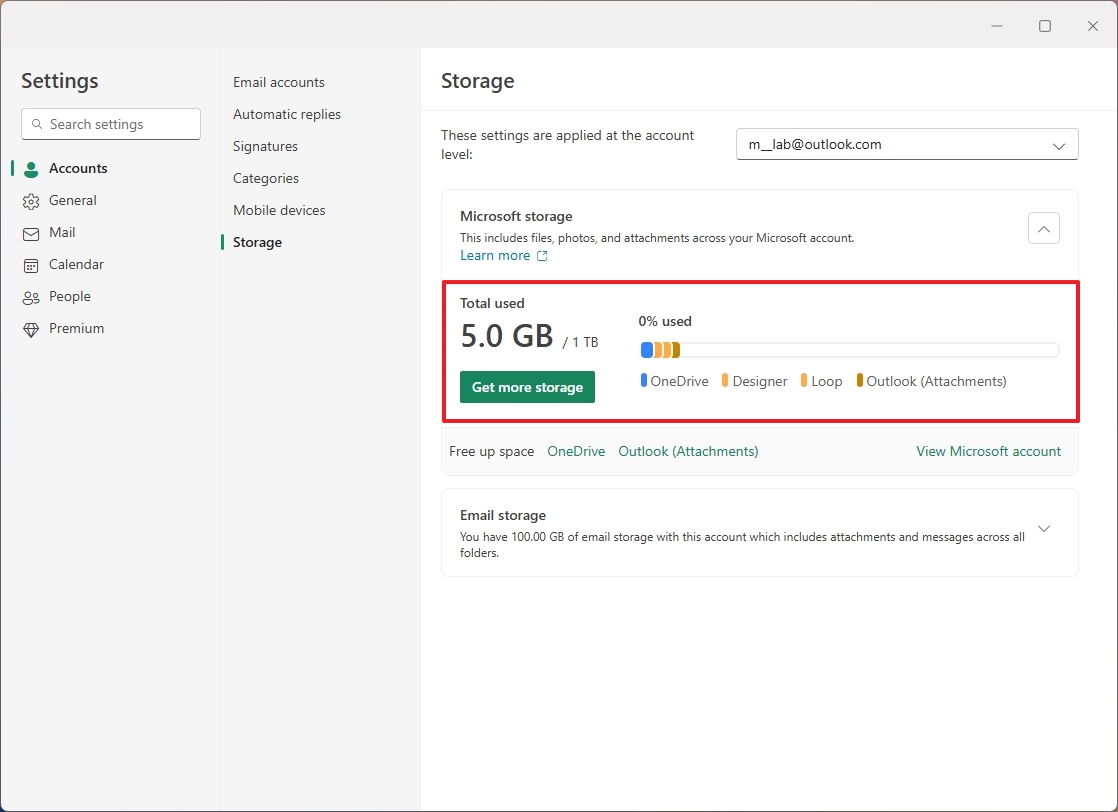
(Image credit: Mauro Huculak)
- Review your storage usage.
On the page, you can view your total storage available as well as the usage, and for Outlook, it's important to note that messages and attachments count for the total usage.
If you have a Microsoft 365 subscription, you can use up to 100GB for messages and storage. If you have the free version of the service, you can use up to 15GB.
General settings
In the "General" section, the Outlook app offers settings to adjust language and time, notifications, search, and offline settings.
The "Accessibility" page allows you to choose the type of keyboard shortcut to use with the app. In contrast, the "Privacy and Data" page lets you export your emails, delete history, and change other privacy settings. Also, the "Search" page allows you to control the search scope, and the "Start up" page lets you decide how Outlook should open when launching the app.
In this section, you will also find the settings to customize the appearance, such as color mode, background image, and themes.
Configure language and time
Usually, you would choose the language and time settings during the email account setup, but if any of the settings are incorrect, you can change them with these instructions:
- Click the Settings (gear) button.
- Click on General.
- Click the "Language and time" setting.
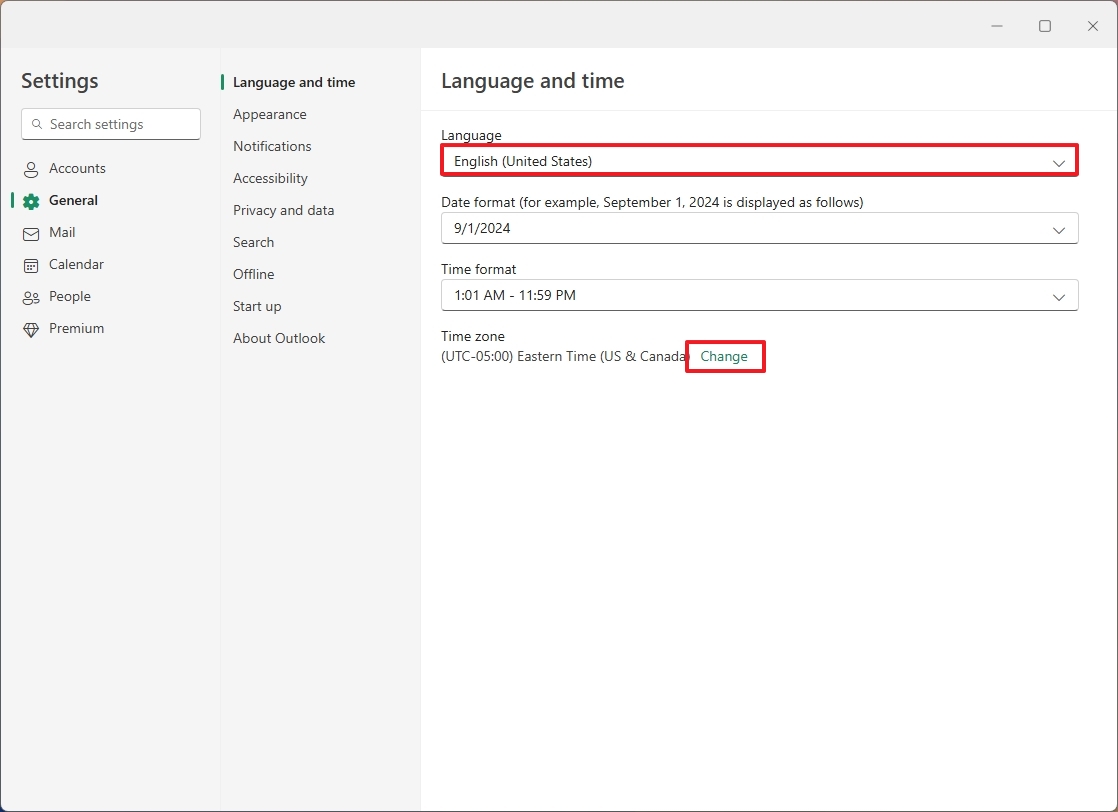
(Image credit: Mauro Huculak)
On the page, you can set the correct language, date format, time format, and time zone.
Switch between light and dark mode
The new Outlook app for Windows 11 includes two color modes, dark and light, which you can switch between manually or automatically.
To change the Outlook app color mode, use these steps:
- Click the Settings (gear) button.
- Click on General.
- Click the "Appearance" setting.
- (Option 1) Choose the Light or Dark mode.
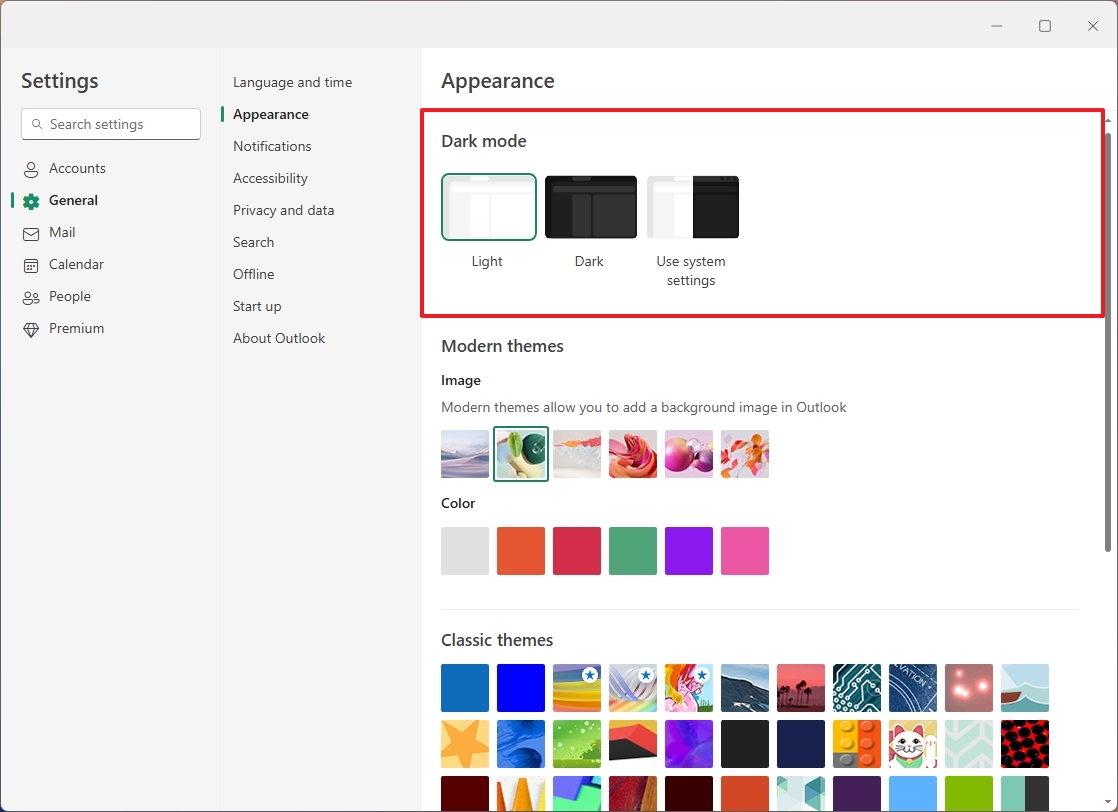
(Image credit: Mauro Huculak)
- (Option 2) Choose the "Use system settings" option to change the mode automatically when changing the Windows 11 color mode.
Once you complete the steps, the app will apply the color mode, according to your configuration.
Change Outlook background image
Similar to the legacy version of the email client for Windows, changing the background image is still possible, but you can only choose from a small collection of images.
To change the background image for the Outlook app, use these steps:
- Click the Settings (gear) button.
- Click on General.
- Click the "Appearance" setting.
- Select the image background for the Outlook app in the "Image" section.
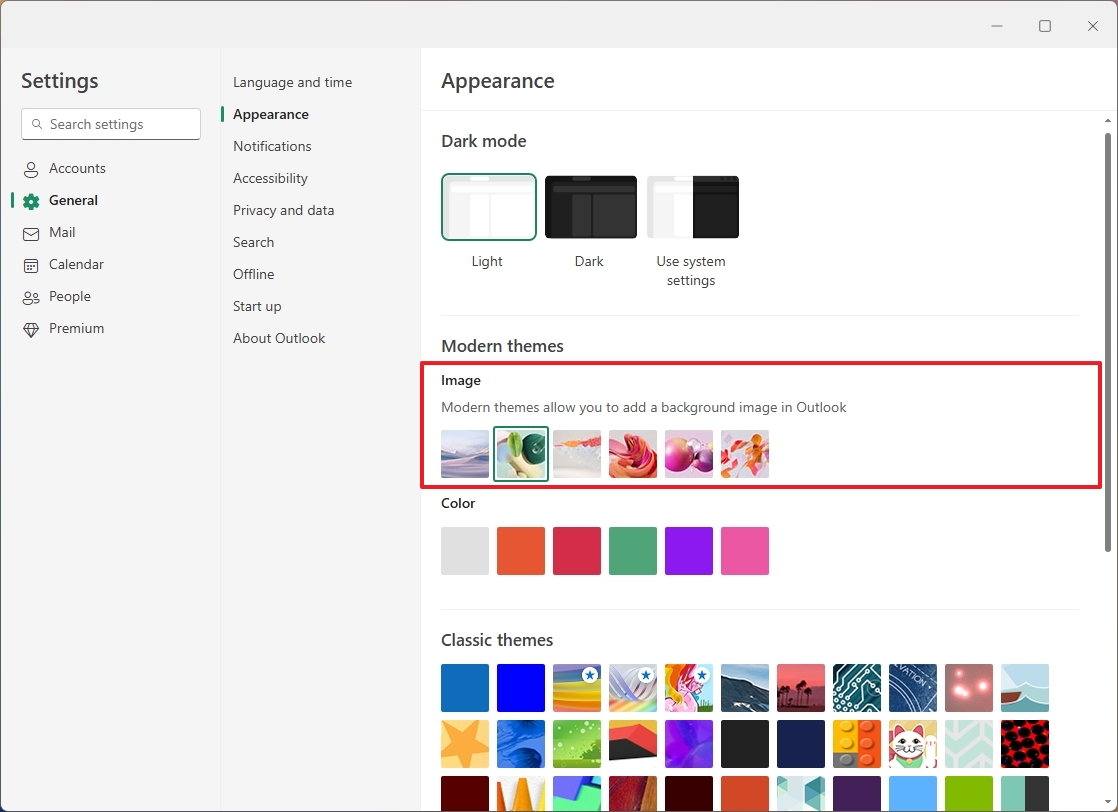
(Image credit: Mauro Huculak)
- (Optional) Choose from one of the available colors in the "Color" settings.
It's important to note that you can only choose from one of the available images. At the time of this writing, it's not possible to choose a custom background.
Change Outlook app theme
In addition to choosing the color mode and background image, you can also change the app theme to change the appearance with different color schemes and visual elements.
To change the Outlook app theme, use these steps:
- Click the Settings (gear) button.
- Click on General.
- Click the "Appearance" setting.
- Select the theme for the Outlook app under the "Classic themes" section.
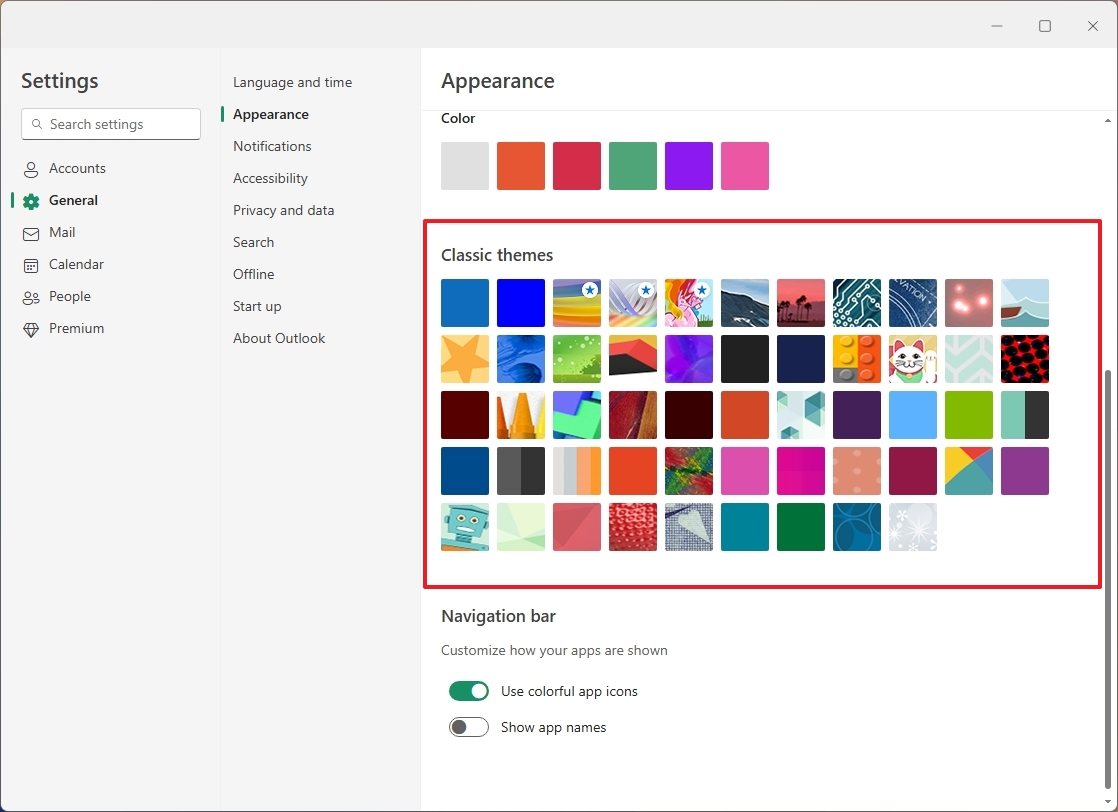
(Image credit: Mauro Huculak)
- (Optional) Turn the "Use colorful app icons" toggle switch on or off to control the icons from the left pane.
- (Optional) Turn the "Show app names" toggle switch on or off to show or hide the apps' names in the left pane.
Once you complete the steps, the theme will apply in the app as well as in the web version of Outlook.
Configure Outlook notifications
Outlook, like any other email client, can send notifications for new emails, calendars, and other tasks. The default settings should work for most people, but you can choose your preferred configuration.
To change the notification settings for Outlook, use these steps:
- Click the Settings (gear) button.
- Click on General.
- Click the "Notifications" setting.
- Turn on the "Notifications in Outlook" toggle switch to enable the feature within the
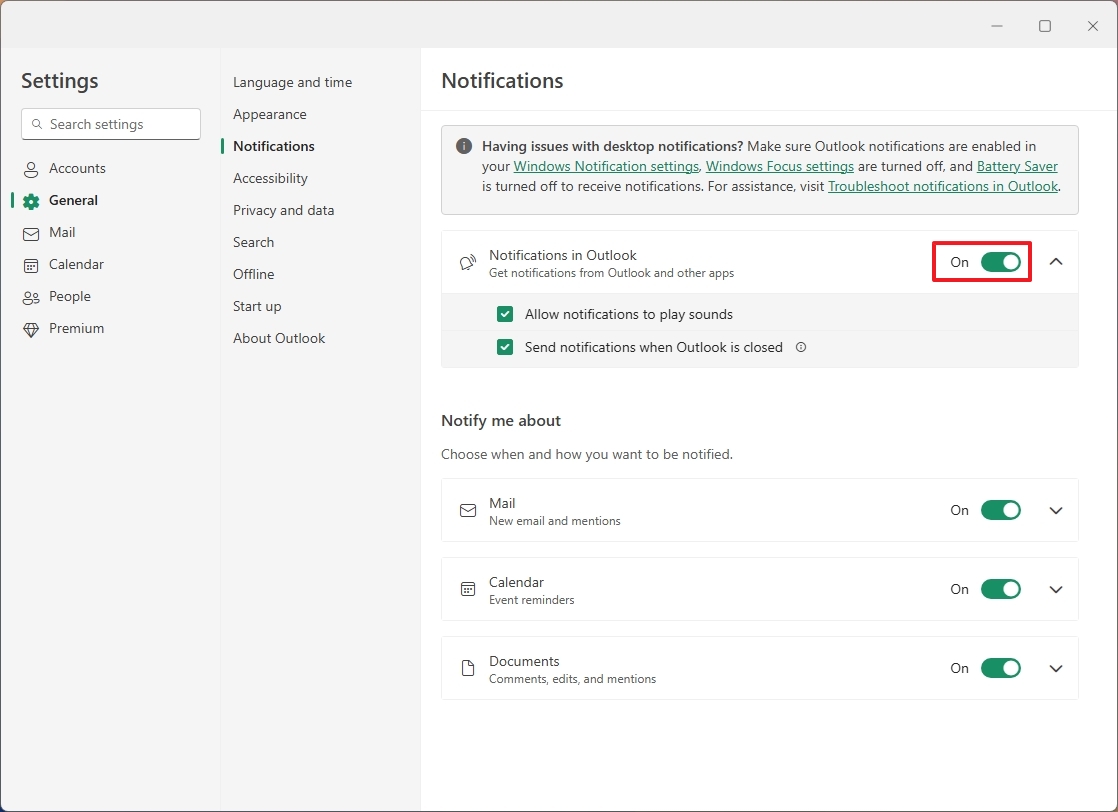
(Image credit: Mauro Huculak)
- Click the "Notifications in Outlook" setting.
- Check the "Allow notifications to play sounds" option. (If you clear the option, you will receive notifications, but they will not play sound.)
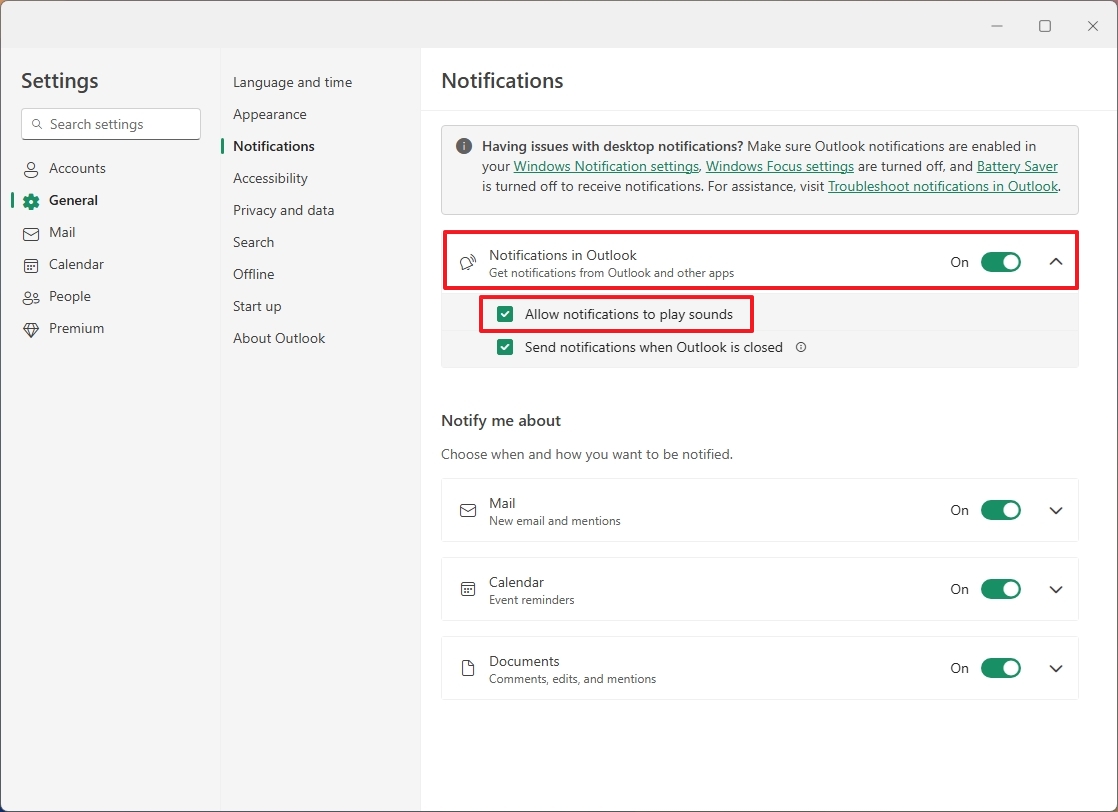
(Image credit: Mauro Huculak)
- (Optional) Check the "Send notifications when Outlook is closed" option.
- Turn on the "Mail" toggle switch to receive toast notifications for new emails on Windows 11.
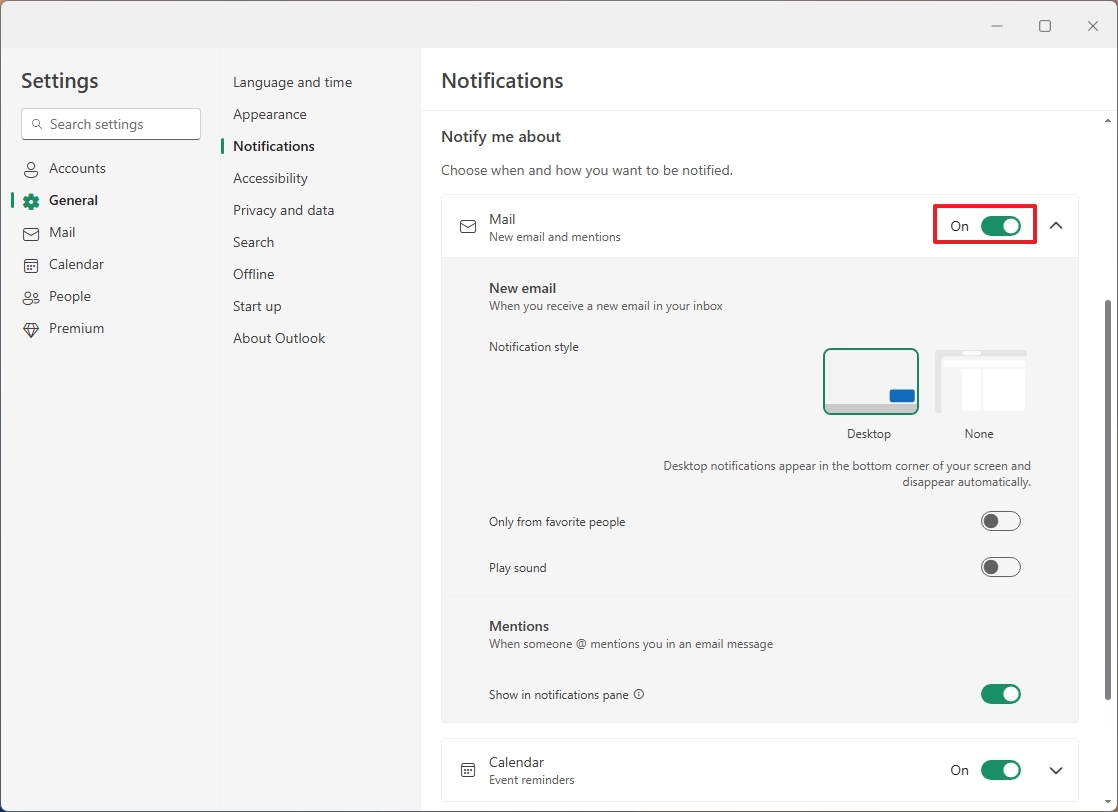
(Image credit: Mauro Huculak)
- Quick tip: You can open the "Mail" settings and further customize how notifications should appear.
- Turn on the "Calendar" toggle switch to enable toast notifications for calendar events.
- Turn on the "Documents" toggle switch to enable toast notifications for comments, edits, and mentions.
- Click the Save button.
After you complete the steps, the notification settings will apply to the application.
Enable Outlook offline mode
To turn offline mode on or off in the Outlook app, use these steps:
- Click the Settings (gear) button.
- Click on General.
- Click the "Offline" setting.
- Turn the "Enable offline email, calendar, and people" toggle switch on or off. If you turn off the feature, you won't be able to use the app without an internet connection.
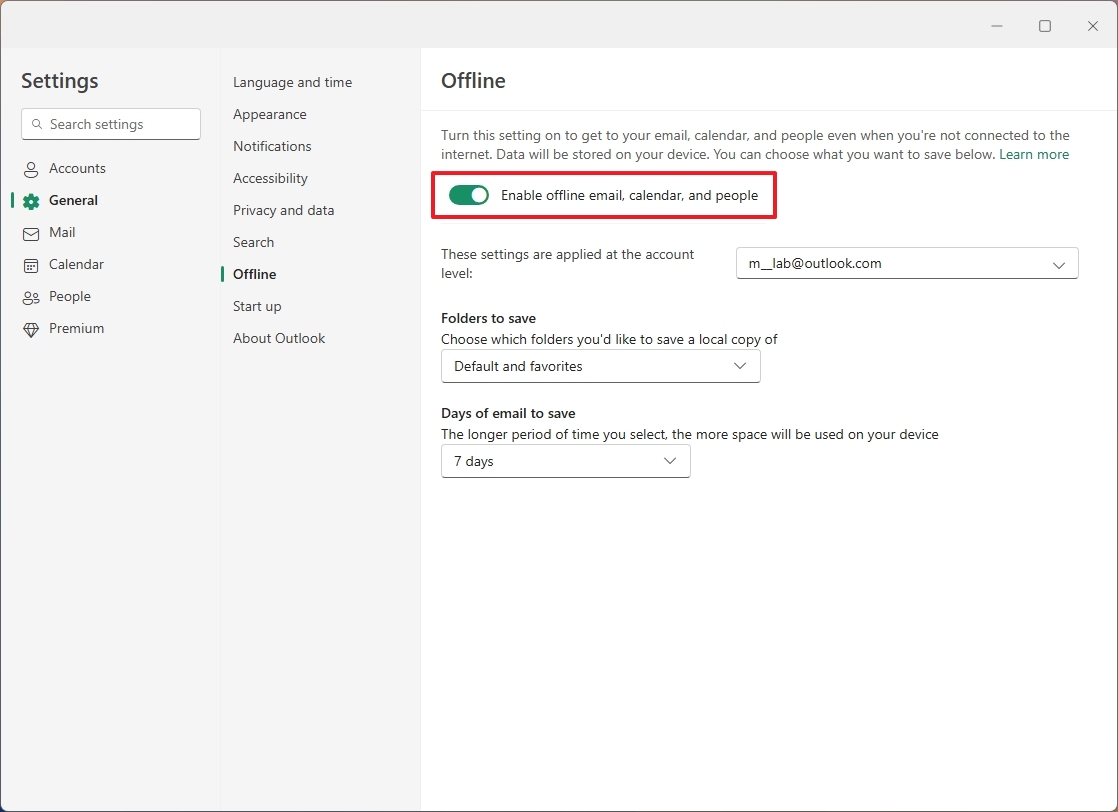
(Image credit: Mauro Huculak)
- (Optional) Select which folders to save a local copy, including "Default," "Default and favorites," or "Default, favorites, and recently used" option.
- Choose the days of emails to save, including 7, 30, 90, or 180 days.
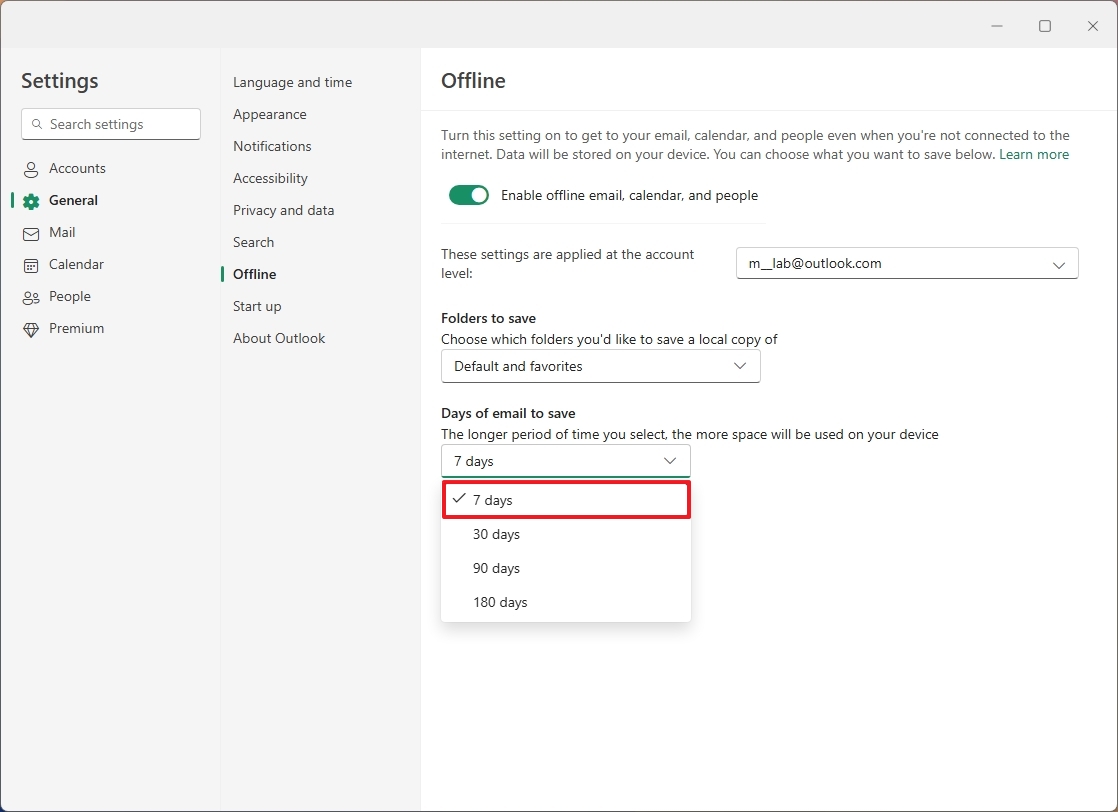
(Image credit: Mauro Huculak)
- Click the Save button.
Once you complete the steps, the Outlook app will continue to work even without an email connection. However, emails will not be sent, and no new emails will arrive until an internet connection is available.
Mail settings
In the "Mail" section, you will find the vast majority of settings related to each of the connected mailboxes. For example, the "Layout" page includes the settings to control "Focused inbox," which, while it may be a useful feature for many people, I don't use because I never check, and then I end up missing important emails.
On the "Compose and reply" page, you can change the settings for message format, replies, link preview, undo send, and more.
Customize Outlook layout
The layout settings allow you to customize various features in the Outlook app, such as "Focused Inbox," text, message organization, sender image, reading pane, and more.
To change the layout settings in Outlook, use these steps:
- Click the Settings (gear) button.
- Click on Mail.
- Click the "Layout" setting.
- Choose the "Don't sort my messages" option to disable the Focused inbox on the account.
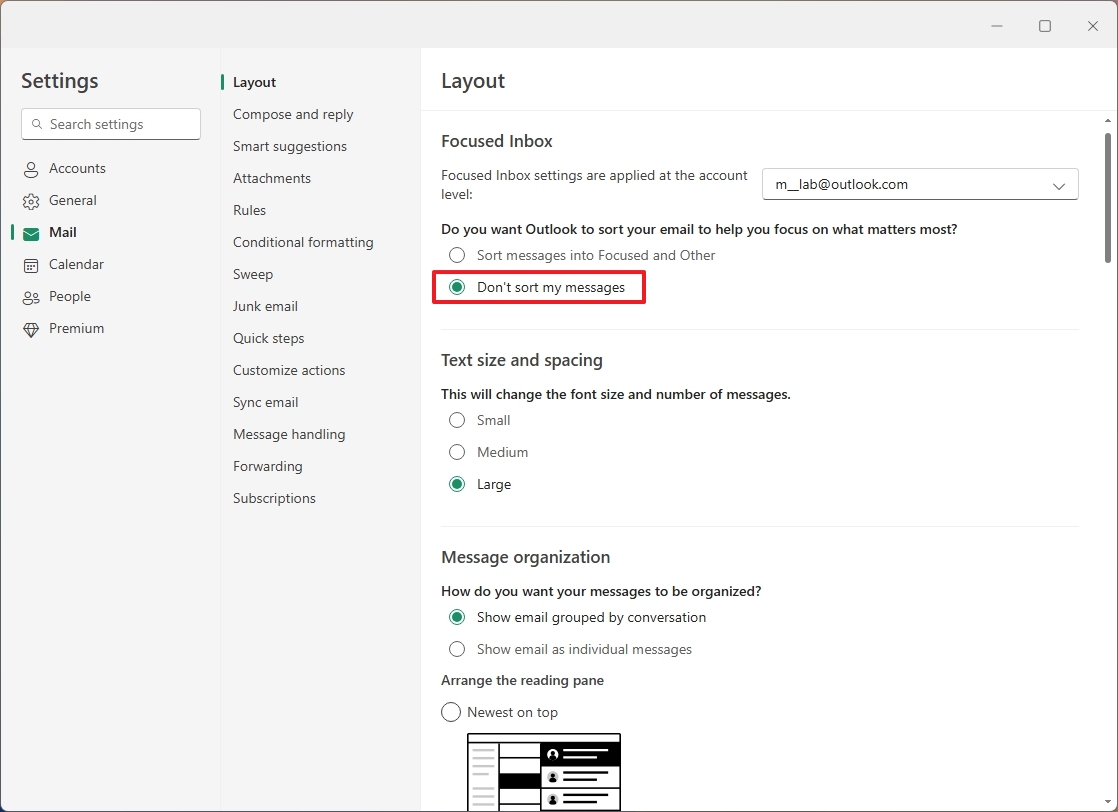
(Image credit: Mauro Huculak)
- (Optional) Choose the "Small," "Medium," or "Large" option in the "Text size and spacing" section.
- Select the "Show email grouped by conversation" or "Show email as individual message" option under the "Manage Organization" section.
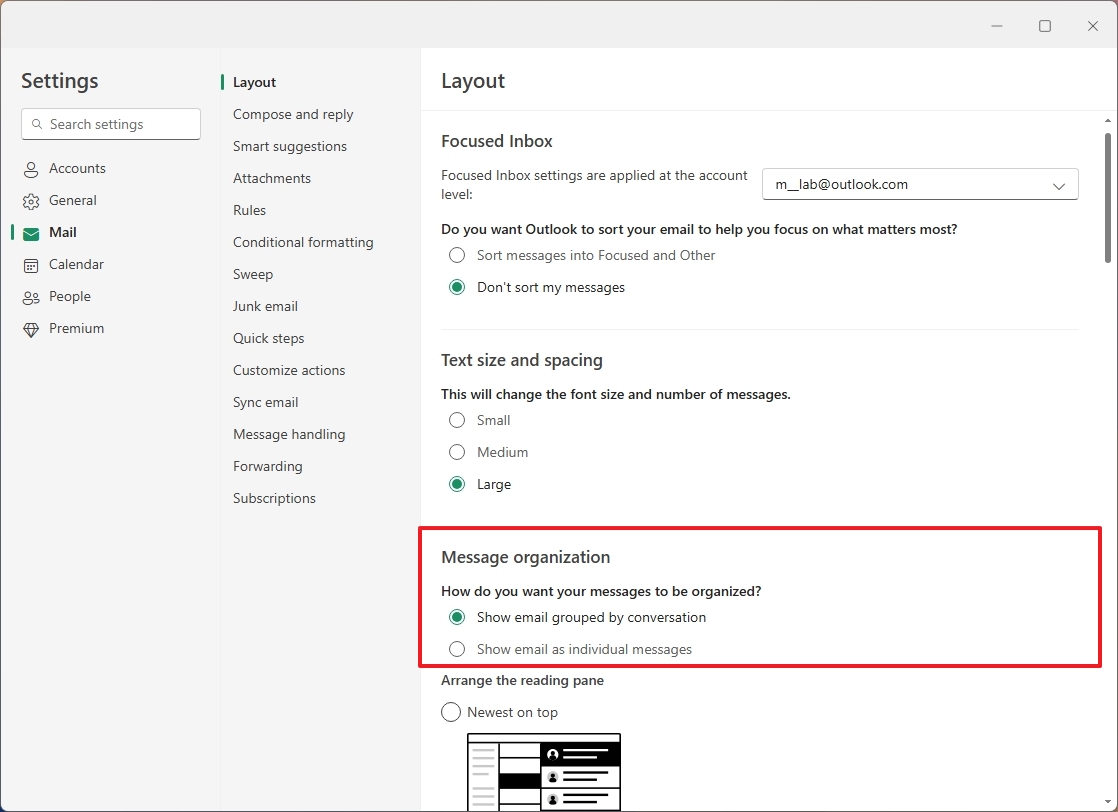
(Image credit: Mauro Huculak)
- Choose the "Newest at the top," "Newest at the bottom," or "Show each message separately" in the "Arrange the reading pane" section to change the layout of emails.
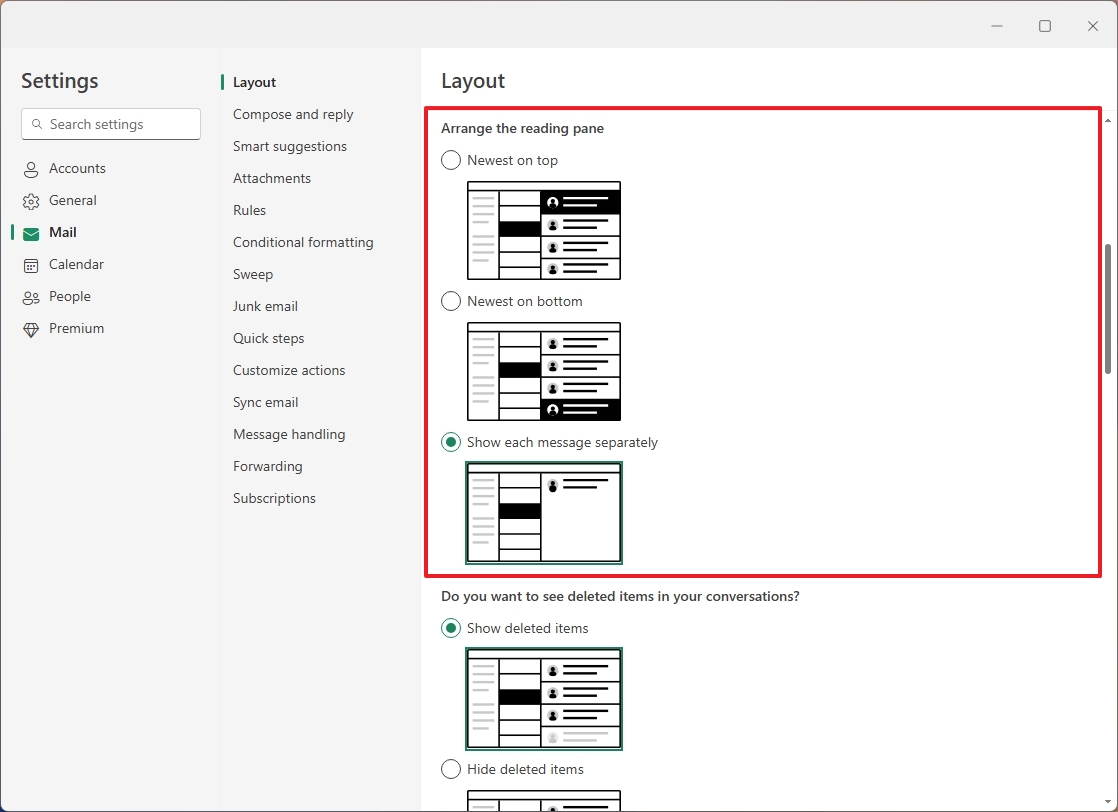
(Image credit: Mauro Huculak)
In addition, the "Layout" page allows you to change other settings, such as message list format, preview text, and date headers. You can also decide whether to view inline attachments and control animations.
Customize messages format
You can also customize the default format of messages. For example, you can choose to compose messages in HTML or plain text. You can also change the font size and style, reply settings, link preview, undo send, and more.
To change the format of the message for Outlook, use these steps:
- Click the Settings (gear) button.
- Click on Mail.
- Click the "Compose and reply" setting.
- Change the default font family and size under the "Message format" section.
- Select the HTML or Plain text option for the "Compose message in (...) format" setting.
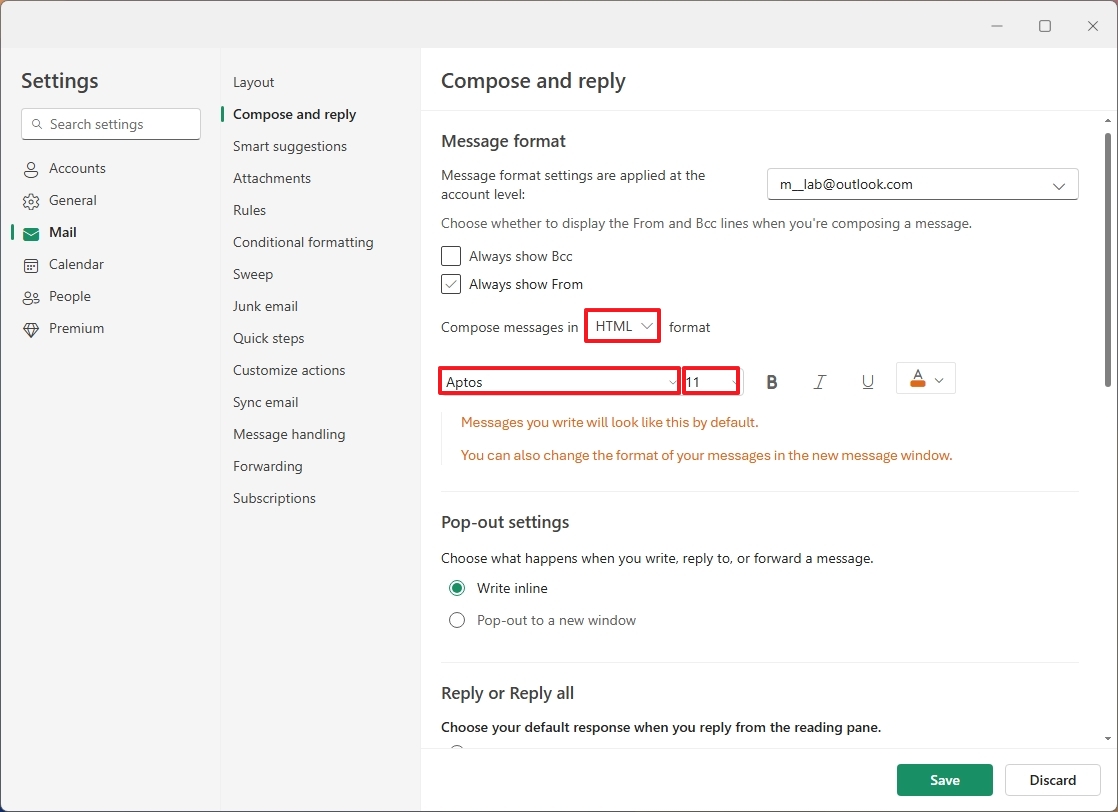
(Image credit: Mauro Huculak)
- Quick tip: You can also change the default color for the font.
- Choose the "Write inline" or "Pop-out to a new window" option in the "Pop-out settings" section to select the action when you compose an email.
- Select the "Reply" or "Replay all" option for the default action when responding to an email under the "Reply or Replay all" section.
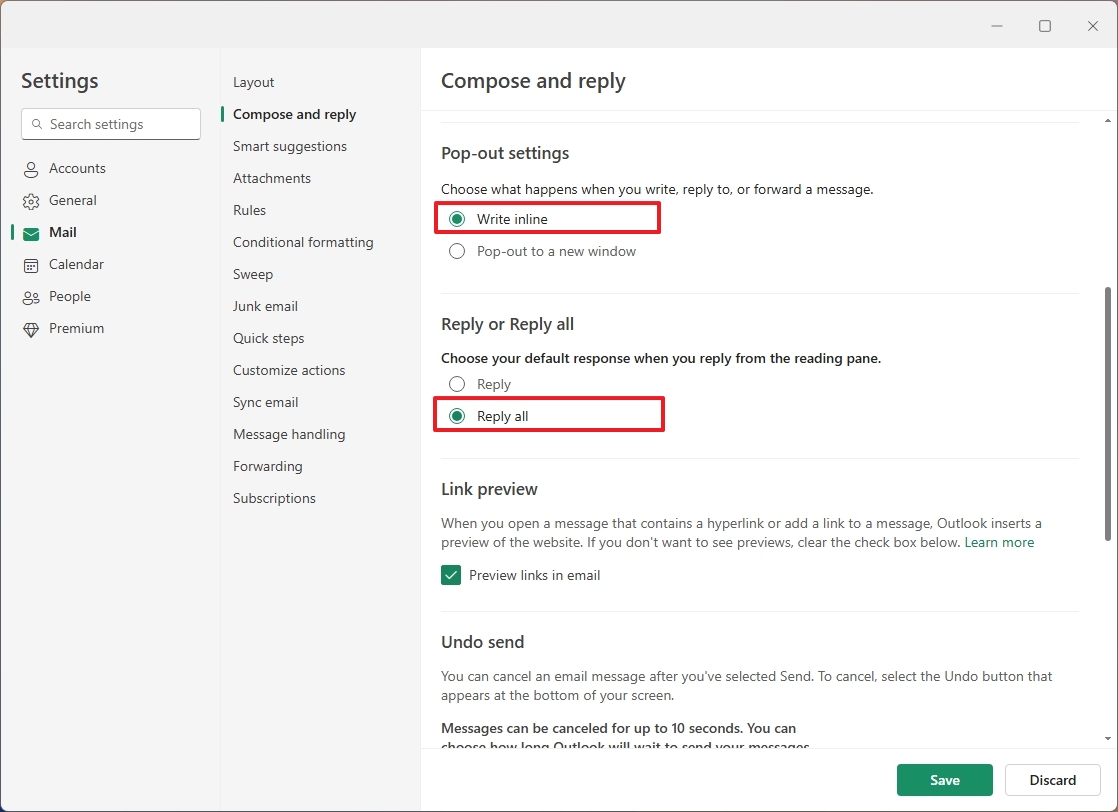
(Image credit: Mauro Huculak)
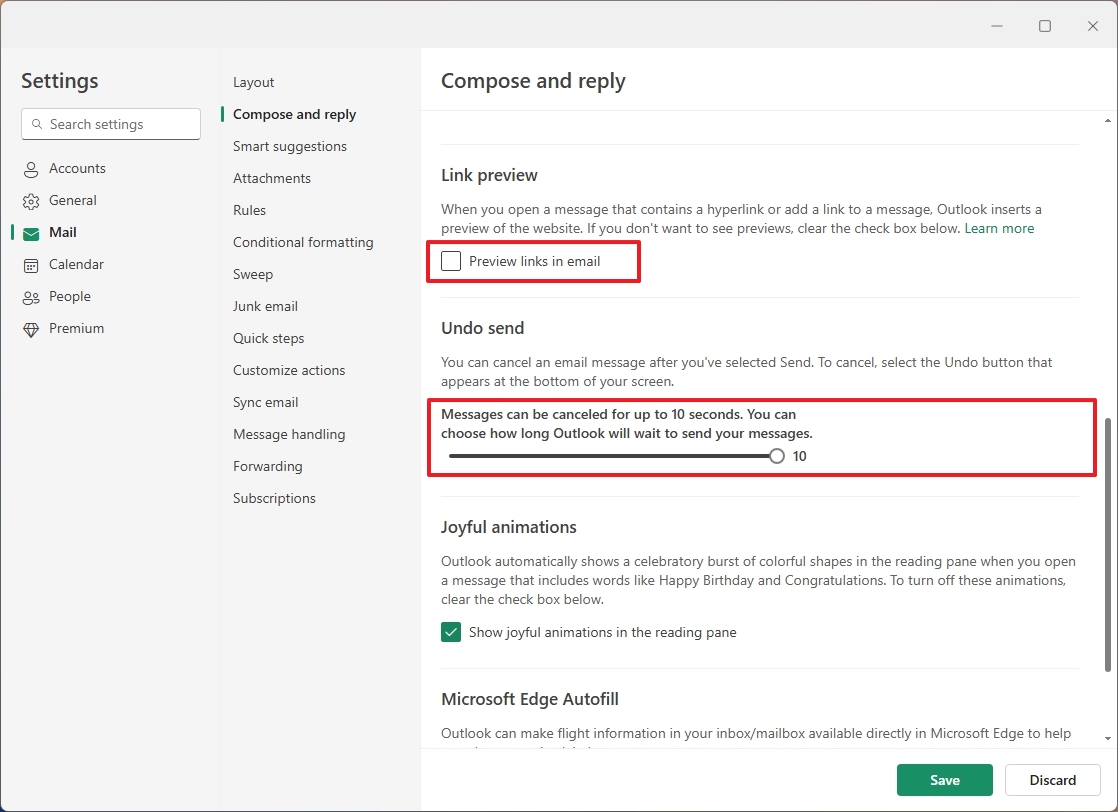
- (Optional) Clear the "Preview links in email" option to prevent the app from embedding a preview of the link you're inserting into an email.
- Use the slider to choose how long (up to 10 seconds) to cancel an email sent using the "Undo Send" setting.
(Image credit: Mauro Huculak)
- Click the Save button.
On this page, you can also control the time to cancel a sent email, joyful animations, and flight information.
Configure smart suggestions
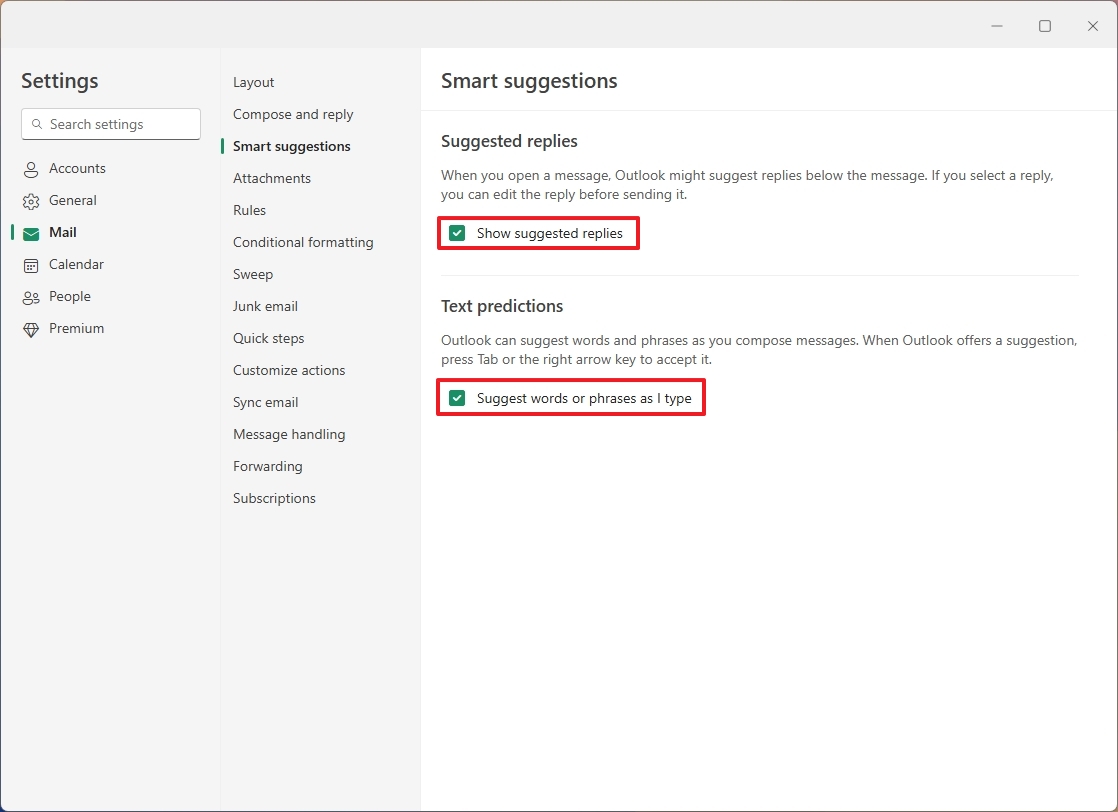
In Outlook, "Smart suggestions" enable two messaging features. First, you can allow Outlook to suggest email replies. Second, the email client can also show text predictions as you type.
To turn smart suggestions in Outlook on or off, use these steps:
- Click the Settings (gear) button.
- Click on Mail.
- Click the "Start suggestions" setting.
- Check or clear the "Show suggested replies" option to turn reply suggestions on or off.
- Check or clear the "Suggest words or phrases as I type" option to turn text prediction on or off.
(Image credit: Mauro Huculak)
- Click the Save button.
Once you complete the steps, the new configuration will apply to the email client.
Set up Outlook rules
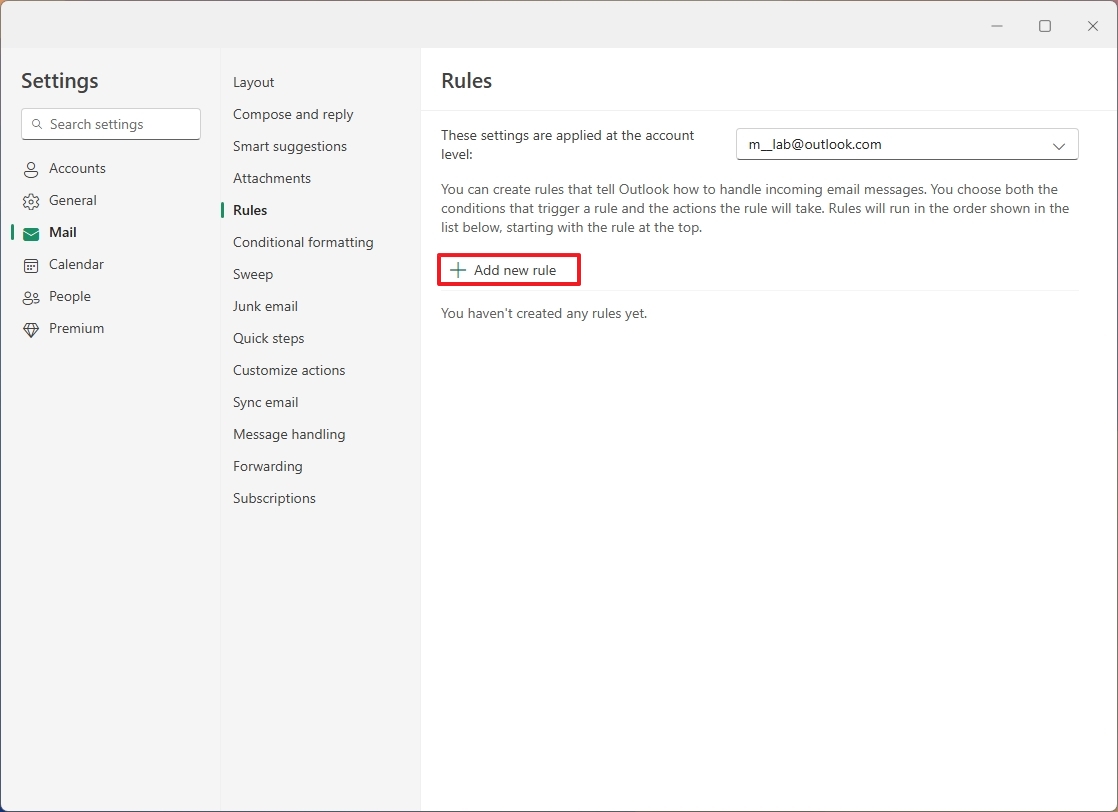
Outlook rules allow you to control how the app handles incoming emails. For example, you can create a rule to catch the email from a specific address and move it to a specific folder, but you can choose from a slew of conditions.
To set up Outlook rules, use these steps:
- Click the Settings (gear) button.
- Click on Mail.
- Click the "Rules" setting.
- Click the "Add new rule" option.
(Image credit: Mauro Huculak)
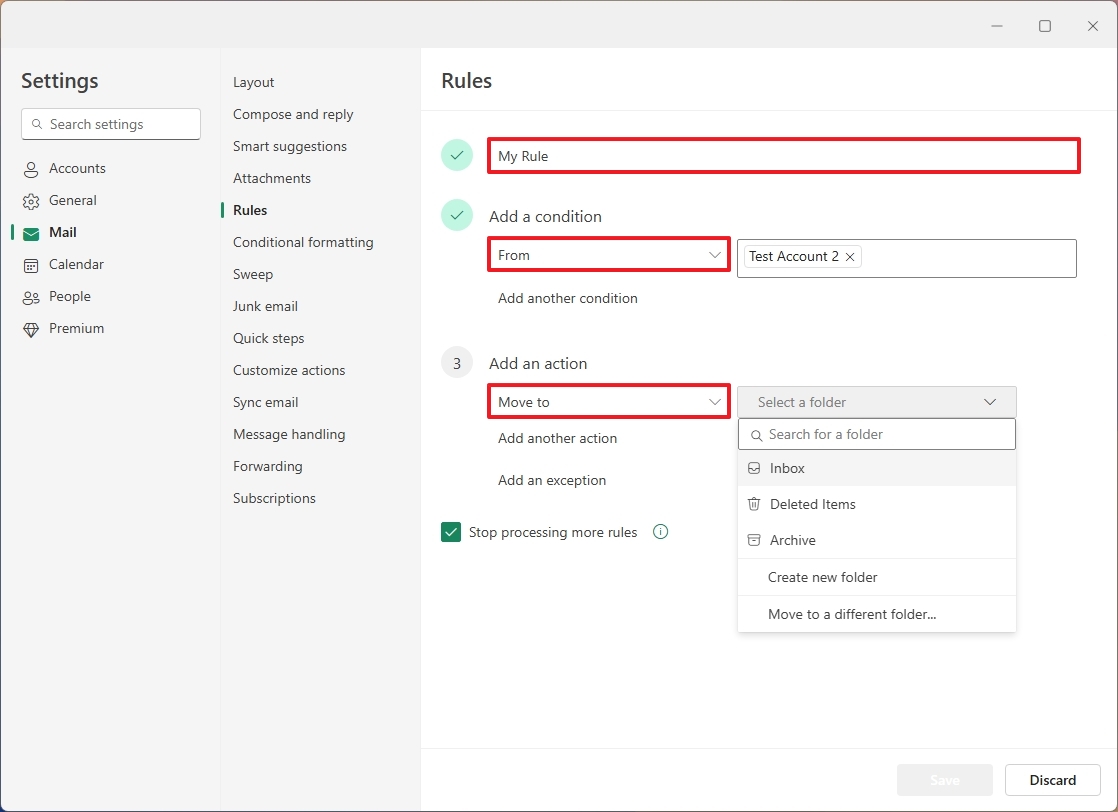
- Confirm a descriptive name for the condition.
- Choose the condition.
(Image credit: Mauro Huculak)
- Quick note: Outlook offers many conditions, and some of the categories include "People," "Names," "Subjects," "Keywords," "Marked with," "Message includes," "Message size," "Received," and "All messages."
- Select the action ("Organize," "Mark message," and "Route") for the condition.
- Click the Save button.
After you complete the steps, the rule will run, and when new emails arrive, they will go through your rules to apply the correct condition.
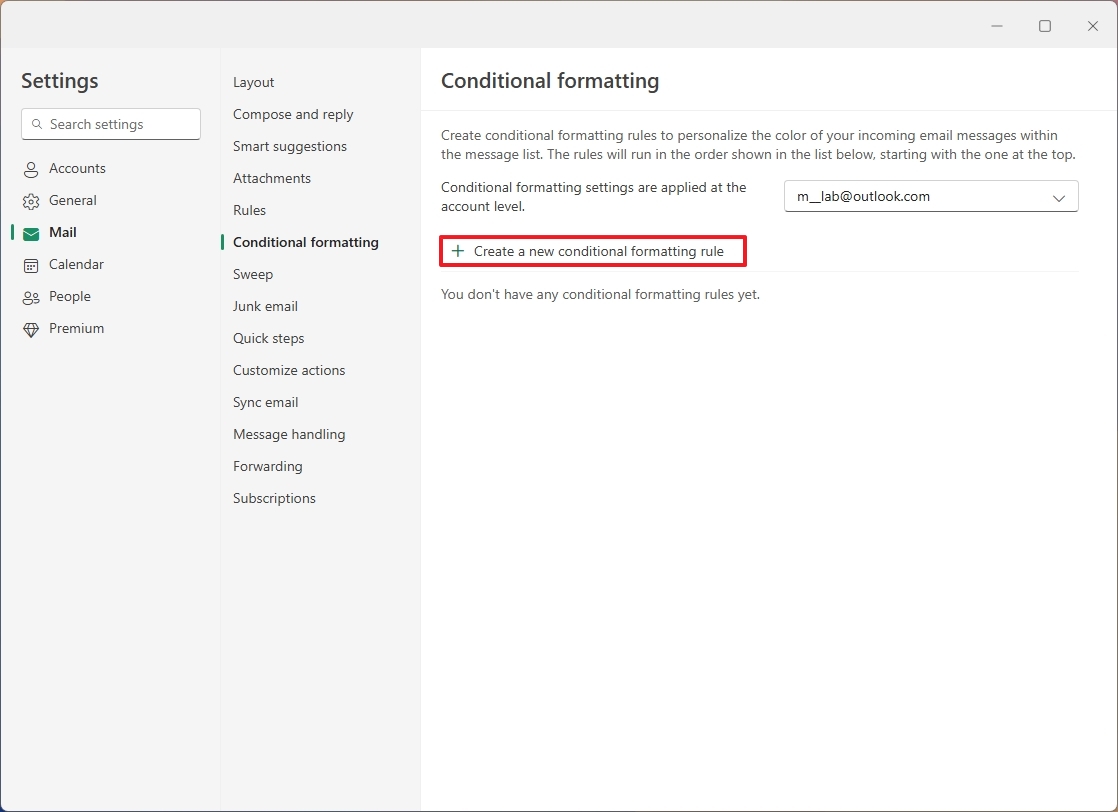
Set up Outlook conditional formatting
Conditional formatting is similar to the rules, but they are meant to match a condition and apply a format to that email.
To configure conditional formatting in Outlook, use these steps:
- Click the Settings (gear) button.
- Click on Mail.
- Click the "Conditional formatting" setting.
- Click the "Create a new conditional formatting rule" option.
(Image credit: Mauro Huculak)
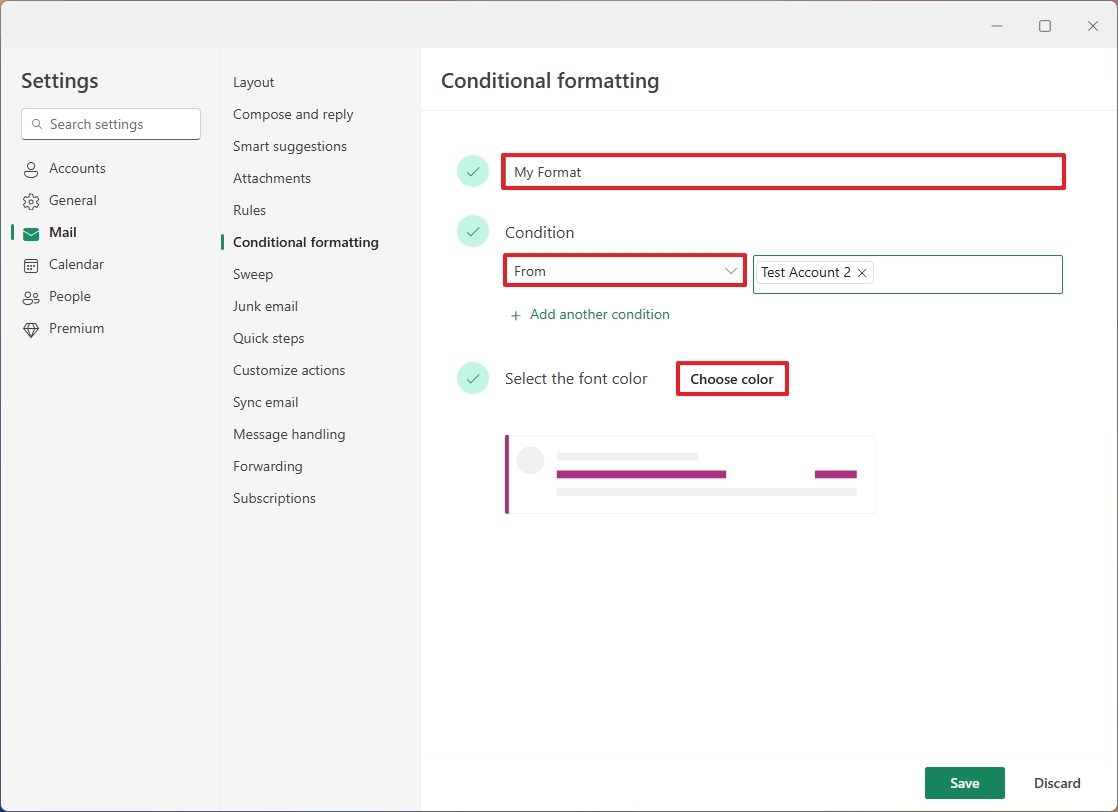
- Confirm a descriptive name for the rule.
- Choose a condition from the people, my name is, and subject categories.
(Image credit: Mauro Huculak)
- Click the Choose color button.
- Select the color to format the email.
- Click the OK button.
- Click the Save button.
Once you complete the steps, emails that match your condition will change the formatting according to your configuration.
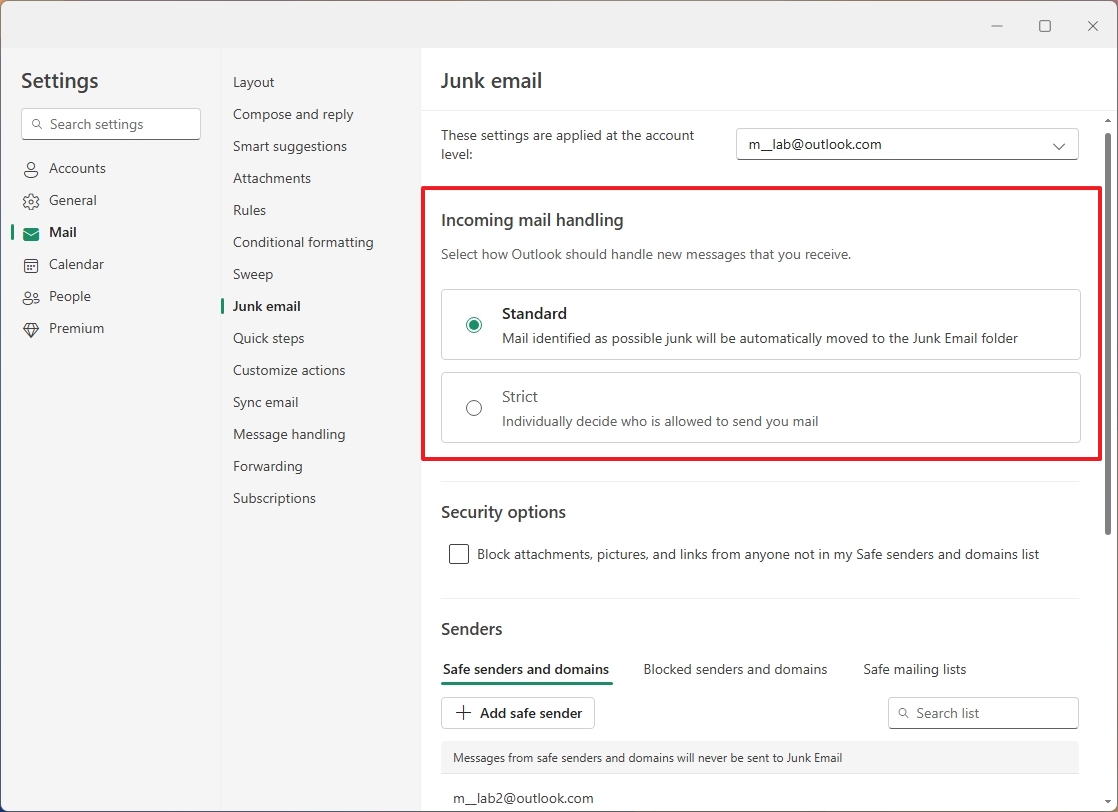
Configure junk email settings
Although email services usually control the traffic of junk email, the Outlook app offers a setting to control this feature on your computer.
To configure junk email settings in Outlook, use these steps:
- Click the Settings (gear) button.
- Click on Mail.
- Click the "Junk email" setting.
- Choose the "Standard" or "Strict" option in the "Incoming mail handling" section.
(Image credit: Mauro Huculak)
- Quick note: I usually recommend using the "Standard" option since the "Strict" option requires you to set the email address allowed to send you emails.
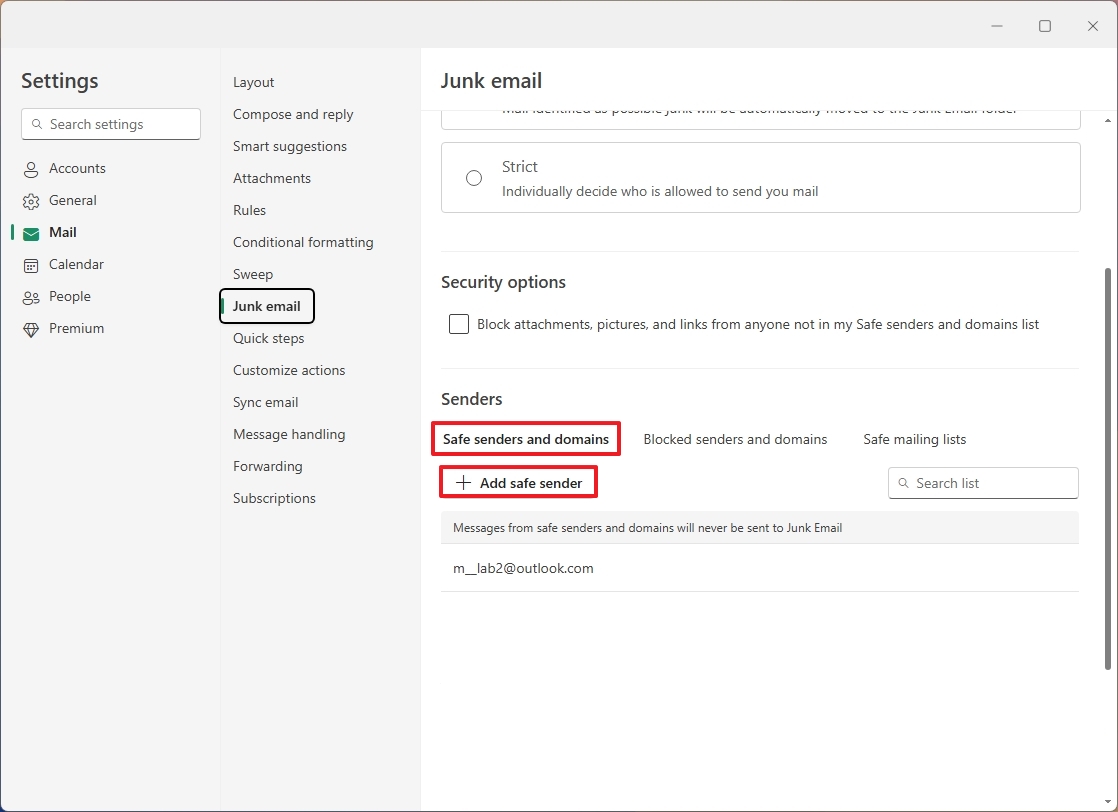
- Click the "Safe senders and domains" tab under the "Senders" section.
- Click the "Add safe sender" button.
(Image credit: Mauro Huculak)
- Confirm the email or domain allowed to send you emails.
- Click the OK button.
- Quick tip: To add more filters, you may need to repeat steps 6 through 8.
- (Optional) Click the "Blocked senders and domains" tab.
- Click the "Add blocked sender" button.
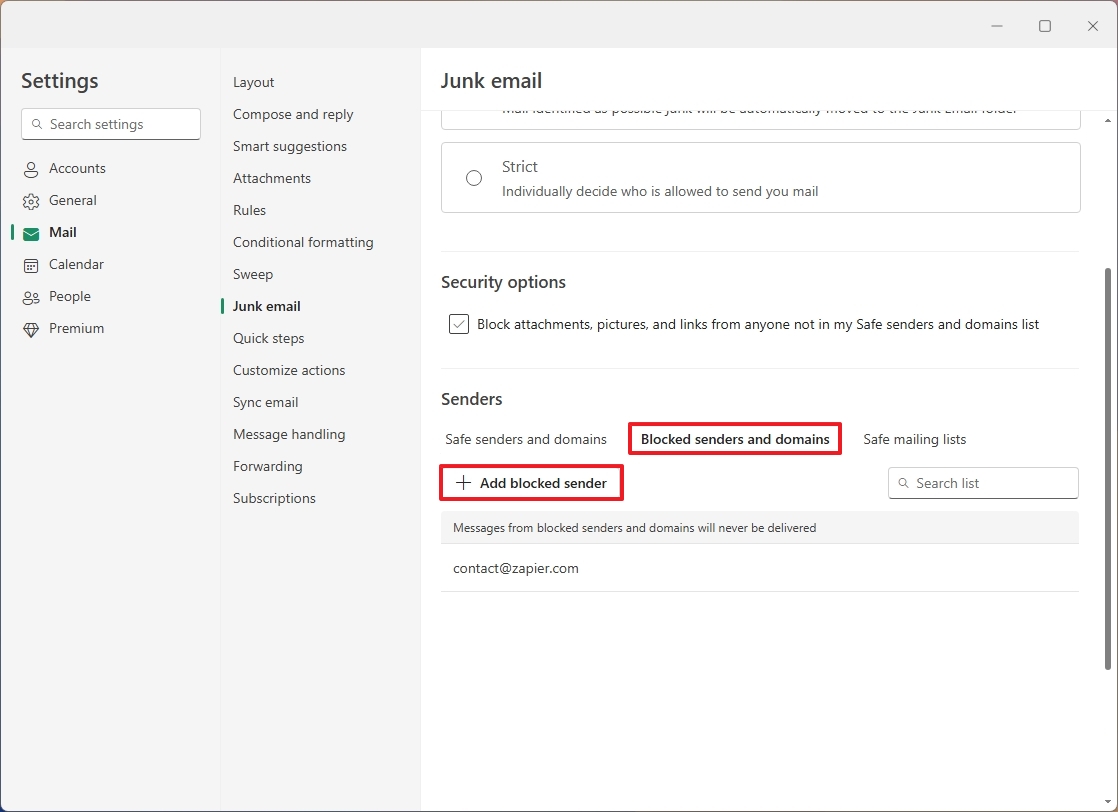
(Image credit: Mauro Huculak)
- Confirm the email or domain is not allowed to send you emails.
- Click the OK button.
- Check the "Block attachments, pictures, and links [...]" option under the "Security options" section.

(Image credit: Mauro Huculak)
- Click the Save button.
After you complete the steps, the number of junk mail should now be reduced.
Customize email quick actions
In Outlook, you can choose the quick options that appear while hovering over an email, and here's how:
- Click the Settings (gear) button.
- Click on Mail.
- Click the "Customize actions" setting.
- Check only the quick actions you want to use, such as "Delete," "Archive," "Pin," "Mark as read or unread," "Flag," and "Move to a folder."
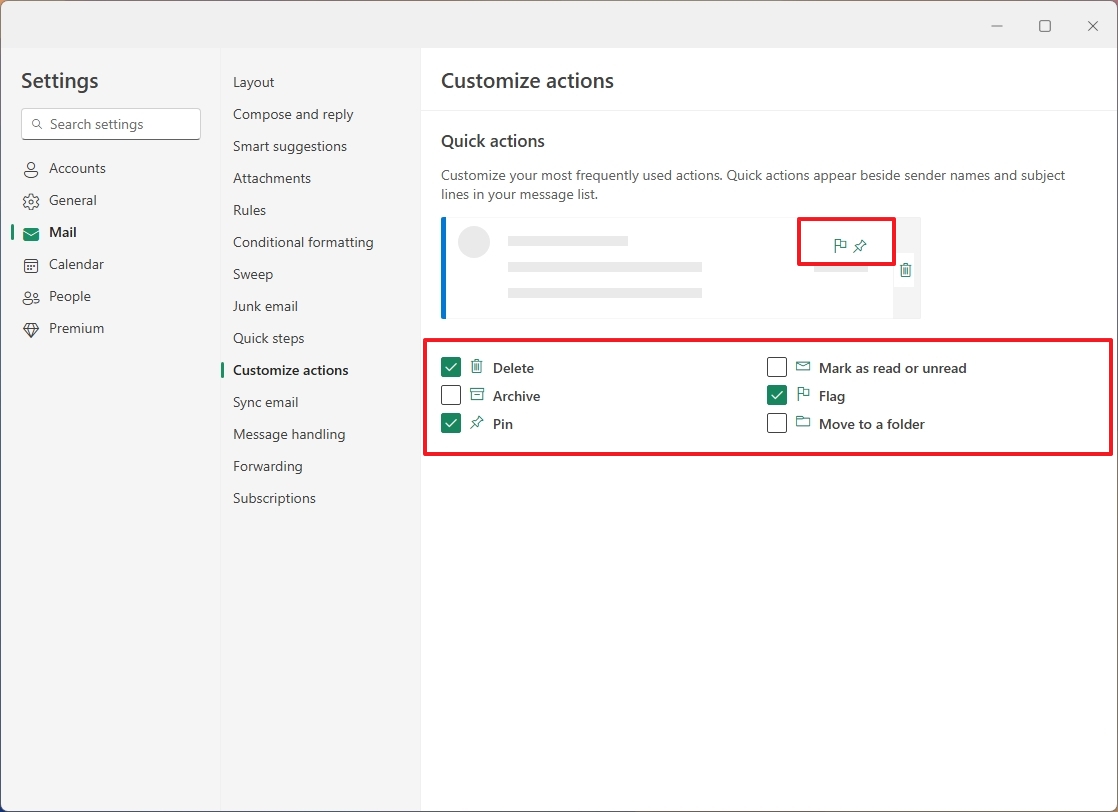
(Image credit: Mauro Huculak)
- Click the Save button.
Once you complete the steps, when hovering over emails from the left pane, you should now see the quick action buttons you specified in the settings.
Change message handling settings
Although the default message handling settings should be optimal for most users, Outlook also gives you more granular control. For example, you can choose the action for deleted messages, mark as read, read receipts, shopping, action confirmations, and translations.
To change the message handling settings, use these (optional) steps:
- Click the Settings (gear) button.
- Click on Mail.
- Click the "Message handling" setting.
- Check the "Empty my deleted items folder" option under the "Message options" section to remove deleted items when you sign out of the app.
- Check the "Mark displayed items as read when the selection changes" option under the "Mark as read" section.
- Choose the "Never send a response" option in the "Read receipts" section to prevent others from knowing when you open their message.
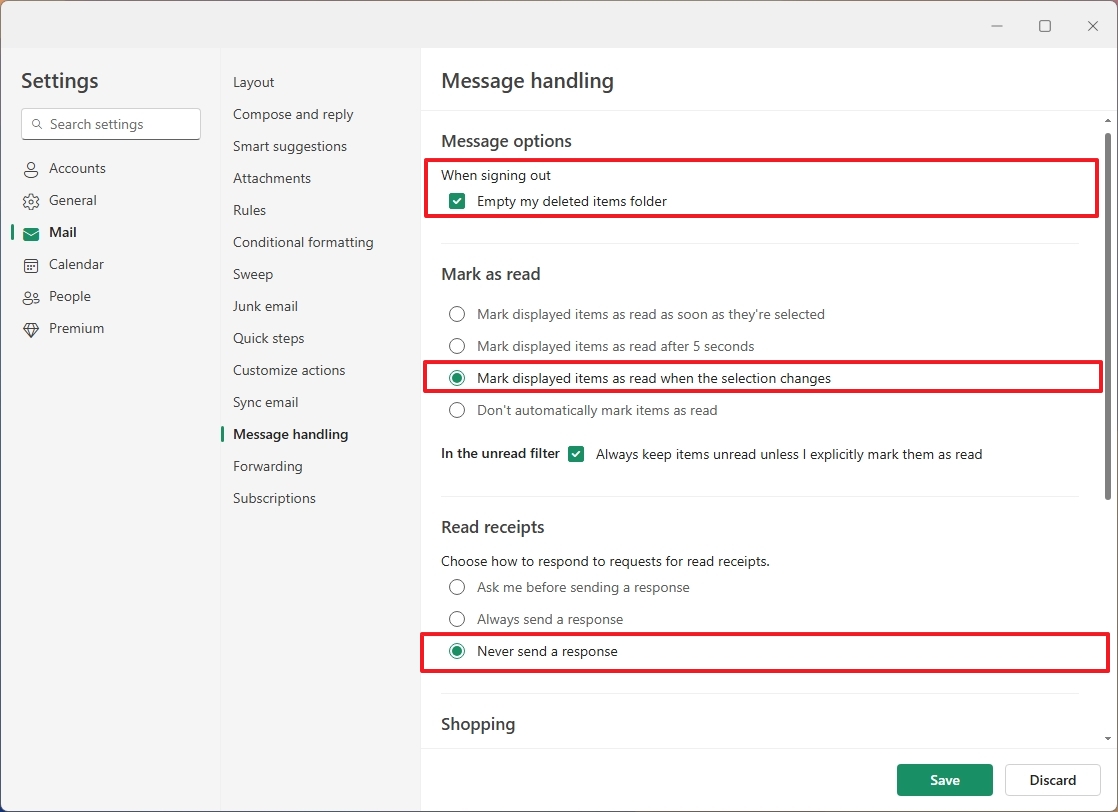
(Image credit: Mauro Huculak)
- Quick note: Alternatively, you can choose the "Ask me before sending a response" option, but I would always recommend never sending a response automatically.
- Clear the Shopping option.
- If you receive emails in other languages, you can choose the "Always translate" option.
- Quick tip: If you're bilingual, you can choose the "Never translate" option.
- Choose the language to which to translate the message.
- Select the languages you don't want to be translated.
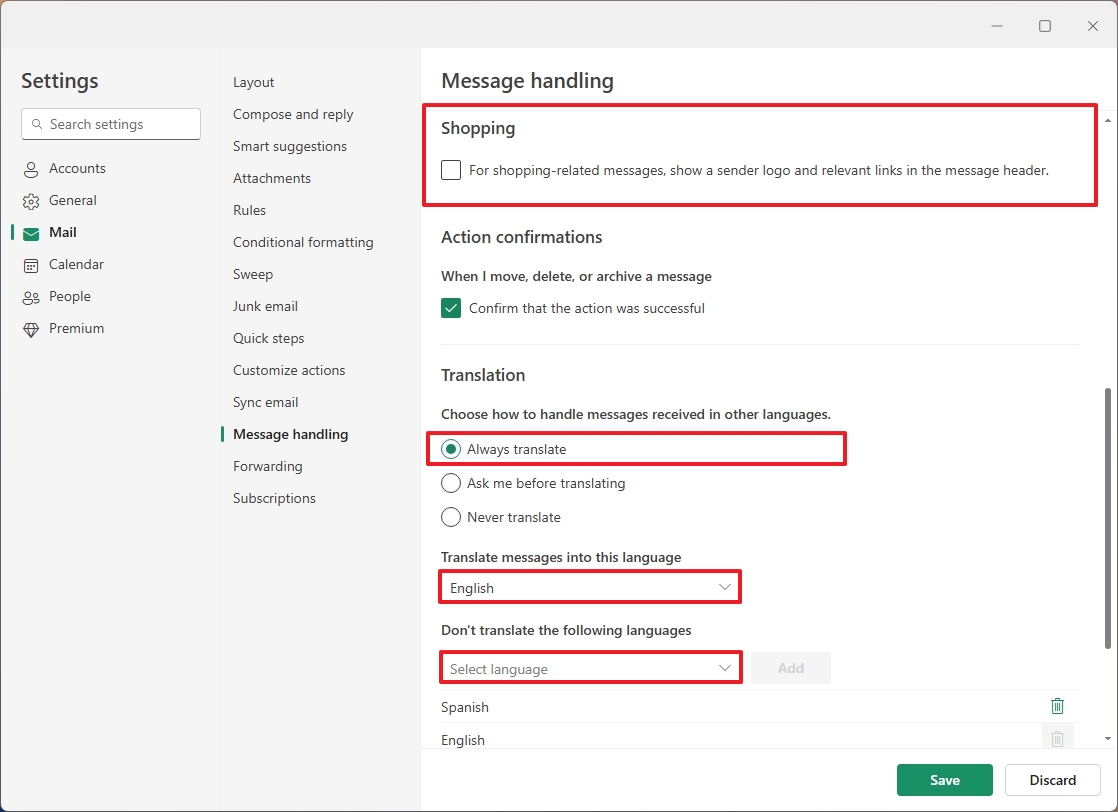
(Image credit: Mauro Huculak)
- Click the Add button.
- Click the Save button.
After you complete the steps, the new settings will apply immediately, according to your configuration.
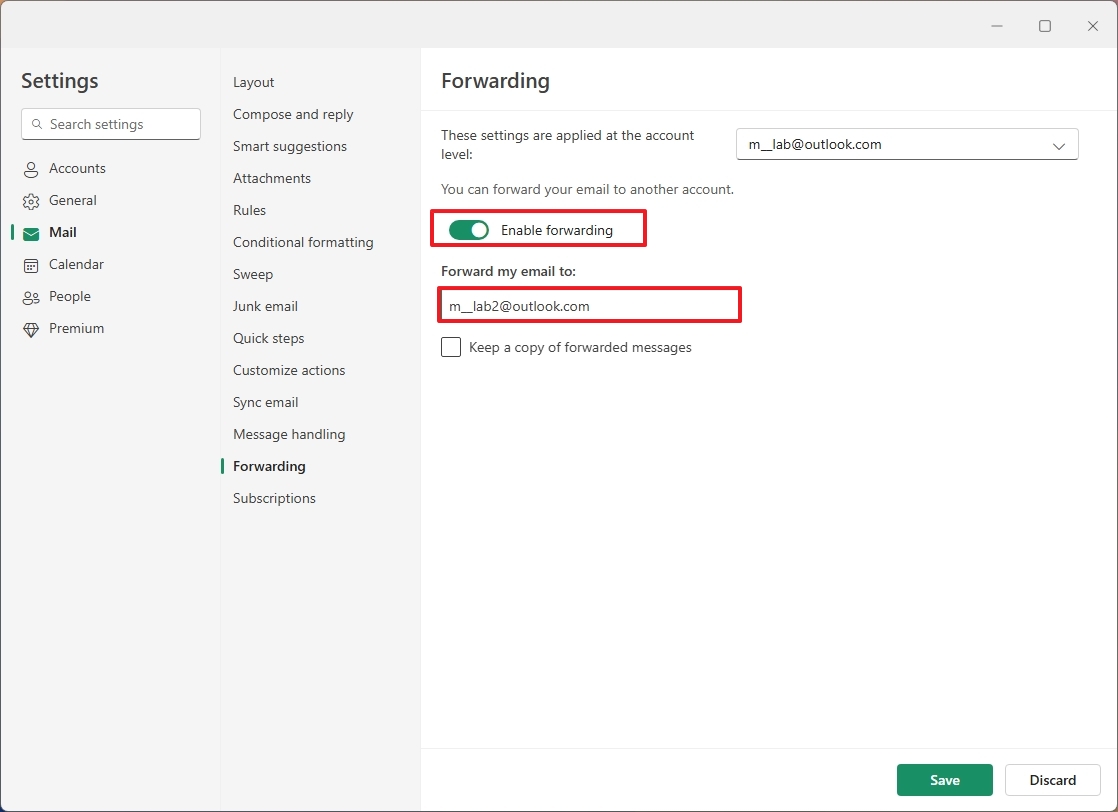
Configure Outlook forwarding
Finally, the Outlook app also allows you to forward emails automatically to other addresses, and here's how:
- Click the Settings (gear) button.
- Click on Mail.
- Click the "Forwarding" setting.
- Turn on the "Enable forwarding" option.
- Confirm the email address to which to forward emails.
(Image credit: Mauro Huculak)
- (Optional) Check the "Keep a copy of forwarded messages" option.
- Click the Save button.
Once you complete the steps, Outlook will start forwarding new emails to the new address you specified.
Calendar settings
The "Calendar" section includes the different options to adjust the view as well as other features for the calendars.
You can control the calendar appearance, events, weather information, actions, and you can control how to share calendars with other people.
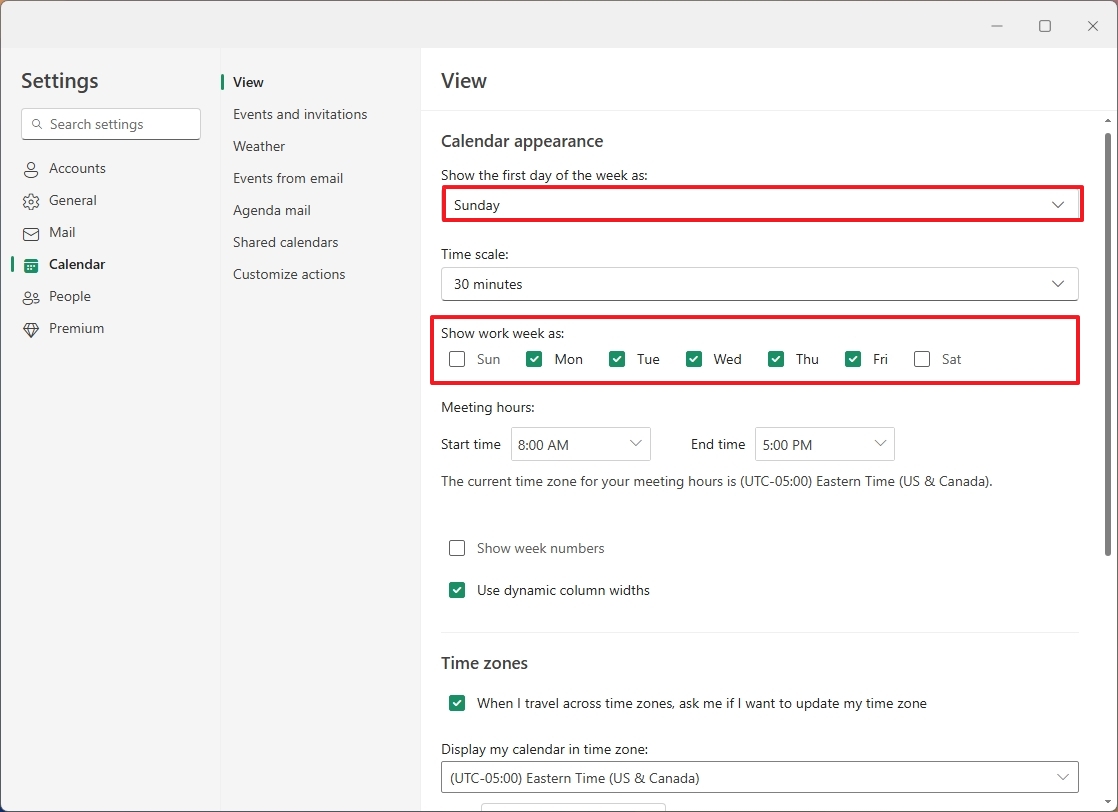
Customize calendar basic settings
The Outlook app also includes a calendar experience that includes all the basic features you come to expect. The default settings should work for most people, but you can always customize various settings; for example, you can set the work weekdays, show the weather in the calendar, change event settings, and more.
To change the basic calendar settings in the calendar experience for Outlook, use these steps:
- Click the Settings (gear) button.
- Click on Calendar.
- Click the "View" setting.
- Choose the first day of the week.
- Select the work weekdays.
(Image credit: Mauro Huculak)
- (Optional) Check the "Show week numbers" option to view the week numbers in the calendar.
- Click the Save button.
- Click on Events and invitations.
- Change the default reminder for events you create.
- Click the Save button.
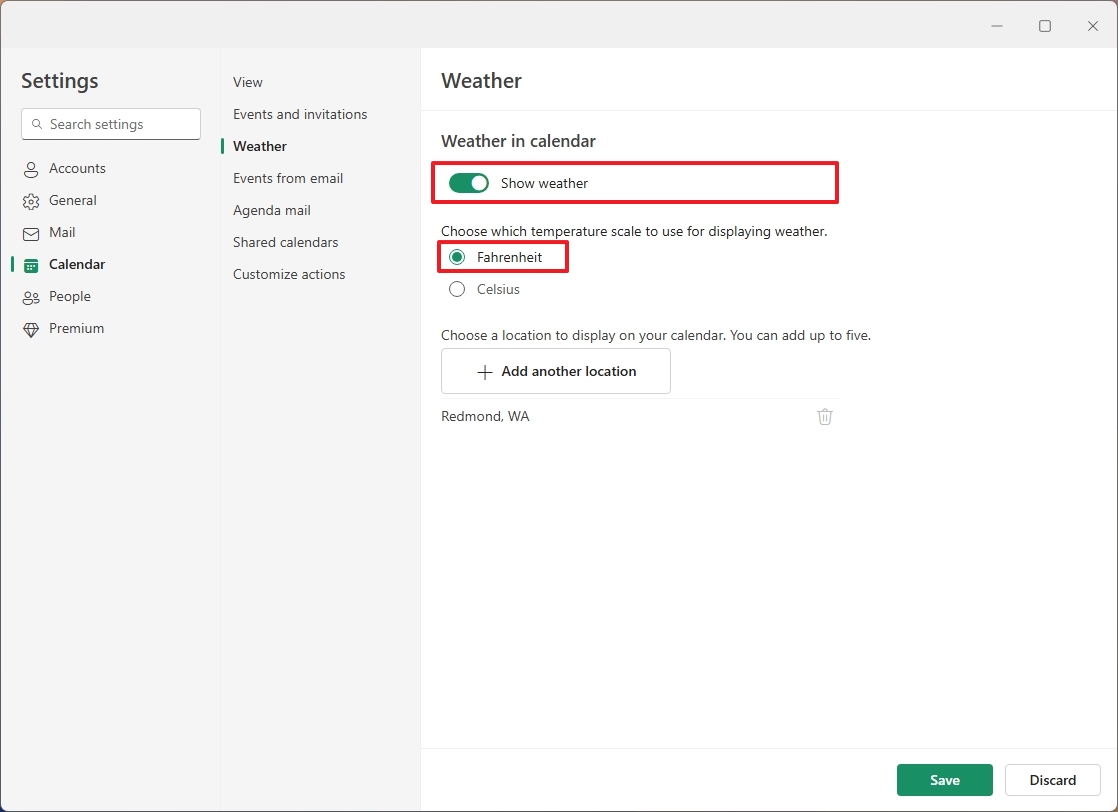
- Click on Weather.
- Turn the Weather feature on or off for the calendar.
(Image credit: Mauro Huculak)
- Choose Fahrenheit or Celsius.
- Click the "Add another location" button to set your weather location for the calendar.
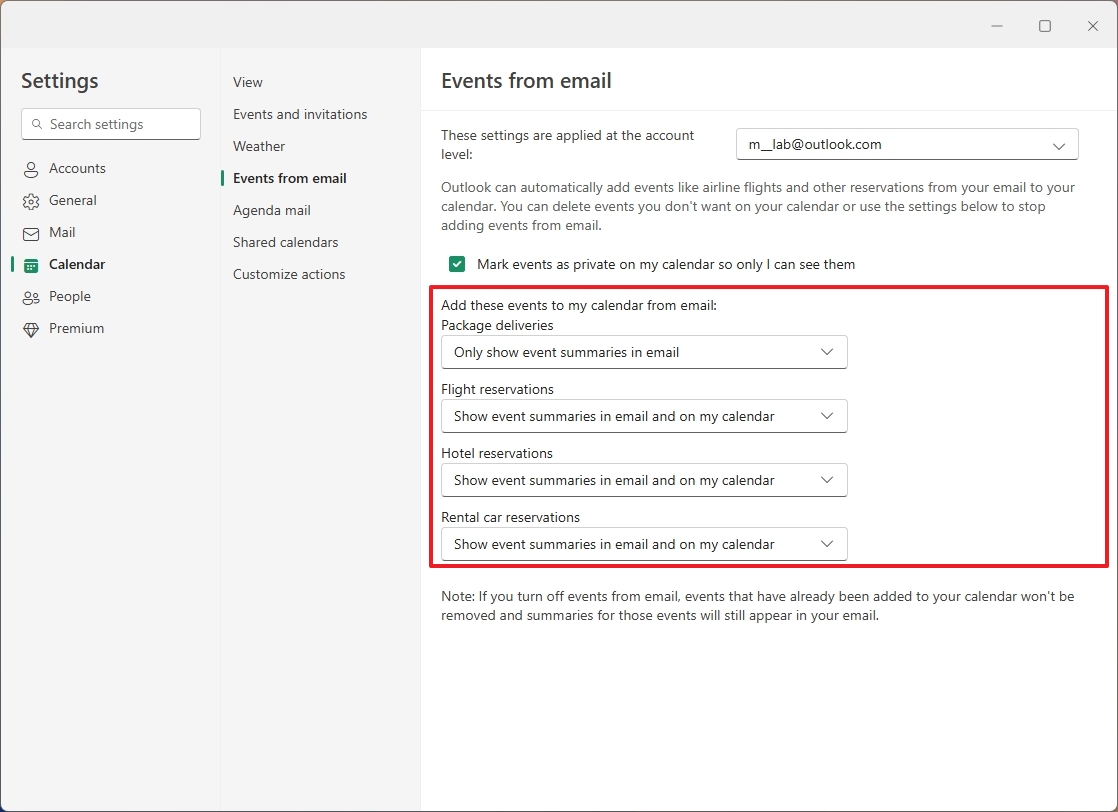
- Click on Events from email.
- Choose whether to add package delivery, flight, hotels, and car rental reservations to the calendar.
(Image credit: Mauro Huculak)
- Click on Agenda mail.
- (Optional) Turn off the "Send me a daily agenda mail" option to prevent the app from sending you daily emails with events and tasks.
After you complete the steps, the new settings will apply to the calendar.
Share an Outlook calendar
If you want, it's also possible to share the calendar with other people, and here's how:
- Click the Settings (gear) button.
- Click on Calendar.
- Click the "Shared calendars" setting.
- Choose the calendar under the "Share a calendar" section.
- Click the Share button.
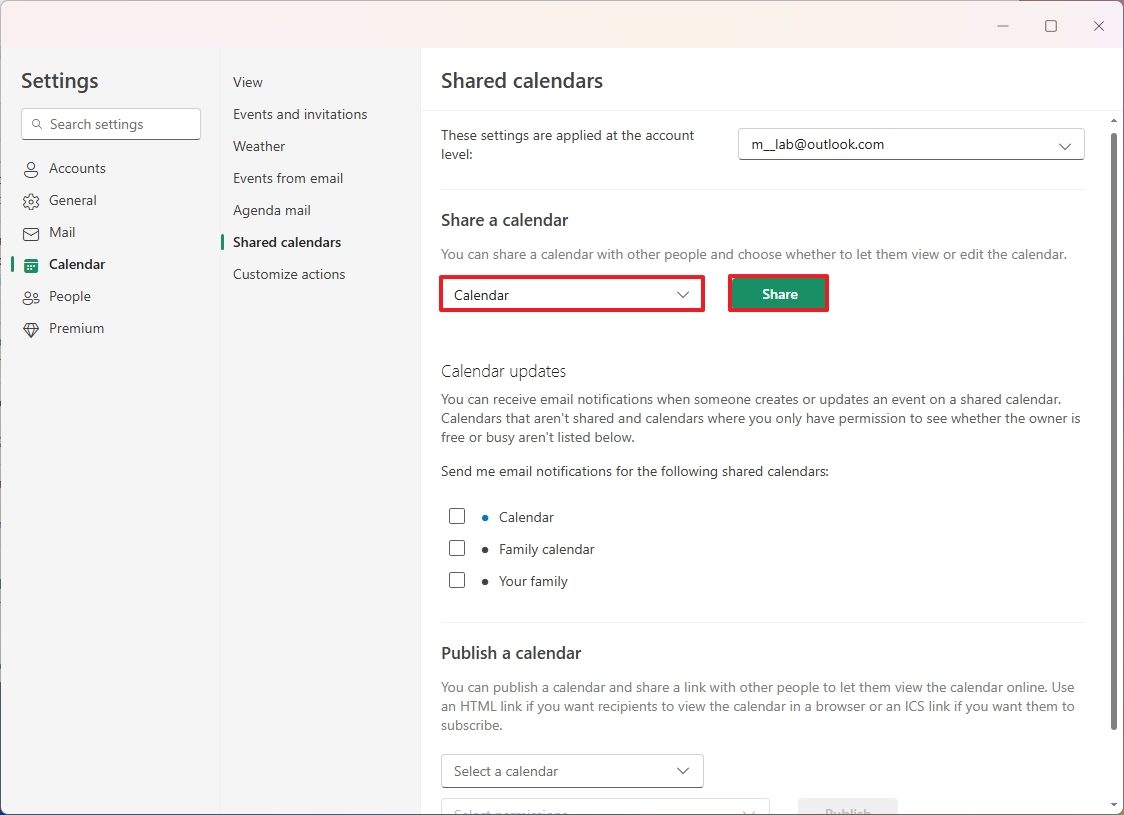
(Image credit: Mauro Huculak)
- Confirm the email address to share the calendar.
- Click the Share button.
Once you complete the steps, the calendar should be available for the recipients.
Hope you enjoyed this news post.
Thank you for appreciating my time and effort posting news every single day for many years.
2023: Over 5,800 news posts | 2024 (till end of July): 3,313 news posts
Recommended Comments
Join the conversation
You can post now and register later. If you have an account, sign in now to post with your account.
Note: Your post will require moderator approval before it will be visible.