
3175x175(CURRENT).thumb.jpg.b05acc060982b36f5891ba728e6d953c.jpg)
A clean installation of Windows 10 or Windows 11 may enable Bitlocker drive encryption automatically. The main system partition and all fixed drives will be encrypted in this case after the out-of-box experience.
Bitlocker protects data on the PC against unauthorized access by encrypting partitions and drives.
Microsoft calls this specific BitLocker feature device encryption: "Device encryption is a Windows feature that provides a simple way for some devices to enable BitLocker encryption automatically".
Problem is, since the encryption process happens automatically in this case, users may not be aware of it. This can lead to issues, for instance when reinstalling the operating system without saving the Bitlocker recovery key or using a Microsoft account. Access to files is lost in the worst case.
Thankfully, there are ways to block Windows from enabling the automatic encryption of drives during clean installs.
Option 1: during installation
New PCs come with a preinstallation of Windows. This speeds up the setup process, but it also gives users less control.
Step 1: It begins on the country or region selection screen.

Step 2: Open the Registry Editor
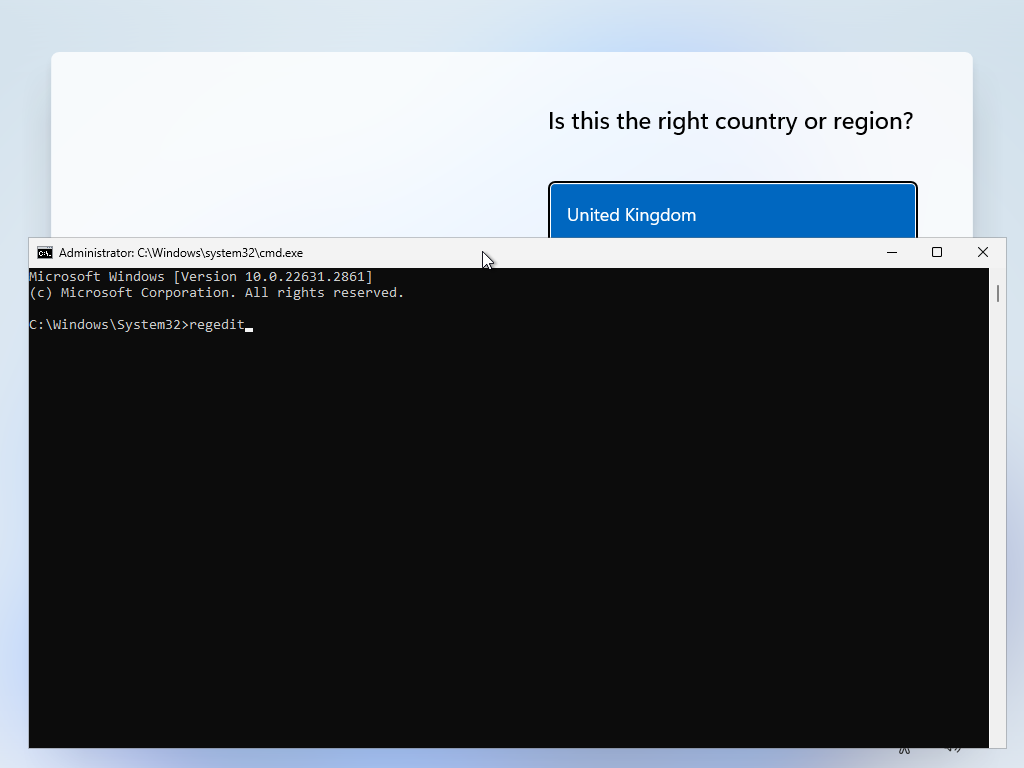
- Use the keyboard shortcut Shift-F10 to open a command prompt window.
- Type regedit and press the Enter-key.
This opens the Registry Editor.
Step 3: Disable automatic encryption using BitLocker
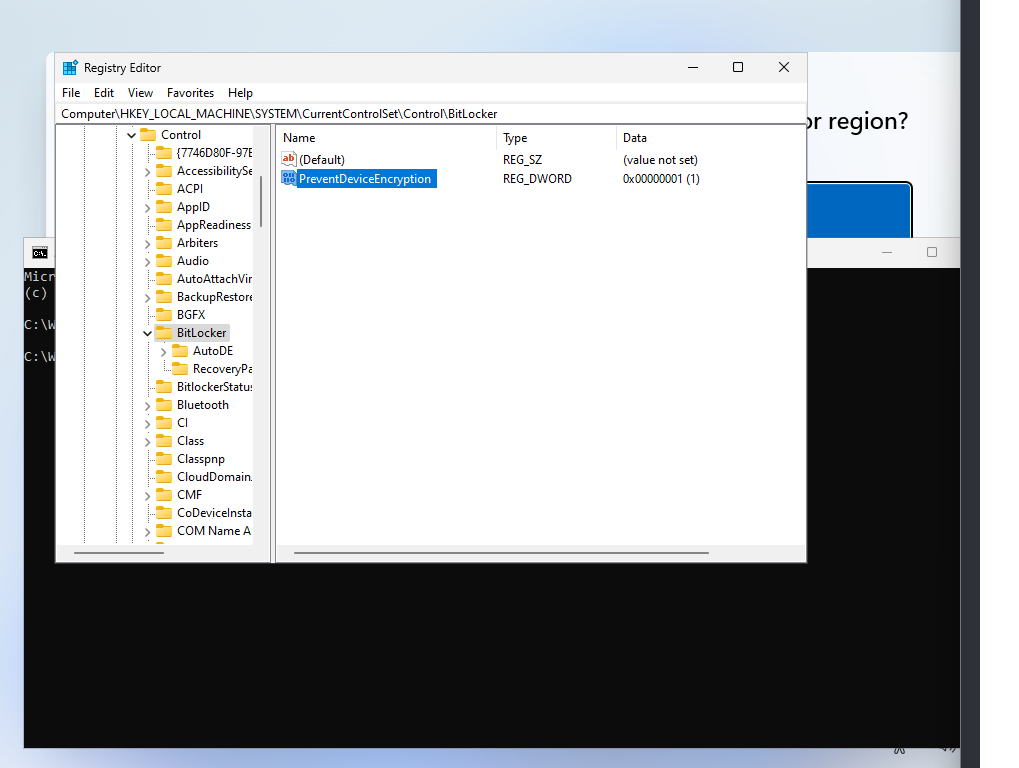
- Use the structure on the left to go to HKEY_LOCAL_MACHINE\SYSTEM\CurrentControlSet\Control\BitLocker
- Right-click on BitLocker and select New > Dword (32-bit) Value.
- Name it PreventDeviceEncryption.
- Double-click on it and change its value to 1.
- Close the Registry Editor.
- Close the Command Prompt window.
Continue with the installation.
Option 2: Manipulating an ISO image
It is also possible to modify an ISO image directly. This requires a USB device with at least 16 GB of storage. The Windows installation is copied to the USB device and the PC is booted from the USB device to install Windows.
Here is how this works:
Step 1: Download Rufus
Rufus is a free program to create bootable USB drives. You can download the latest version for Windows from the homepage.
Step 2: Run Rufus
Rufus does not need to be installed. Just double-click on the downloaded executable file to start the app. Make sure you give your okay for online update checks, if you do not have a Windows ISO image already. This allows you to download the ISO using Rufus.
Step 3a: download the ISO using Rufus
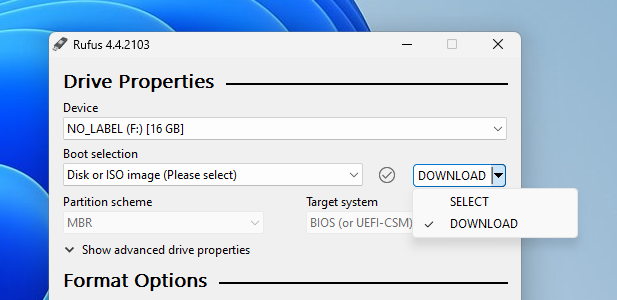
Switch from select to download in the upper half of the interface. Activate Download again to start the process.
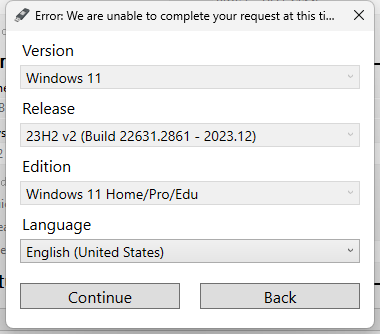
Select the version of Windows, edition, language and architecture. It may take a while for the download to complete.
Step 3b: select an ISO that is already on your device
Make sure select, and not download, is selected in the Rufus interface. Click on the select button and use the file browser that opens to select the ISO image.
Step 4: Preparing the ISO
Select Device at the top to pick a device that you want to copy the Windows installation files to. Note that you cannot pick fixed hard drives.
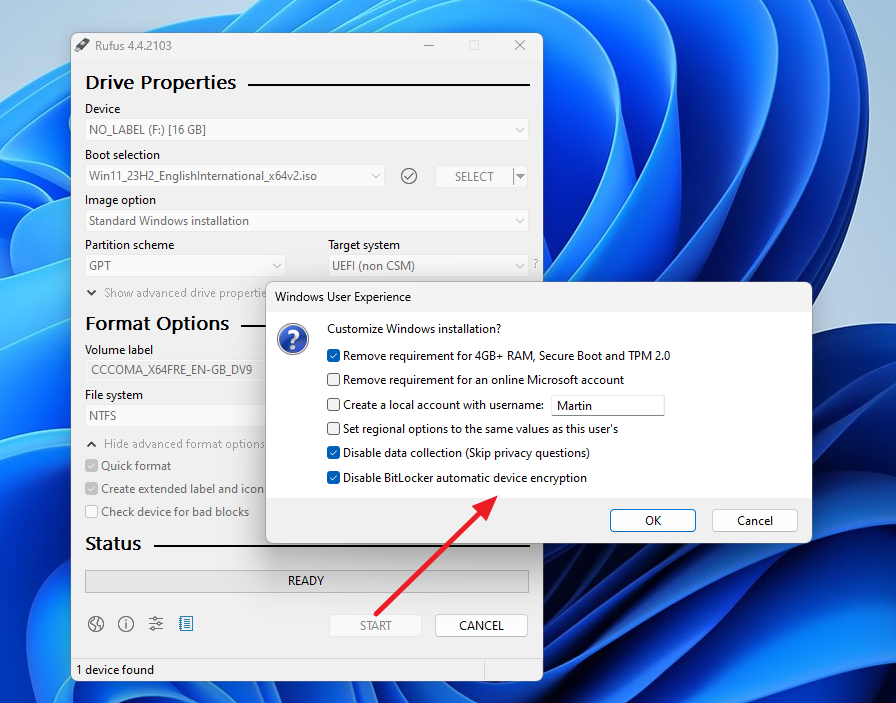
Once done, activate the start button at the very bottom. Rufus displays the Windows User Experience window.
Make sure Disable BitLocker automatic device encryption is checked. This prevents the automatic encryption of drives using BitLocker during installation of Windows.
Select OK to continue. The program writes the files to the selected USB device.
Bonus Tip: check the BitLocker status
A simple command reveals the status of all drives and partitions in regards to BitLocker encryption. Here is how that works:
- Open Start.
- Type CMD.
- Select "run as administrator" while Command Prompt is selected.
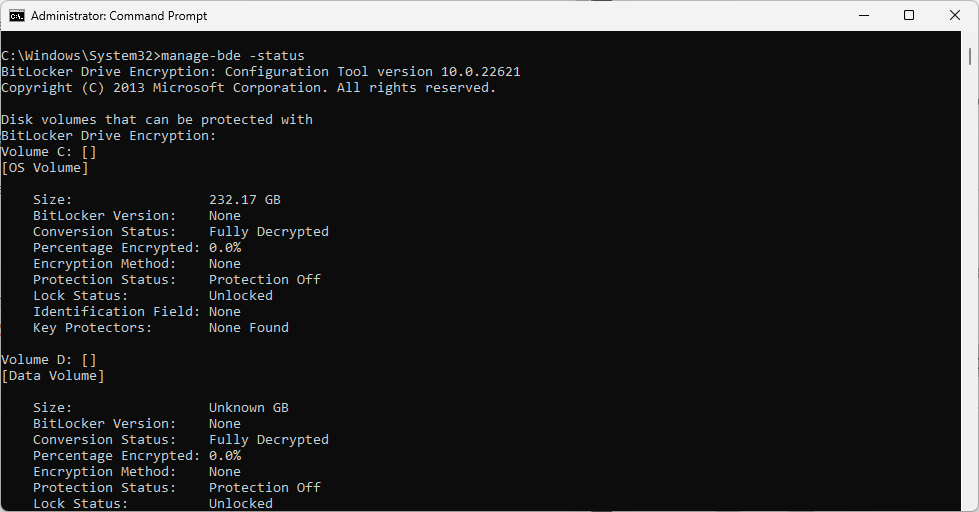
- Paste manage-bde -status and press the Enter-key.
Check any of the following parameters: BitLocker version, Conversion status, Percentage encrypted, Encryption method, Lock status, Identification field, or Key protectors.
If you see "none, "fully decrypted", "0.0%", "None", "Protection Off", "Unlocked", "None", and "None Found", then the drive is not encrypted using BitLocker.
You can disable the protection by running the command manage-bde –off DRIVELETTER, e.g., manage-bde –off C : [<-- omit the space between C and colon, damn smilies] from an elevated command prompt.
What about you? Do you use encryption, maybe even BitLocker? (inspiration from Deskmodder)


Recommended Comments
Join the conversation
You can post now and register later. If you have an account, sign in now to post with your account.
Note: Your post will require moderator approval before it will be visible.