3175x175(CURRENT).thumb.jpg.b05acc060982b36f5891ba728e6d953c.jpg)
Automate how your apps open and arrange themselves on Windows 11 with PowerToys Workspaces.
If you rely on the same group of apps to start your day or move between tasks on Windows 11, PowerToys Workspaces can automate the entire setup. The feature streamlines your environment by launching and arranging your frequently used apps exactly the way you want.
Workspaces is a feature designed for users who want a faster and more consistent desktop experience. Instead of opening the same programs every morning or constantly shuffling windows into place, you can trigger a complete layout with a single click. You decide which apps open, how they open, and where they appear on the screen, creating a repeatable workspace you can use for any activity.
How to install PowerToys on Windows 11
If you don't already have PowerToys installed on the computer, use these steps:
- Open Start.
- Search for Command Prompt, right-click the top result, and select the Run as administrator option.
- (Option 1) Type the following command to install the latest preview of PowerToys and press Enter: winget install --id Microsoft.PowerToys

(Image credit: Mauro Huculak)
- (Option 2) Type the following command to install the stable version of PowerToys from the Microsoft Store and press Enter: winget -s msstore powertoys
After you complete the steps, you can proceed to create a workspace to launch and arrange apps automatically.
How to create a workspace with PowerToys
To create a workspace with PowerToys, use these steps:
- Open PowerToys.
- Click on Windowing & Layouts.
- Click on Workspaces.
- Turn on the Enable Workspaces toggle switch.

(Image credit: Mauro Huculak)
- Click the Open editor option.
- Click the Create Workspace button.

(Image credit: Mauro Huculak)
- Open the applications and rearrange them so that the system remembers them.
- Click the Capture button.

(Image credit: Mauro Huculak)
- Click the Remove button to dismiss apps you want the system to remember (if applicable).
- Confirm a name for the layout in the "Workspace name" option.

(Image credit: Mauro Huculak)
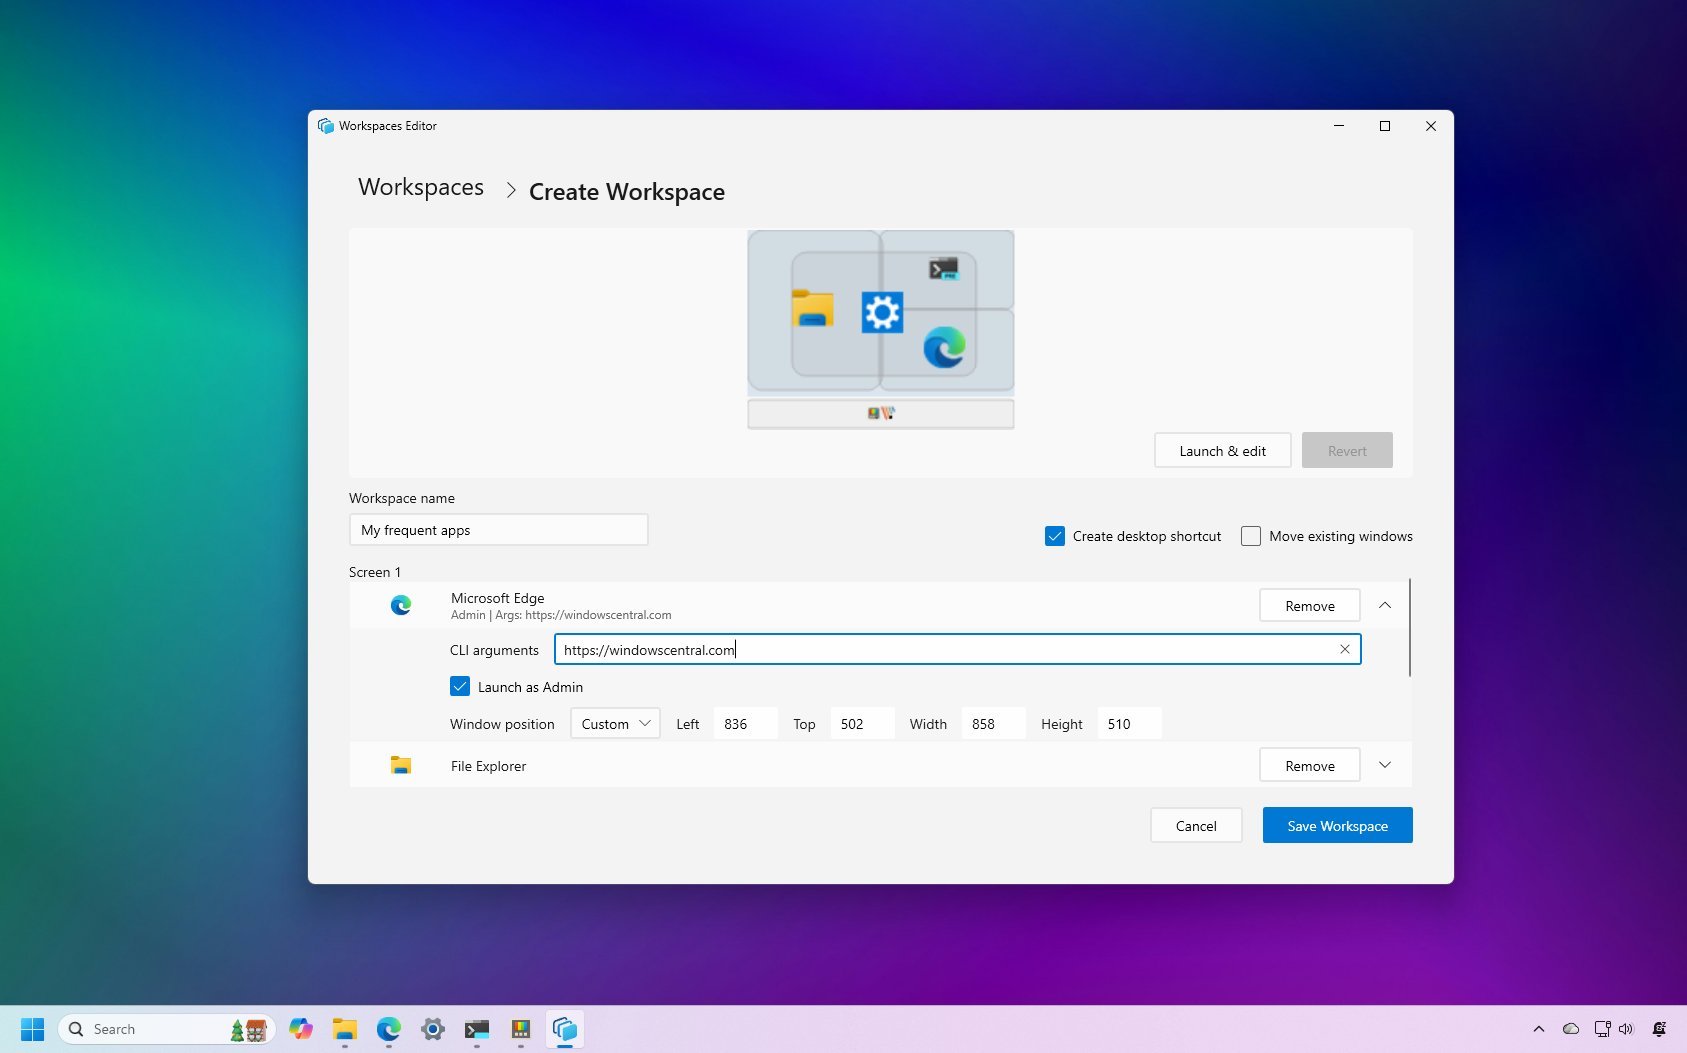
- (Optional) Click on an app to reveal its customization settings.
- Configure the arguments you want with the application.

(Image credit: Mauro Huculak)
- Quick tip: You can also set the app to launch as an administrator, and it's even possible to set a custom screen position.
- (Optional) Check the Create desktop shortcut option to launch a specific workspace using a shortcut.
Once you complete the steps, you launch a specific workspace with all the applications by clicking the "Launch" button from the "Workspace Editor" or using the desktop shortcut.
You can always repeat the steps outlined above to create as many workspaces as you need.
Although this should launch and rearrange a one-click action, I have noticed that some applications (such as File Explorer) may not arrange correctly.
Also, if you have an application running as an administrator (such as Windows Terminal), you'll need to launch PowerToys as an administrator for the feature to detect and record the application.
Hope you enjoyed this news post. Feedback welcome.
Posted Friday 28 November 2025 at 4:18 am AEST (my time).
News posts... 2023: 5,800+ | 2024: 5,700+ | 2025 (till end of October): 5,009
Recommended Comments
There are no comments to display.
Join the conversation
You can post now and register later. If you have an account, sign in now to post with your account.
Note: Your post will require moderator approval before it will be visible.