3175x175(CURRENT).thumb.jpg.b05acc060982b36f5891ba728e6d953c.jpg)
These are some of the most commonly overlooked steps users forget during the initial setup of Windows 11.
After installing Windows 11, many users usually start using the system without checking important default settings. While the operating system works out of the box, skipping some of the initial configurations can lead to performance issues, privacy concerns, or even trouble recovering your device if something goes wrong later.
Some of the most overlooked settings include enabling System Restore, understanding BitLocker recovery keys, adjusting some basic power and privacy preferences, checking if device drivers are installed correctly, and setting up regular backups.
Although they only seem like good tweaks, they're actually essential steps that can help you protect your data, maintain stability, and make sure your computer operates the way you expect.
In this how-to guide, I'll share several configurations that are often ignored but should be part of the initial setup of Windows 11.
Essential configurations many users miss after installing Windows 11
These are the configurations you should make a habit of checking after setting up Windows 11 to avoid potential issues and ensure a smoother experience.
1. System Restore
System Restore is a feature that allows you to revert your computer's system files, installed apps, Registry, and system settings to a previous point in time using restore points.
It's designed as a troubleshooting tool to help you recover from problems caused by recent software installations, driver updates, or system configuration changes without affecting your data.
However, this feature is disabled by default, and most users won't know about it until they need to use it and realize that it hasn't been turned on.
To enable System Restore on your computer, use these steps:
- Open Start.
- Search for Create a restore point and click the top result to open the System Properties page.
- Select the main "System" drive under the "Protection Settings" section.
- Click the Configure button.
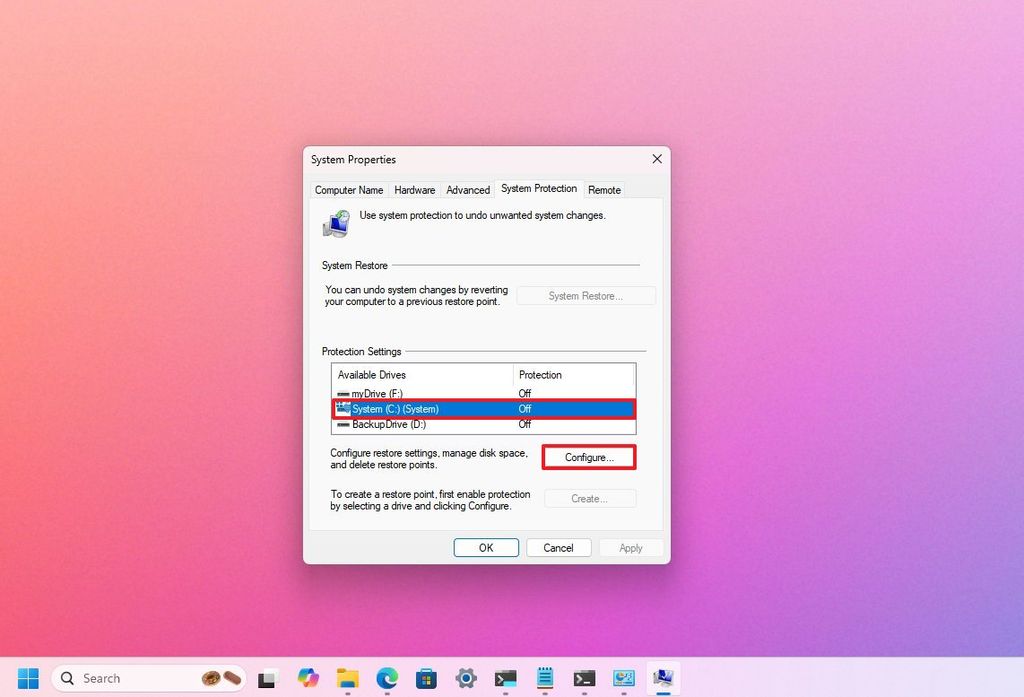
(Image credit: Mauro Huculak)
- Select the "Turn on system protection" option.
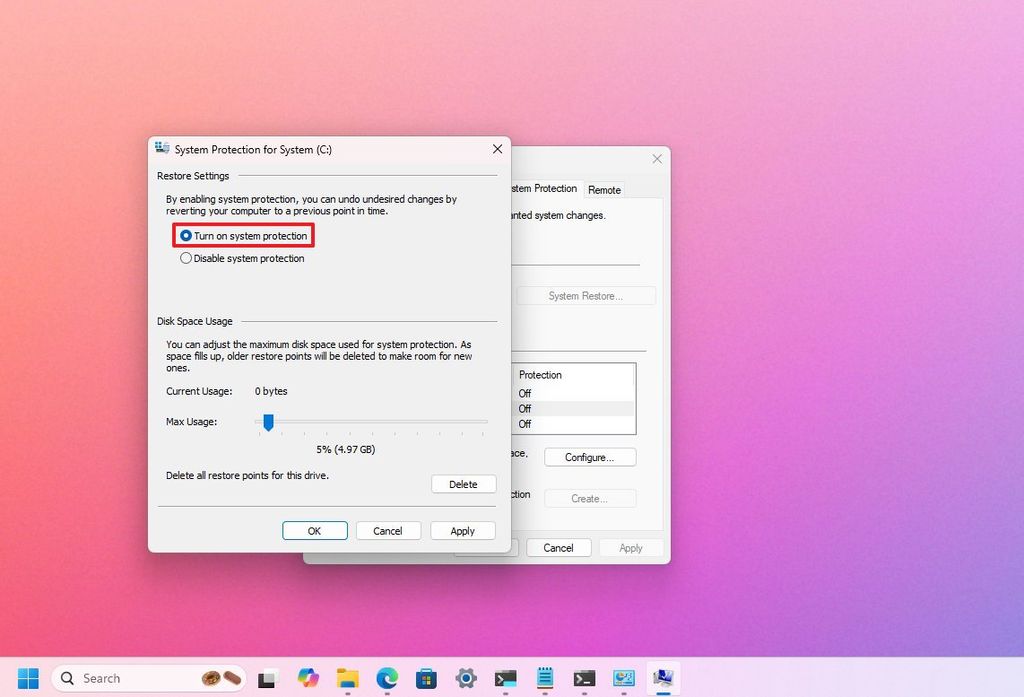
(Image credit: Mauro Huculak)
- (Optional) Use the "Max Usage" slider and select how much space the system should reserve to store restore points.
- Click the Apply button.
- Click the OK button.
Once you complete the steps, the feature will automatically create a restore point when applying system updates or making specific changes.
It's important to note this is not a backup solution. It's only a tool to undo settings changes.
I have also written a comprehensive guide with everything you need to configure System Restore on Windows 11 so that you can learn more about this feature.
2. BitLocker recovery key
Starting with the release of version 24H2, Windows 11 turns on BitLocker automatically on new installations.
Although drive encryption is essential for protecting your data, many users get stuck during startup when an issue occurs, unaware that a recovery key is required to unlock the device. But the biggest problem is that they don't know where they can retrieve the key.
Fortunately, if you have configured the operating system with a Microsoft account, Windows 11 backs up the recovery key automatically in your online account. For this reason, it's important to know how to retrieve the recovery key before it's too late.
To find your BitLocker recovery key, use these steps:
- Open your Microsoft account.
- Sign in with your account credentials.
- Confirm your computer's recovery key from the list using the "Device Name" information.
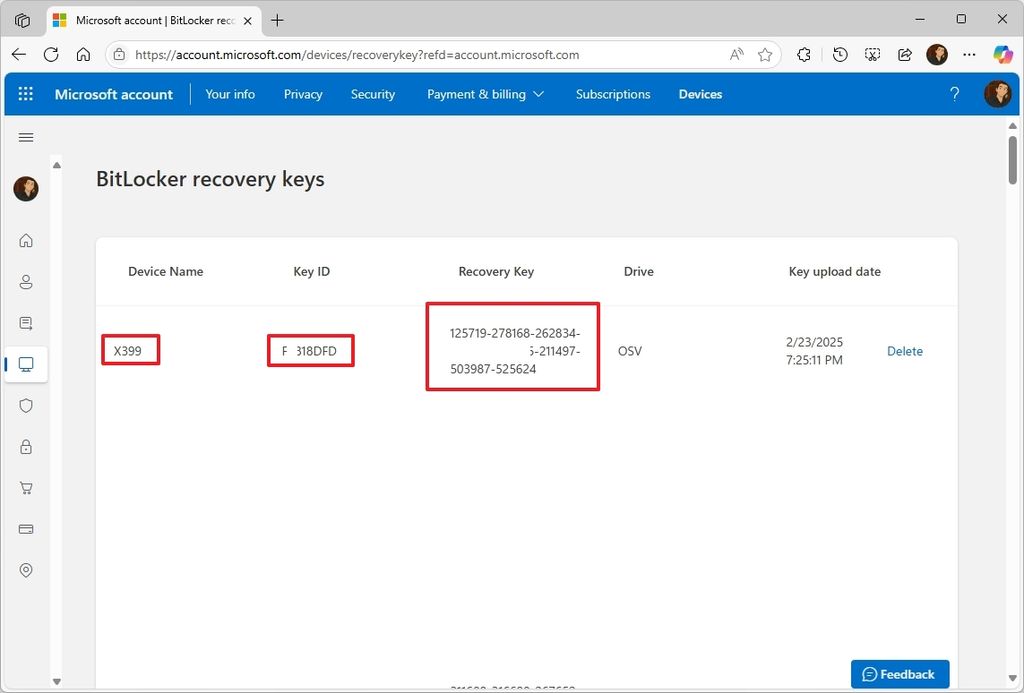
(Image credit: Mauro Huculak)
Once you complete the steps, copy the "Device Name," "Key ID," and "Recovery Key" information to a safe location. If your computer gets stuck during the initial boot, you can match the "Key ID" on the boot screen with the one you retrieved from your account to unlock the device.
3. Power settings
A lot of users ignore adjusting the power settings after the installation of Windows 11, and this can cause the computer to underperform and other unexpected behaviors, including turning off the screen or getting into sleep mode shortly after leaving your desktop.
If you want to configure your device to behave the way you want it, use these steps:
- Open Settings.
- Click on System.
- Click the Power & battery (or Power) page on the right side.
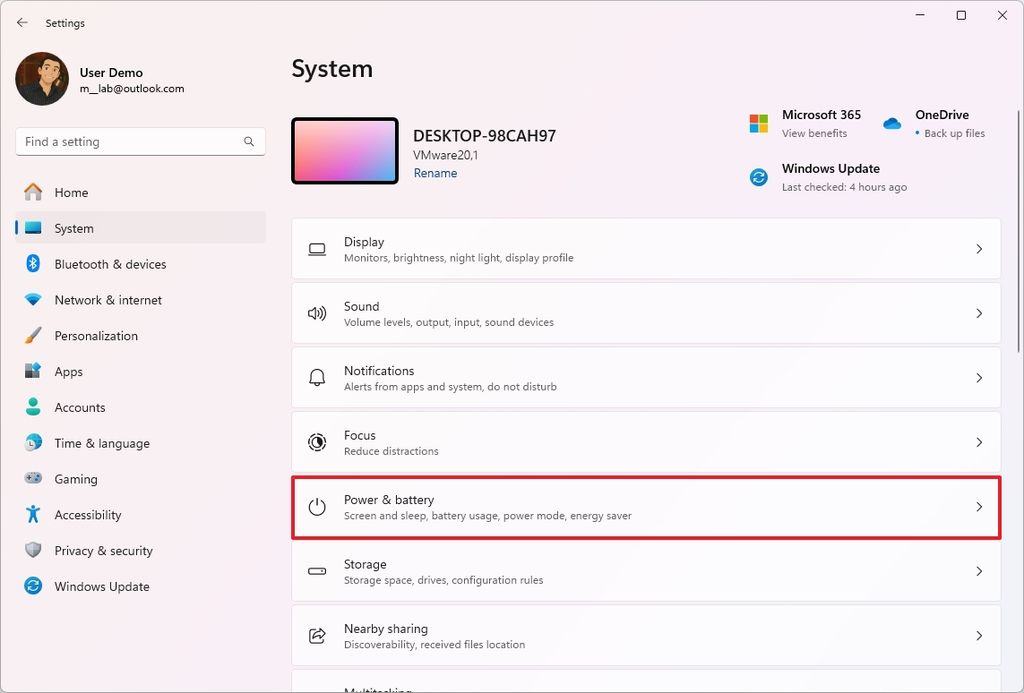
(Image credit: Mauro Huculak)
- Click the Power Mode setting.
- Select the "Best Performance" option for the best result for "Plugged in" and "On battery".
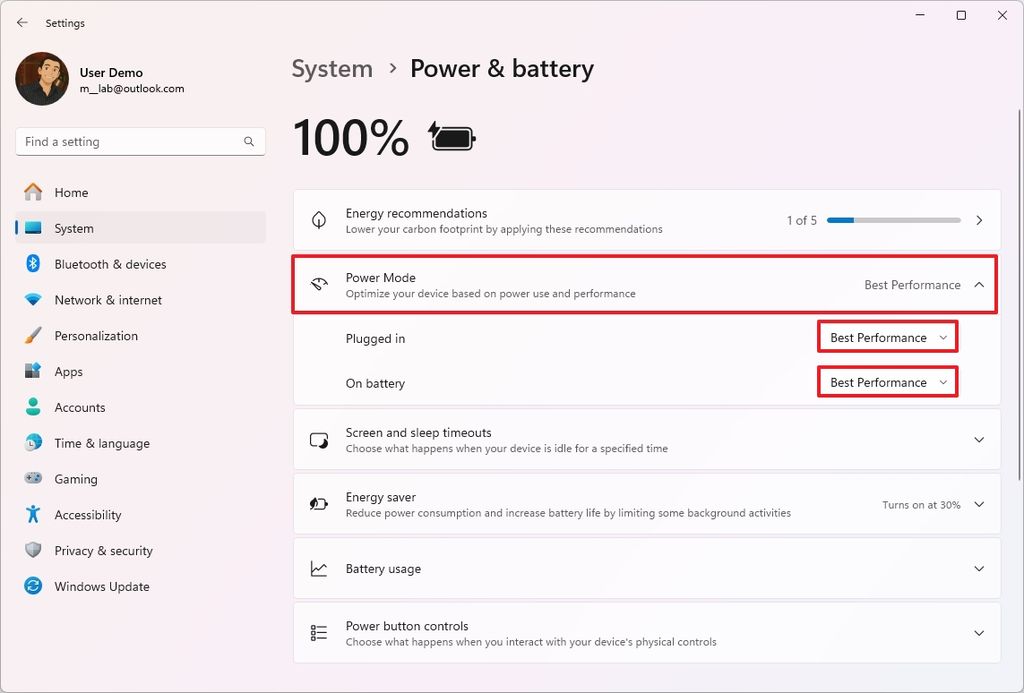
(Image credit: Mauro Huculak)
- Quick note: This setting is subjective since you may need to choose the "Best Power Efficiency" option to conserve battery on your laptop.
- Click the "Screen and sleep timeouts" setting.
- Configure the timers for the "Plugged in" and "On battery" settings when your screen turns off automatically and the device enters sleep mode.
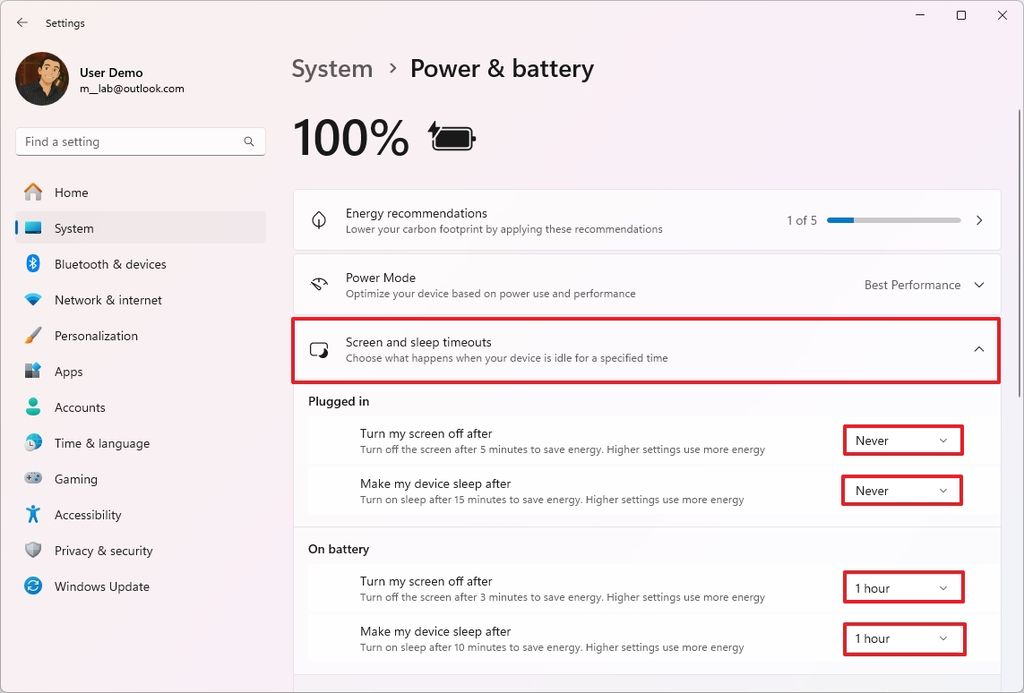
(Image credit: Mauro Huculak)
After you complete the steps, the new power configurations will apply to the computer.
4. Privacy settings
Windows 11, by default, collects a fair amount of diagnostic and usage data. It also creates a unique advertising ID for personalized ads across the experience and tracks the physical location of your device in the cloud, among other things.
After a clean installation or setting up a new device, I always recommend changing at least one of the system settings for a more private experience.
To change the privacy settings on Windows 11, use these steps:
- Open Settings.
- Click on Privacy & security.
- Click the "Find my device" page on the right side.
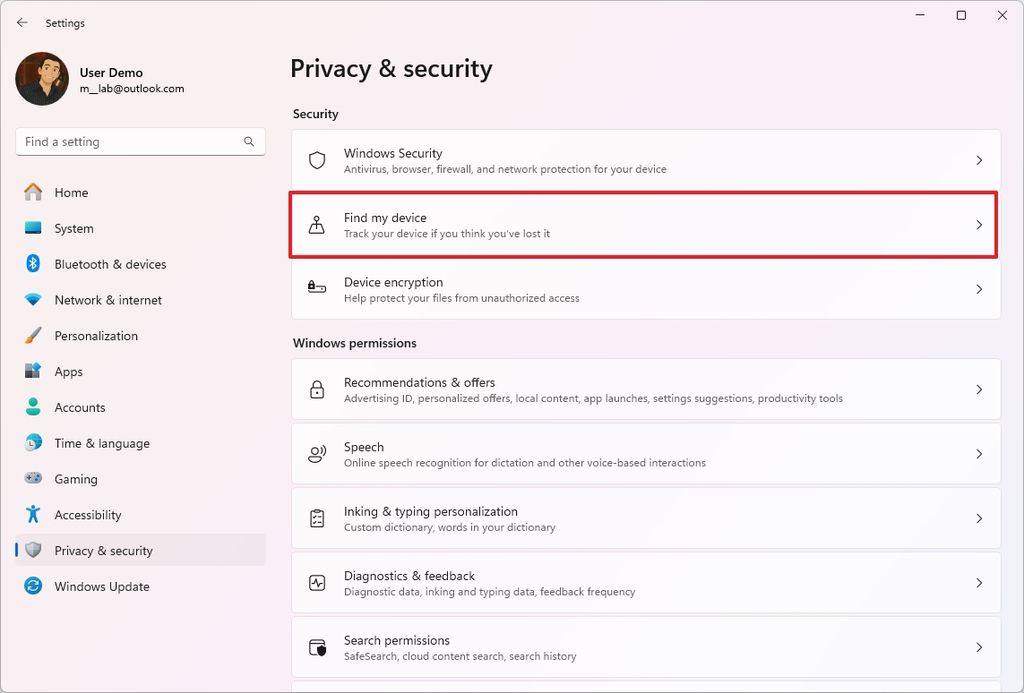
(Image credit: Mauro Huculak)
- Turn off the "Find my device" toggle switch.
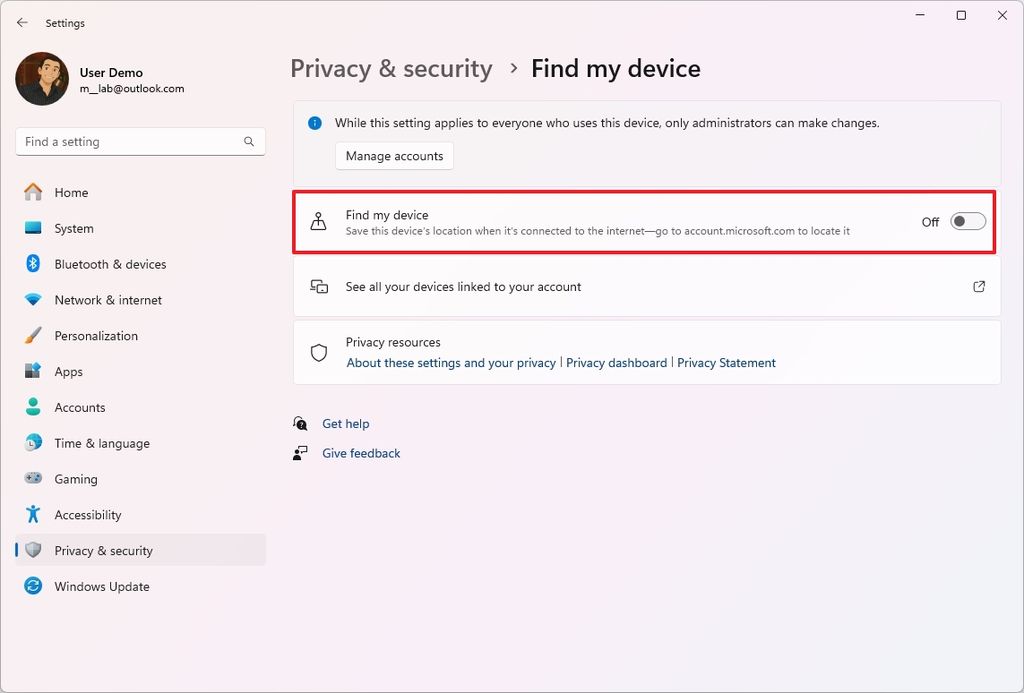
(Image credit: Mauro Huculak)
- Click on Privacy & security in the breadcrumb.
- Click the "Recommendations & offers" page on the right side.
- Turn off the "Personalized offers" toggle switch.
- Turn off the "Advertising ID" toggle switch.
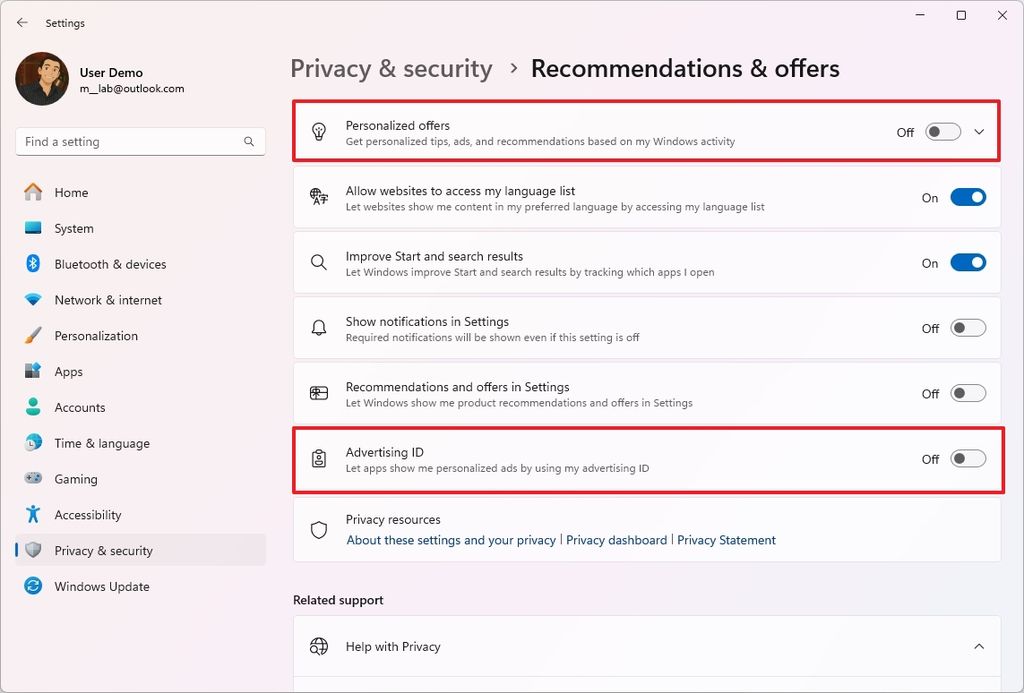
(Image credit: Mauro Huculak)
- Quick tip: On this page, you can choose the recommendations and offers settings according to your preferences.
- Click on Privacy & security in the breadcrumb again.
- Click the "Diagnostics & feedback" page on the right side.
- Turn off the "Send optional diagnostic data" toggle switch under the "Diagnostic data" setting.
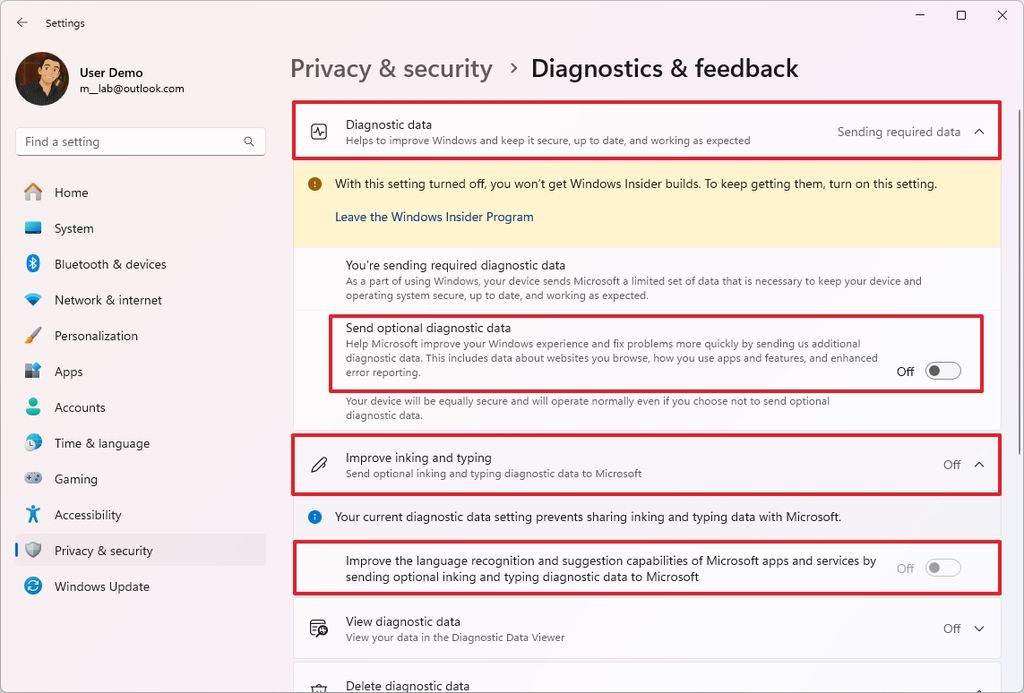
(Image credit: Mauro Huculak)
- Quick note: Microsoft requires users to send some diagnostic data to help maintain their computers.
- Turn off the "Improve inking and typing" toggle switch.
- Click the "Delete diagnostic data" setting.
- Click the Delete button.
Once you complete the steps, you will minimize the amount of data your computer sends to Microsoft. However, it's important to note that no matter how many settings you turn off, the device will always be sending out some amount of information to the company.
5. Device drivers
Sometimes, after setting up a new installation, if the computer has access to the internet and your keyboard, mouse, webcam, and speakers are working, many users neglect to change if the device is missing drivers.
Although the computer may seem to be working correctly, a lot of times, the operating system fails to install the correct drivers for components like motherboard chipsets and USB controllers.
After installation, it's essential to check and confirm that the device drivers are installed correctly.
To check the device drivers installed on your computer, use these steps:
- Open Start.
- Search for Device Manager and select the top result to open the app.
- Confirm that none of the components are labeled as unknown, or they don't have a yellow exclamation or red mark.
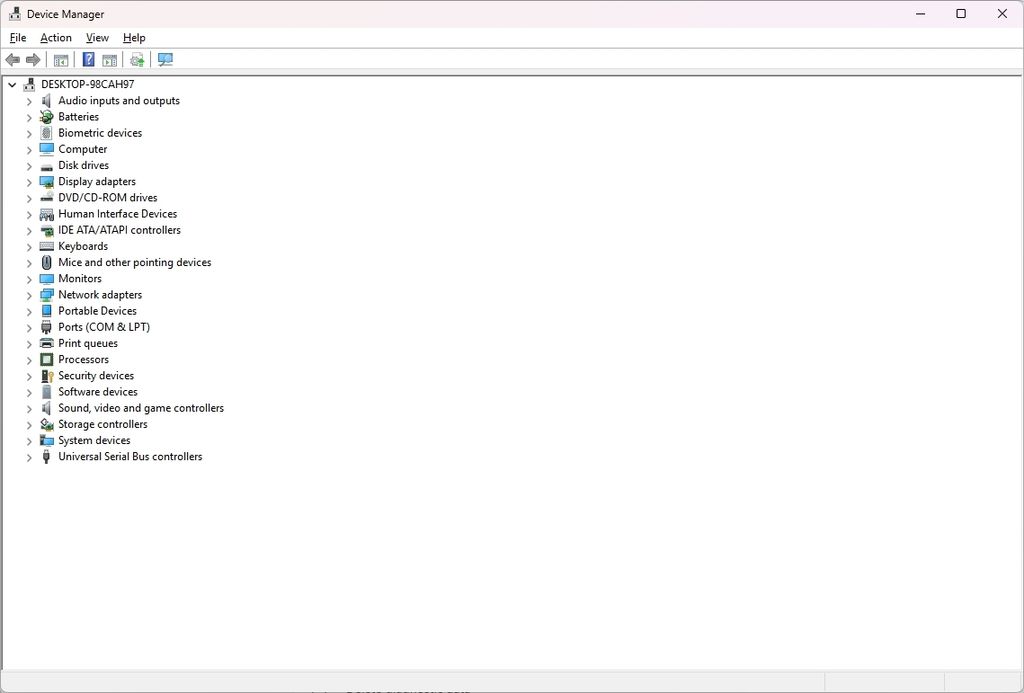
(Image credit: Mauro Huculak)
An "Unknown Device" literally means that the operating system cannot identify a piece of hardware connected to your computer.
A yellow exclamation mark is the most common and important indicator of a driver problem. It means that the system has identified an issue with the device.
Finally, a red "X" typically means the device is disabled. It's either manually disabled in Device Manager or disabled due to a system policy. A disabled device won't function.
To download and install device drivers on Windows 11, use these steps:
- Open Settings.
- Click on Windows Update.
- Click the Advanced options page on the right side.
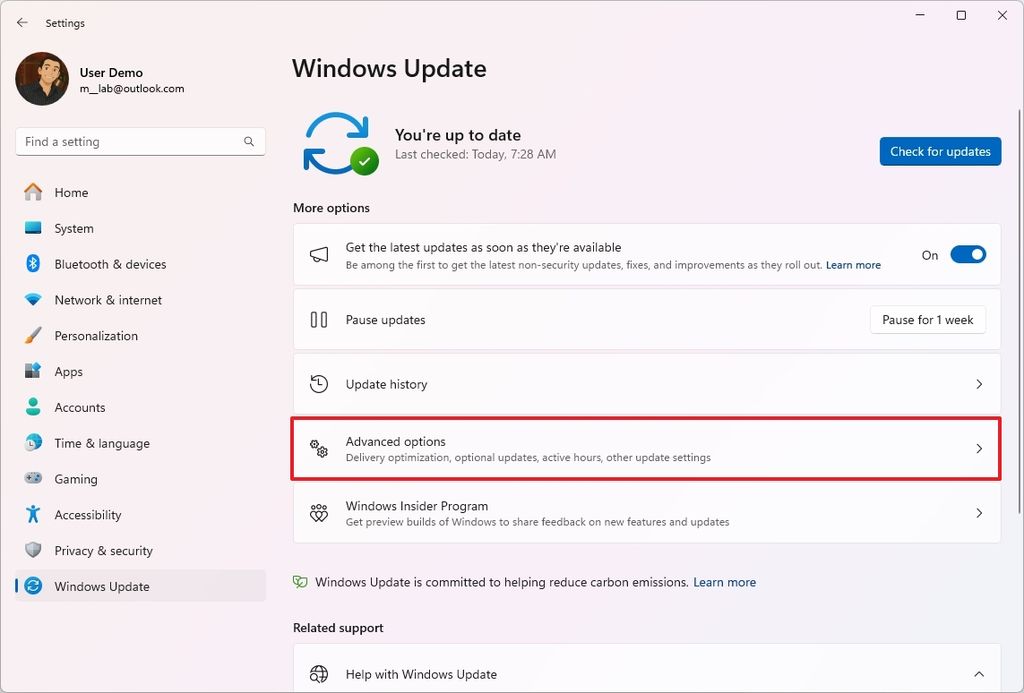
(Image credit: Mauro Huculak)
- Click the Optional updates setting.
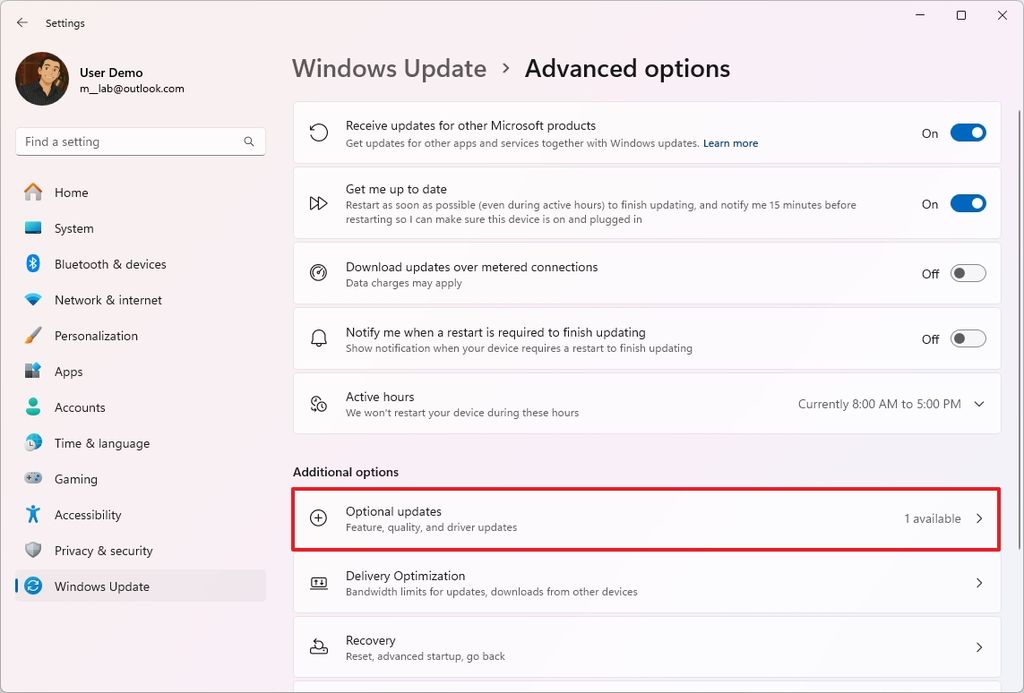
(Image credit: Mauro Huculak)
- Click the Driver Updates setting
- Select the drivers you want to update.
- Click the "Download & install" button.
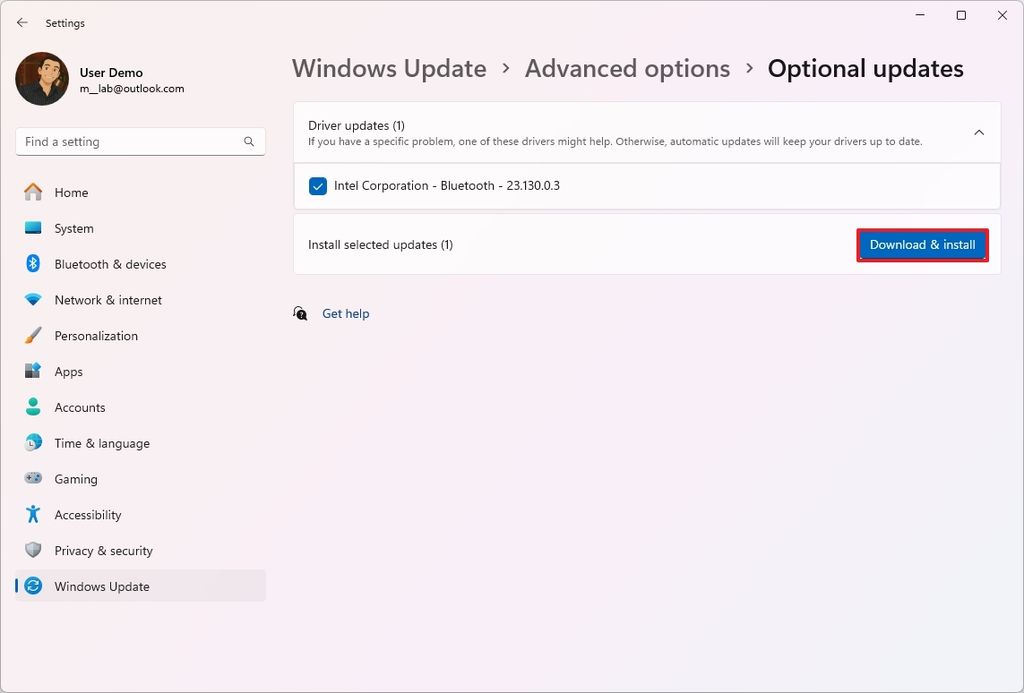
(Image credit: Mauro Huculak)
After you complete the steps, the drivers will download and install on your computer.
If the system is not able to find the required drivers, you will have to install the device driver manually on Windows 11.
6. System backup
As soon as you complete the setup of Windows 11, the very next step should be to set up a backup of your system in case something goes wrong and you must restore your computer or individual files from accidental deletion.
Usually, you will hear about creating a system image backup, but this is typically a temporary solution because this feature only protects your setup and files since the last backup.
The solution works to safeguard your system, but in scenarios such as when upgrading to a new version of the operating system, replacing the hard drive, or making other significant system changes.
If you want to protect and keep your setup and data safe, a lot of users ignore the legacy "Backup and Restore" feature that creates backups automatically in the regular basics.
To set up a daily backup of your computer and files, connect an external drive with enough space and use these instructions:
- Open Start.
- Search for Control Panel.
- Click on System and Security.
- Click on Backup and Restore (Windows 7).
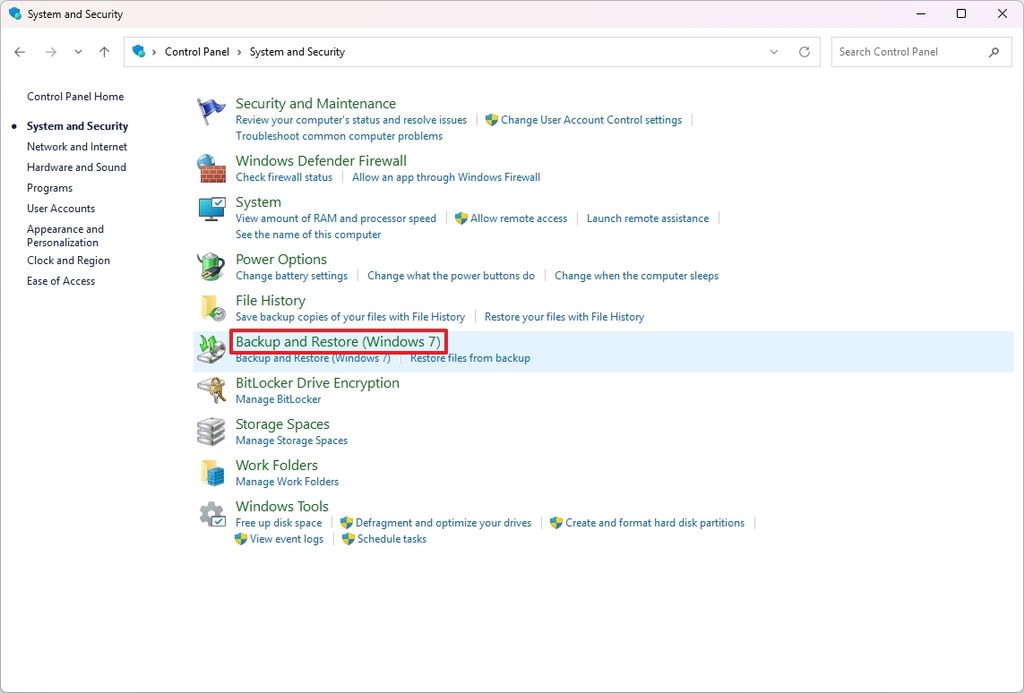
(Image credit: Mauro Huculak)
- Click the "Set up backup" option.
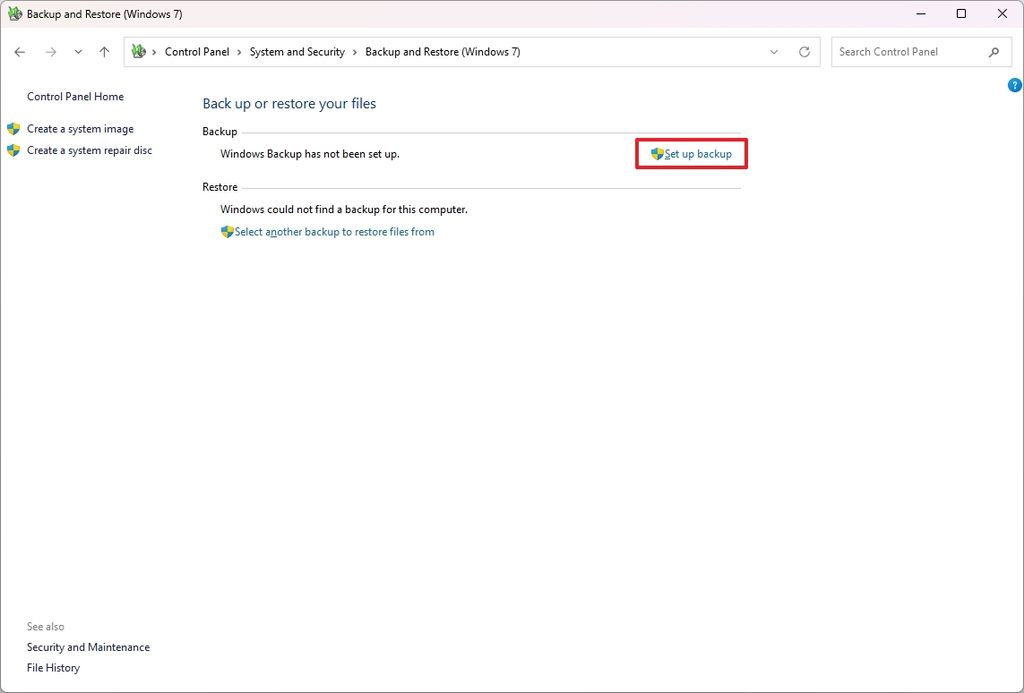
(Image credit: Mauro Huculak)
- Select the external storage to save the backup.
- Click the Next button.
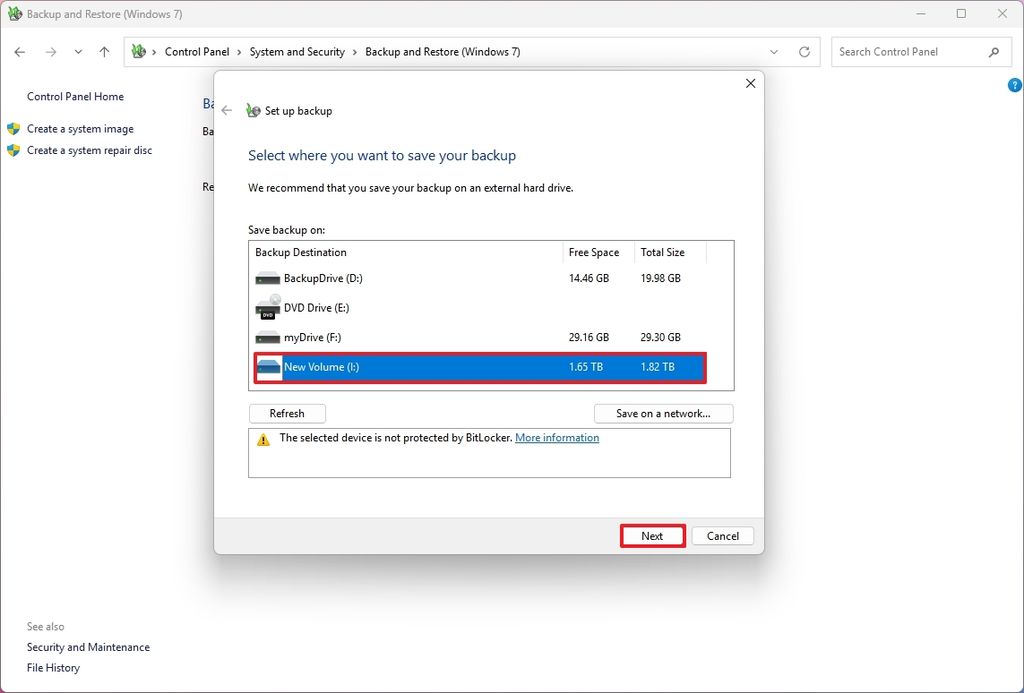
(Image credit: Mauro Huculak)
- Choose the "Let me choose" option.
- Click the Next button.
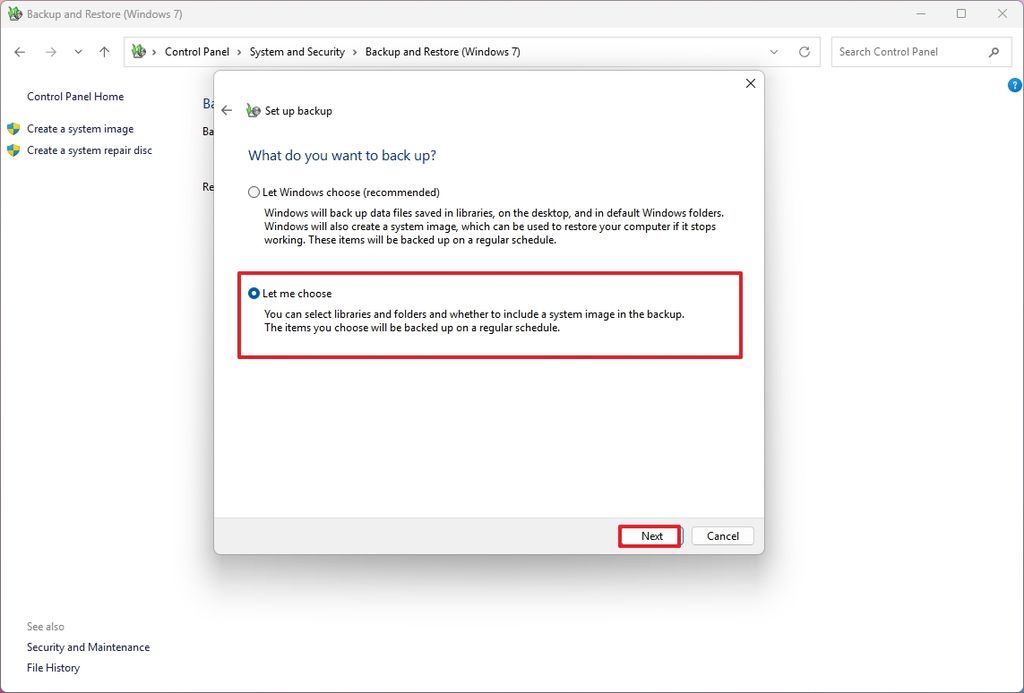
(Image credit: Mauro Huculak)
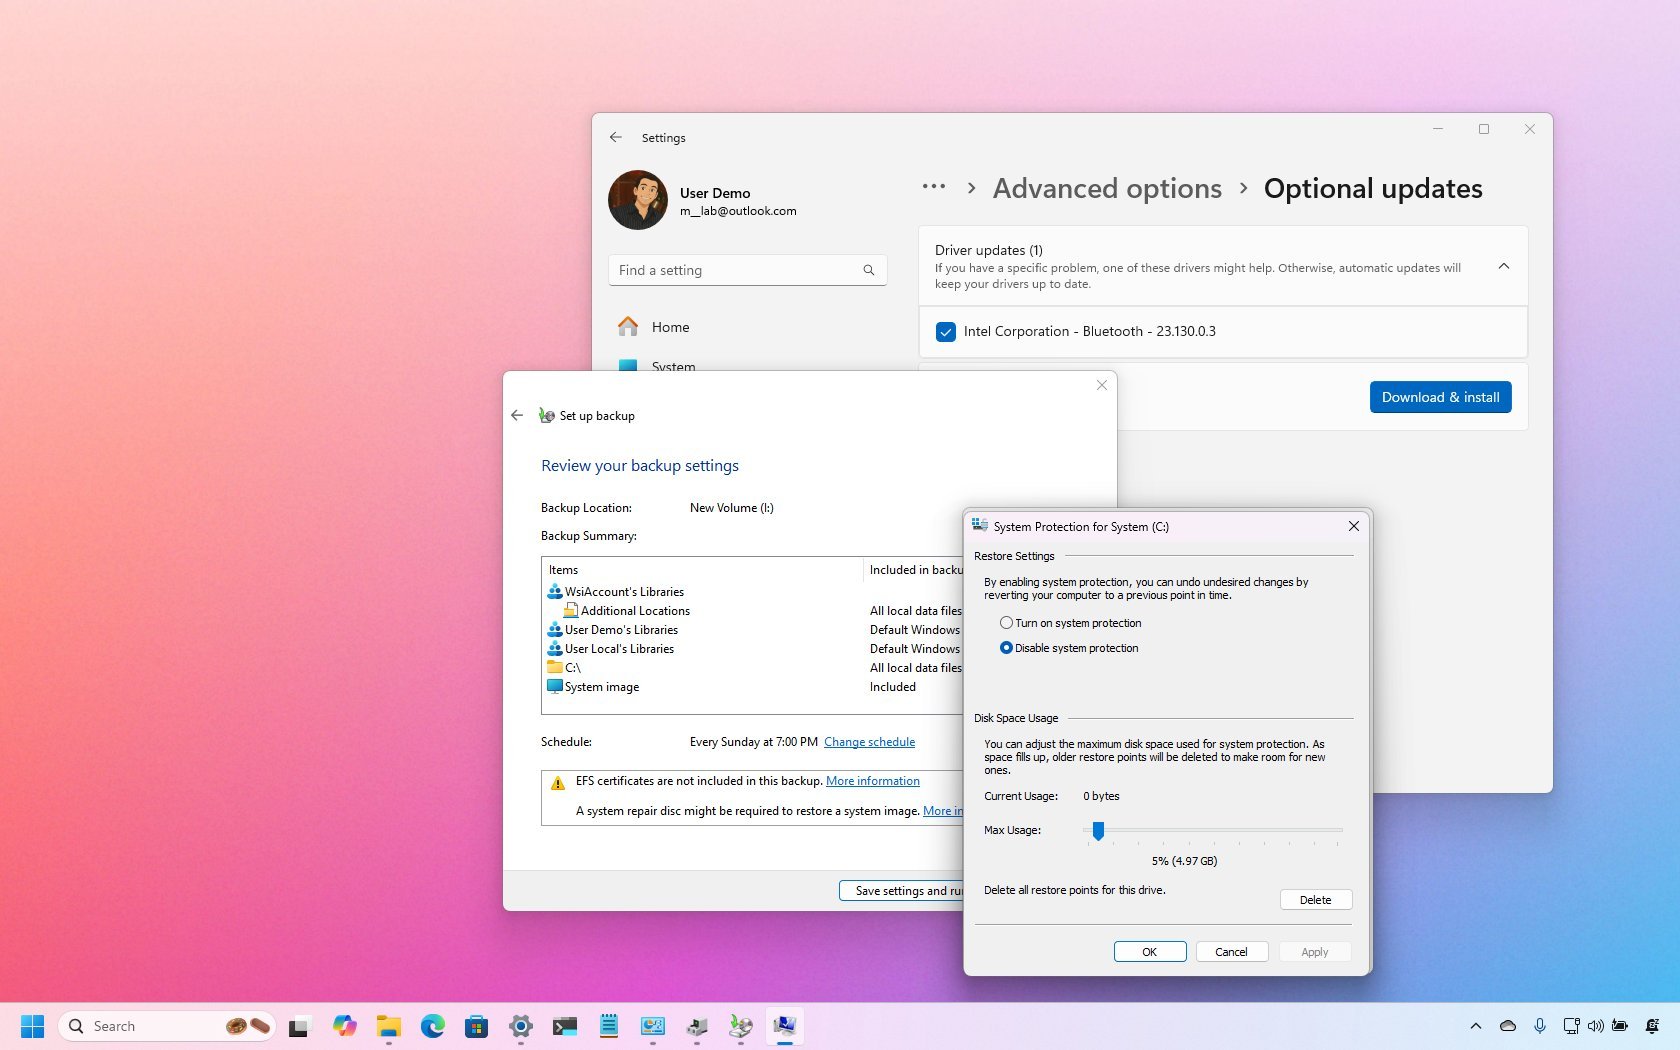
- Select the content you want to include in the backup from "Data Files" and "Computer."
- Check the option to include the system image of the drives.
- Click the Next button.
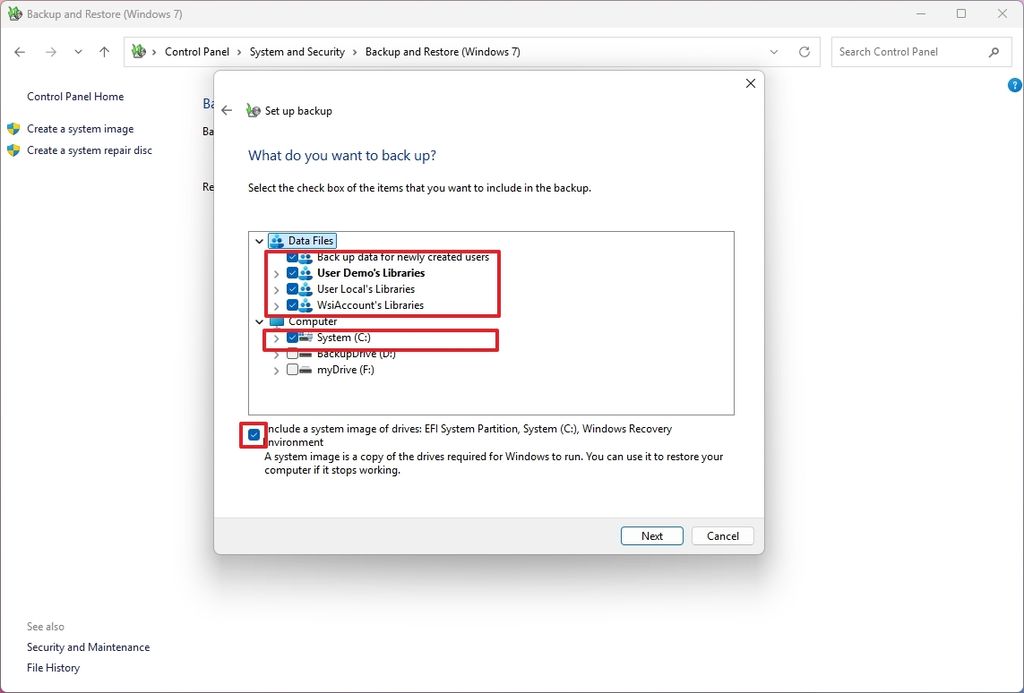
(Image credit: Mauro Huculak)
- Click the "Save settings and run backup" button.
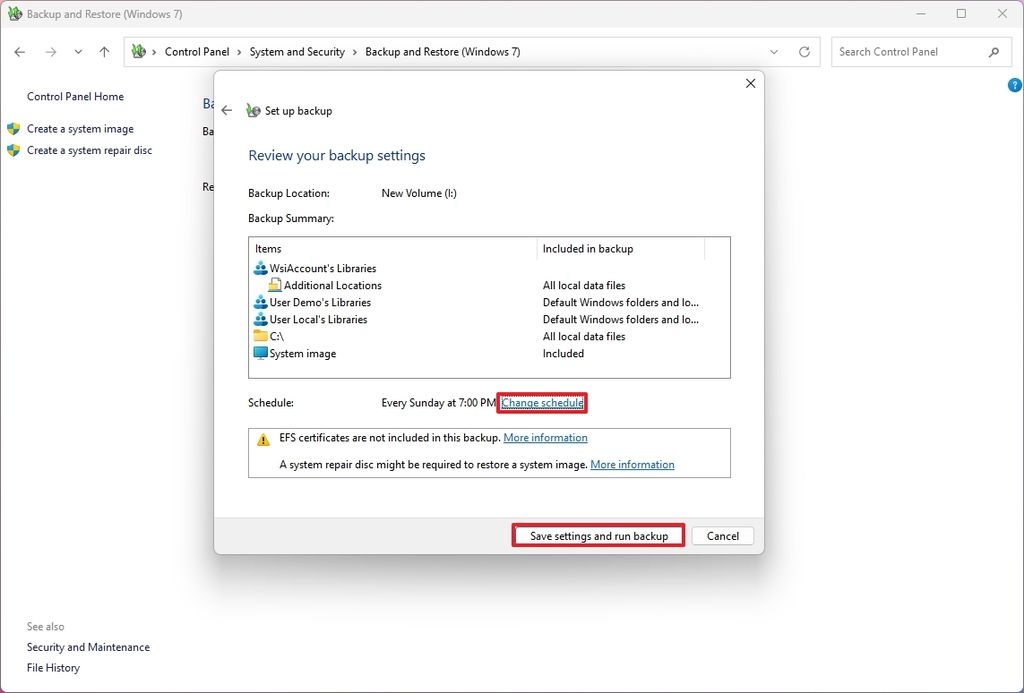
(Image credit: Mauro Huculak)
If you continue with the default settings, the system will run the backup every week, on Sundays at 7 PM, but you can also use the schedule option to run a new incremental backup every day at a specific time.
Do you know any other configuration you notice people usually forget? Let me know in the comments.
Hope you enjoyed this news post.
Thank you for appreciating my time and effort posting news every day for many years.
News posts... 2023: 5,800+ | 2024: 5,700+ | 2025 (till end of May): 2,377
RIP Matrix | Farewell my friend


Recommended Comments
Join the conversation
You can post now and register later. If you have an account, sign in now to post with your account.
Note: Your post will require moderator approval before it will be visible.